You can find an index to the ported tutorials here.
I recently created a new game for the iPhone (Tanks! Mayhem) and the Palm Pre/Pixie (Tanks!) as part of an effort to learn OpenGLES 2.0. I’d already become familiar with ES 1.0 using it in a previous game but felt that for the effect I wanted to achieve in the new game ES2.0 was the way to go.
OpenGLES 2.0 introduces the idea of a programmable graphics pipeline. This basically puts you in charge of writing the code that is going to generate your graphics - very powerful, very generic, very overwhelming for someone getting started.
To get going I purchased the Blue Book (OpenGLES 2.0 programming guide) - which is great and I thoroughly recommend it - but one of the things that I found I really missed were some simple “this is how you’d do this thing you did in 1.0 in 2.0”. Lots of books give you a complete implementation of 1.0 written as a shader which is interesting, but not much help for someone trying to get started.
When I was starting out learning ES 1.0 I found Jeff Lamarche’s excellent set of blog posts where he ported the NeHe tutorials over to the iPhone.
I’m going attempt to do the same for ES2.0 and port the tutorials over to ES2.0 on the iPhone - I’m going to assume that anyone reading this is familiar with ES1.0 - if you’re not then why not run through his tutorials…
Before we get started we’re going to need some ground work. As I said, ES2.0 introduces us to a programmable pipeline, there are two areas of the pipeline that we can program, the coordinate processing, and the setting of pixel colours. In ES2.0 the code you run for these two areas is called a “vertex shader” and a “fragment shader”. These two bits of code combine to make a “program”.
As inputs, these programs take:
- vertex attributes - consider these as the arrays you would normally pass into functions like glVertexPointer, glTexCoordPointer, glColorPointer etc...
- uniforms - I think of these like constants
Only the vertex shader part of the program gets access to the values from the vertex attributes. The vertex shader is run for each array index of the arrays you pass in for the vertex attributes. It also has access to the uniform values. The vertex shader is responsible for writing a value to the gl_Position variable - this variable tells OpenGL where to do it’s drawing. So for example if you wanted to draw a triangle you would create an array with three vertices specifying where you want your triangles to be drawn. You’d put that array into a vertex attribute and then issue the glDrawArrays with GL_TRIANGLES as the drawing type. Your vetex shader would get called for each vertice in the array and would take the coordinates and copy them into the gl_Position variable.
OpenGL takes the coordinates you generated, applies any clipping, and then rasterises the triangle. For each pixel it generates during the rasterisation process the fragment shader is called to find out what color the pixel should be.
That’s what I think happens anyway…
The fragment shader has access to all the uniforms. It also has access to varying variables. Varying variables are values that can be set by the vertex shader to be passed along to the fragment shader. They are called varying because they vary from pixel to pixel. The reason for this is because OpenGL interpolates the value they contain between each vertice.
That’s probably as clear as mud. So on with the lessons…
Lesson 1 of the NeHe tutorials is all about getting set up to render. We’re going to use the standard xCode OpenGLES template. We’re also going to need a bunch of helper functions. I’m using the set of common files that come with the OpenGL ES2.0 programming guide. You can download them as part of the example code from here: http://www.opengles-book.com/downloads.html.
Tutorial 2
Lesson 2 is where the fun actually starts. We’re going to draw a white triangle and a sqaure on the screen - very exciting…
It’s at this point that I got stuck. where had glFrustrumf and glOrthof gone? How was I supposed to set up my projection and modelview matrices?
ES 2.0 makes no assumptions about how you are going to transform your coordinates, you may choose to use a projection and modelview matrix. You may choose some completely arbitrary combination of matrices. You may even not be transforming your coordinates at all using a matrix.
However, typically you will want to have a projection matrix and modelview matrix. The sample common code that comes with the OpenGL ES2.0 programming guide comes in really handy here. It has the missing frustrum and ortho functions along with a handy set of matrix functions. Using the functions we can set up out project and modelview matrices:
In your class file you’ll need three variables:
ESMatrix projection;
ESMatrix modelView;
ESMatrix mvp;
Projection will hold our projection matrix and modelView will hold our modelView matrix. To set these up we’ll use the following code - which should look very familiar:
const GLfloat zNear = 1, zFar = 600, fieldOfView = 40*M_PI/180.0;

esMatrixLoadIdentity(&projection);
GLfloat size = zNear * tanf(fieldOfView / 2.0);
esFrustum(&projection, -size, size, -size / ((float) height / (float) width), size / ((float) height / (float) width), zNear, zFar);

esMatrixLoadIdentity(&modelView);

glViewport(0, 0, width, height);
This will set our project matrix up with a perspective matrix and our modelView matrix up with identity. To get our combined modelview project (mvp) matrix that we can use for transforming coordinates we’ll do:
esMatrixMultiply(&mvp, &modelView, &projection );
We now need our shader code. For this simple example we are going to be drawing triangles (in the original NeHe tutorial they draw a square as well - but ES is limited to triangles). This is pretty simple - our vertex shader will need to transform the input coordinates by our mvp matrix and our fragment shader just needs to set the pixels to whatever colour we choose. So here’s our vertex shader:
attribute vec4 position;
uniform mat4 mvp;

void main()
{
    gl_Position = mvp * position;
}
So, what’s going on here? We’ve got two inputs to the shader, a vertex attribute called position which is a vector and a uniform called mvp which is a 4x4 matrix. The position attribute will take our input vertex coordinates and the mvp matrix will be filled with the mvp matrix that we created from our modelview and projection matrices. And here is our fragment shader:
uniform lowp vec4 color;

void main()
{
 gl_FragColor = color;
}
Here we just have one input - a uniform that is a vector that we’ll load up with the colour we want to set our pixels to. To load these bits of code into the GPU we need to compile and link them. The first step is to compile the source code and attach the compiled shaders to a program object:
GLuint vertexShader = glCreateShader(GL_VERTEX_SHADER);
glShaderSource(vertexShader, 1, &vertexShaderSource, NULL);
glCompileShader(vertexShader);

GLuint fragmentShader = glCreateShader(GL_FRAGMENT_SHADER);
glShaderSource(fragmentShader, 1, &fragmentShaderSource, NULL);
glCompileShader(fragmentShader);

GLuint simpleProgram = glCreateProgram();
glAttachShader(simpleProgram, vertexShader);
glAttachShader(simpleProgram, fragmentShader);
We then need to bind our vertex attributes to specific locations. This will let us access them later. This step needs to be performed before the program is linked:
glBindAttribLocation(simpleProgram, ATTRIB_POSITION, "position");
ATTIB_POSITION is an arbitrary value that you choose in your own code. We can now link the program:
glLinkProgram(simpleProgram);
And finally we can get the locations of our uniforms.
uniformMvp=glGetUniformLocation(simpleProgram, "mvp");
uniformColour=glGetUniformLocation(simpleProgram, "colour");
We should now be fully setup and ready to draw! The following code draws a white triangle on the screen:
// vertices that we're going to draw
const GLfloat triVertices[] = {
  0.0f, 1.0f, 0.0f,
  -1.0f, -1.0f, 0.0f,
  1.0f, -1.0f, 0.0f
 };
// translate back into the screen by 6 units
esTranslatef(&modelView, 0.0f ,0.0f,-6.0f);
// tell the GPU we want to use our program
glUseProgram(simpleProgram);
// create our new mvp matrix
esMatrixMultiply(&mvp, &modelView, &projection );
// set the mvp uniform
glUniformMatrix4fv(uniformMvp, 1, GL_FALSE, (GLfloat*) &mvp.m[0][0] );
// set the colour uniform (r=1.0, g=1.0, b=1.0, a=1.0)
glUniform4f(uniformColour, 1.0, 1.0, 1.0, 1.0);
// set the position vertex attribute with our triangle's vertices
glVertexAttribPointer(ATTRIB_POSITION, 3, GL_FLOAT, false, 0, triVertices);
glEnableVertexAttribArray(ATTRIB_POSITION);
// and finally tell the GPU to draw our triangle!
glDrawArrays(GL_TRIANGLES, 0, 3);
That’s it - you’ve got a triangle on the screen. You can download the full source code for tutorial 2 from here. The important code is found in Tutorial2ViewController.m in the loadShaders, setupView and drawFrame methods. It will draw both a triangle and a square on the screen. 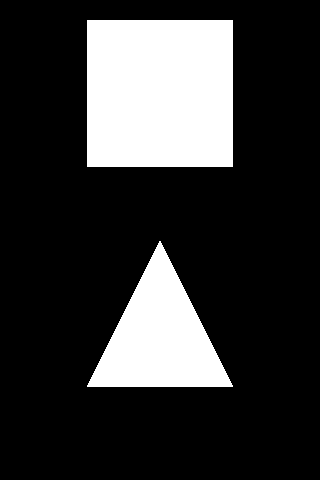
Tutorial 3
We’ve actually already covered part of tutorial 3 by adding a uniform to our fragment shader that lets you set the colour. If you uncomment the line just after the comment that says “// change the colour uniform if you want to have a different colour” then your square will come out in green. However, tutorial 3 is more about being able to change the colour at each vertex. How do we do this in ES2.0? This is where varying variables come in. Along with our position attribute we are going to add a colour attribute. The value of this will be assigned to a varying variable which will be passed into our fragment shader - the value of this variable will then be used to set the pixel value. Our vertex shader now looks like:
attribute vec4 position;
attribute vec4 colour;

uniform mat4 mvp;

varying lowp vec4 vColour;

void main()
{
 gl_Position = mvp * position;
 vColour = colour;
}
and our fragment shader like this:
varying lowp vec4 vColour;

void main()
{
 gl_FragColor = vColour;
}
In our code we will now need a set of colours for the vertices:
const GLFloat triColours[] ={
 1.0f, 0.0f, 0.0f, 1.0f,
 0.0f, 1.0f, 0.0f, 1.0f,
 0.0f, 0.0f, 1.0f, 1.0f,
}
And these will need to be set into our new colour attribute. Note that we no longer have a uniform called colour in our shaders.
// set the colour vertex attribute with our triangle's colours
glVertexAttribPointer(ATTRIB_COLOUR, 4, GL_FLOAT, false, 0, triColours);
glEnableVertexAttribArray(ATTRIB_COLOUR);
You can download the full source code for tutorial 3 from here. The important code is found in Tutorial3ViewController,m in the loadShaders, setupView and drawFrame methods. It will draw both a triangle and a square on the screen with different colours at each vertex. 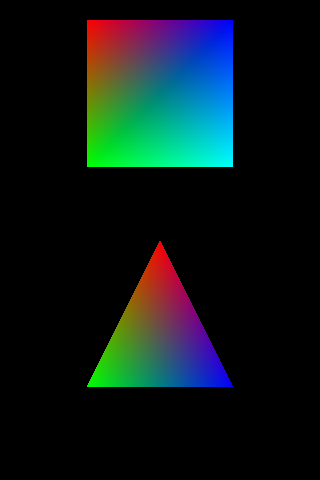
Tutorial 4
For tutorial 4, just use the esRotate function from the esUtils code - apply it to your modelview matrix before you ceate the mvp matrix. e.g.
// translate up by 3 units
esTranslate(&modelView, 0.0f , 3.0f, 0.0f);
// rotate by 45 degrees around the z axis
esRotate(&modelView, 45.0, 0.0, 0.0, 1.0f);
// create our new mvp matrix
esMatrixMultiply(&mvp, &modelView, &projection );
// update the mvp uniform
glUniformMatrix4fv(uniformMvp, 1, GL_FALSE, (GLfloat*) &mvp.m[0][0] );
You can use either Tutorial 2 or 3 to play around with this.
Over the coming weeks I’ll port the rest of the tutorials - hopefully I’ll learn some more as I do it.