We’ve got a few options when developing on the RaspberryPI. We can connect a mouse, keyboard and monitor and treat it like a desktop computer - but it’s not always very convenient.
You can watch a video version of this blog post here:
First off you need a spare mouse, a spare keyboard and a spare monitor - And you need the RaspberryPi close enough that you can plug all this together
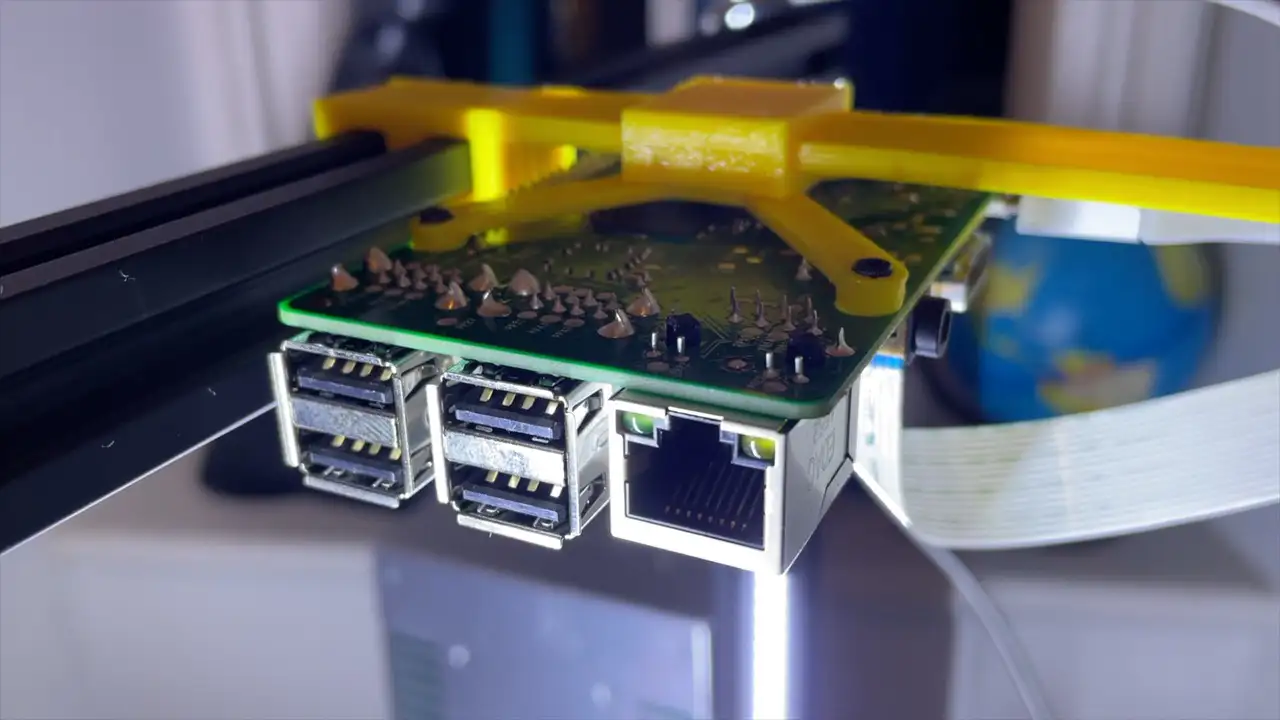
This RaspberryPI is part of my wordle solving robot and it’s connected to my 3D printer. I could plug everything into it, but it’s a bit of a pain and I’d probably end up ripping the sockets off the board.
If you don’t have these spare peripherals you can set the PI up in a headless way and connect to it via SSH.
Once you’re connected then you’ve got access to vim and nano - I’m quite used to using these for making quick edits, but it’s not the most friendly of editors to use.
There are of course more fully functional editors that you can use from the command line, Emacs is particularly powerful.
Another option once we’ve got our headless PI up and running and connected to our network is to use VNC - this is quite nice and we get access to the PIs desktop environment.
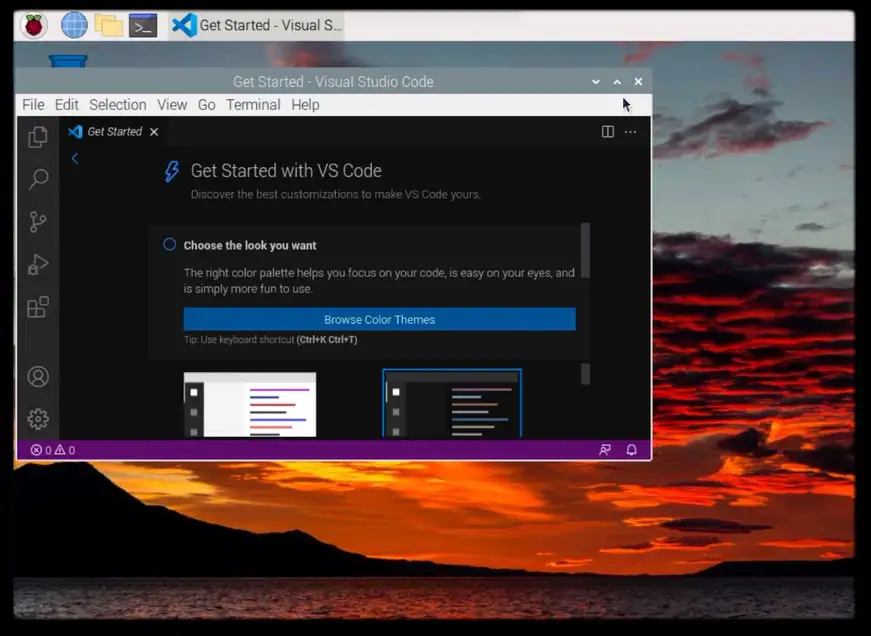
We can then install an IDE like VSCode and crack on with our development.
This last option is nice, but it’s still a bit annoying to use and we need to have a desktop environment installed and running on our Pi.
There is a much nicer way, and that’s to use VSCode’s remote development features.
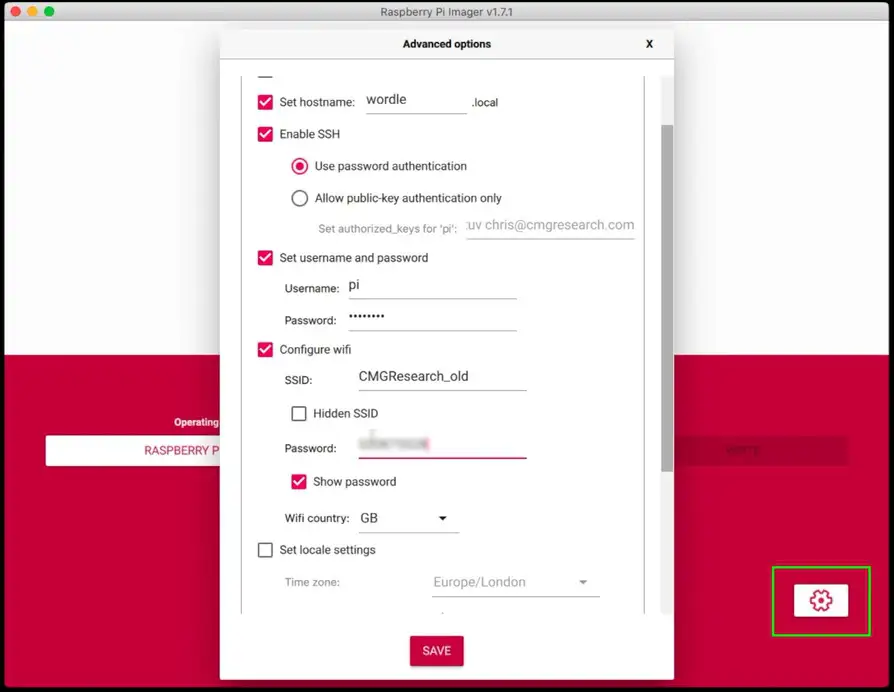
First off we’ll do a headless setup of our Pi - this is now trivially easy with the Pi imager app as we can now access the advanced options using this cogwheel icon.
This lets set up the hostname, turn on SSH, set the username and password and add the WiFi credentials.
When we boot the Pi from the SD Card everything will be set up nicely for us.
Now for the magic part, we just open VSCode on our computer and install the “Remote Development” extension pack.
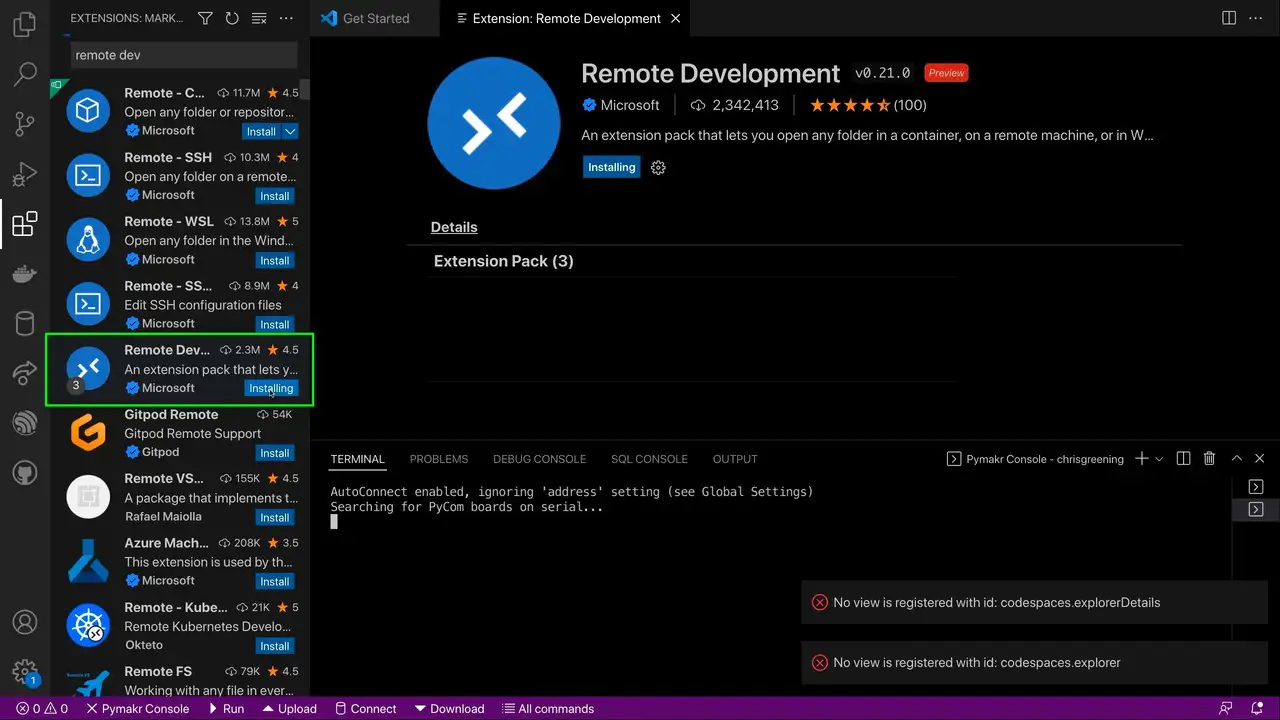
With this installed we now get this extra button in the bottom left of the window.
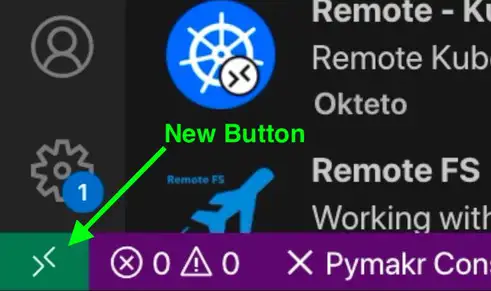
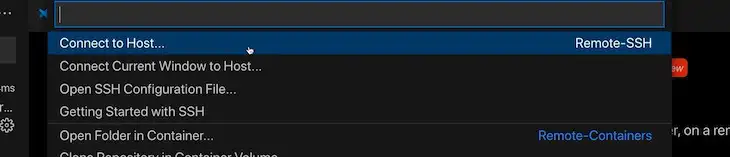
If we click on this button we get an option to connect to a host.
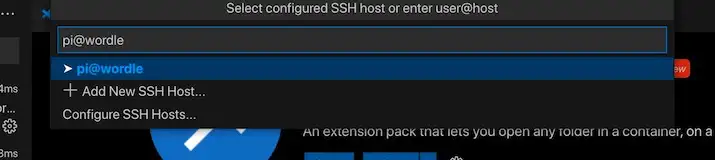
We just enter the same thing that we would use to connect via SSH - in my case the user is pi and I set up the machine to be on wordle so I just enter pi@wordle and then we enter the password.
VSCode will install the VSCode server on the Pi and we’re good to go.
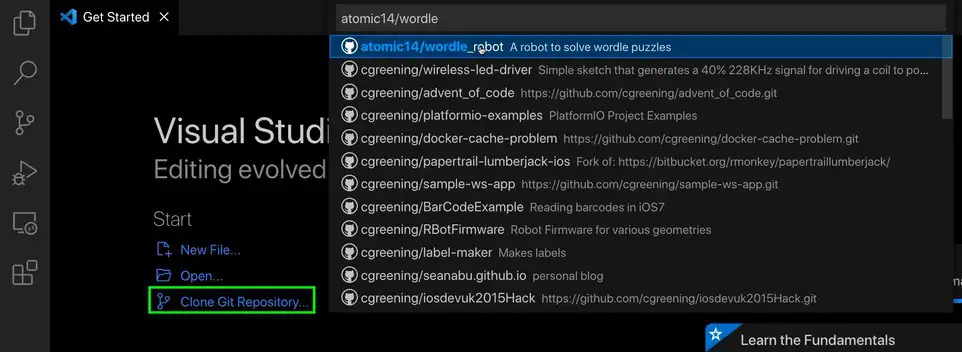
I’m going to use my wordle solving robot code as a demonstration project, so I’ll need to clone it from GitHub.
We can use the clone from git option in VSCode to do this for us and then we just open up the folder that has been cloned.
I’ve got an additional extension that I want to install into my remote environment - this is a python project, so I want to install the python extension.
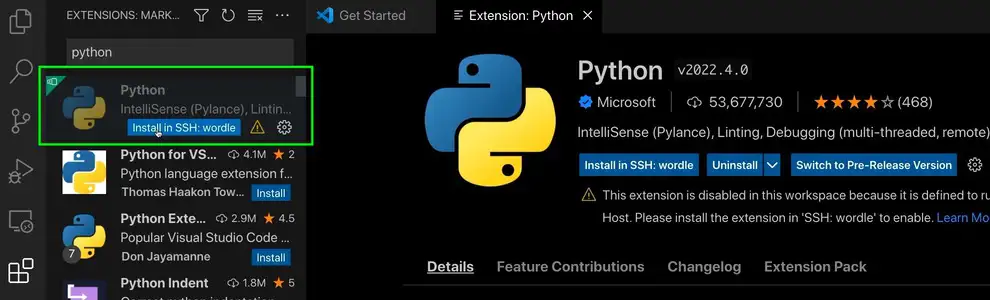
This will also install the extensions for running Jupyter Notebooks.
We’re now ready to finish setting up our project on the Pi.
I’ll open up a new terminal in VSCode - this automatically opens up a terminal on our Pi in the correct folder.
I can then just follow the instructions in my README.md file to get everything installed.
There are some native dependencies that I’ll need to install, so we’ll kick that off first.
sudo apt-get update
sudo apt-get install python3-picamera libjpeg-dev zlib1g-dev libfreetype6-dev liblcms2-dev libopenjp2-7 libtiff5 libatlas-base-dev -y
With that done we can install our python dependencies.
The first thing I’ll do is create a virtual environment - this keeps our python dependencies nice and local to our project.
python3 -m venv venv
VSCode should automatically detect that we have a virtual environment and will switch to using it for Python.
We then activate this environment in the terminal and install all our Python dependencies.
source venv/bin/activate
pip install -r requirements.txt
pip install -r requirements_pi.txt
This takes a while as we want Jupyter Notebooks, OpenCV and support for PiCamera.
We’re now ready to run our code - we can just click on the ipynb files and they’ll open up in VSCodes Jupyter Notebook viewer.
We can access the Pi’s camera directly and read images straight from it as all our code is running on the Pi.
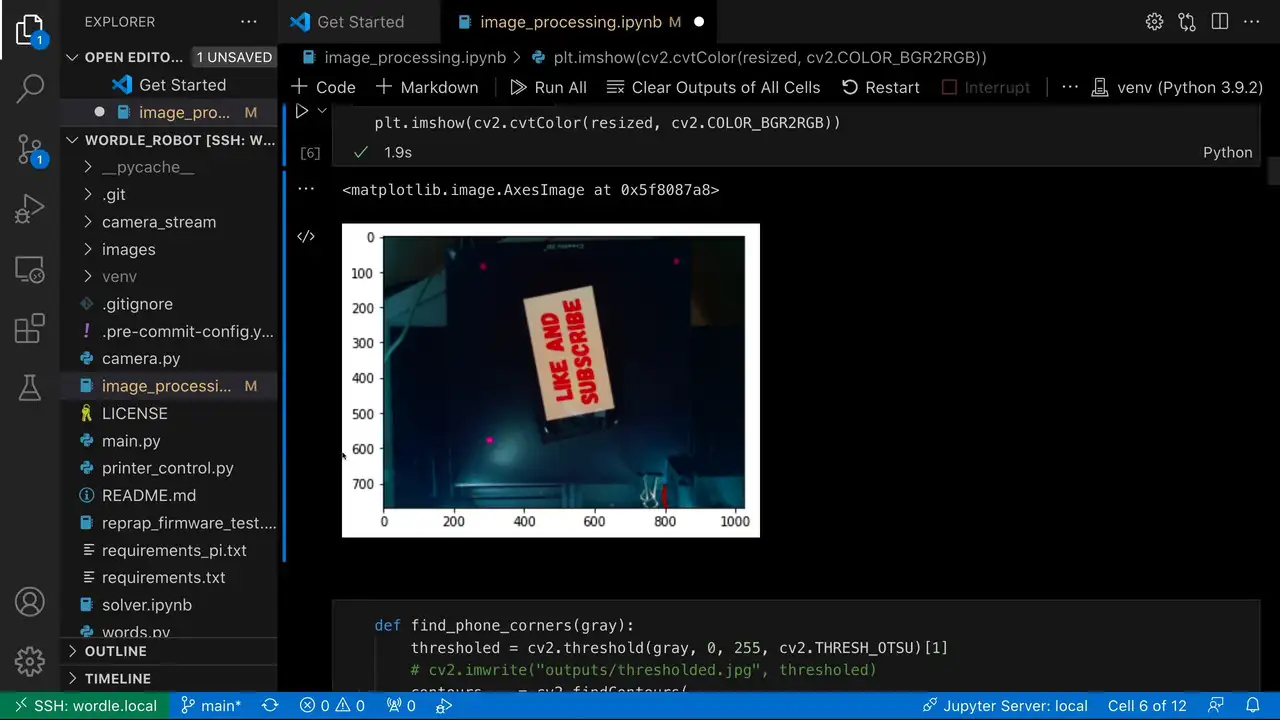
We can step through each of our notebook cells. And, we can even debug the code and see what’s going on.
This is a really nice way of developing code on the Pi - we’ve got access to all the Pi’s hardware so we know immediately if our code will work or not.
There are as always some limitations, there’s no support for armv6 so you can’t use this on Pi Zero. But other than that it works really well.
You can watch a video of all this in action here:
And if you like the wordle solving robot - you can see it in action here: