You can try it out for yourself using this link https://sudoku.cmgresearch.com - just hold a Sudoku puzzle up to your WebCam. Or try it on your mobile phone - it should work pretty well in a mobile browser.
A long time ago I wrote an app for the iPhone that let you take a grab a sudoku puzzle using your iPhone’s camera.
Recently, when I was investigating my self organising Christmas lights project I realised that the browser APIs and ecosystem had advanced to the point that it was probably possible to recreate the system running purely in the browser.
As you can see it works pretty well:
As always, all the code is on GitHub for you to try out for yourself: https://github.com/atomic14/ar-browser-sudoku
It’s good to start with a simple definition of the problem we are trying to solve:
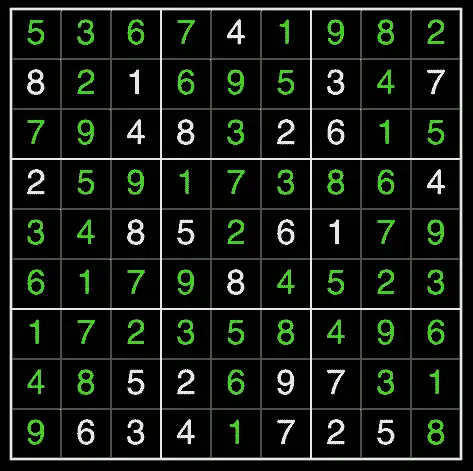
Given an image identify and extract the Sudoku puzzle, recognise the numbers in each cell, solve the puzzle, render the results on top of the original image.
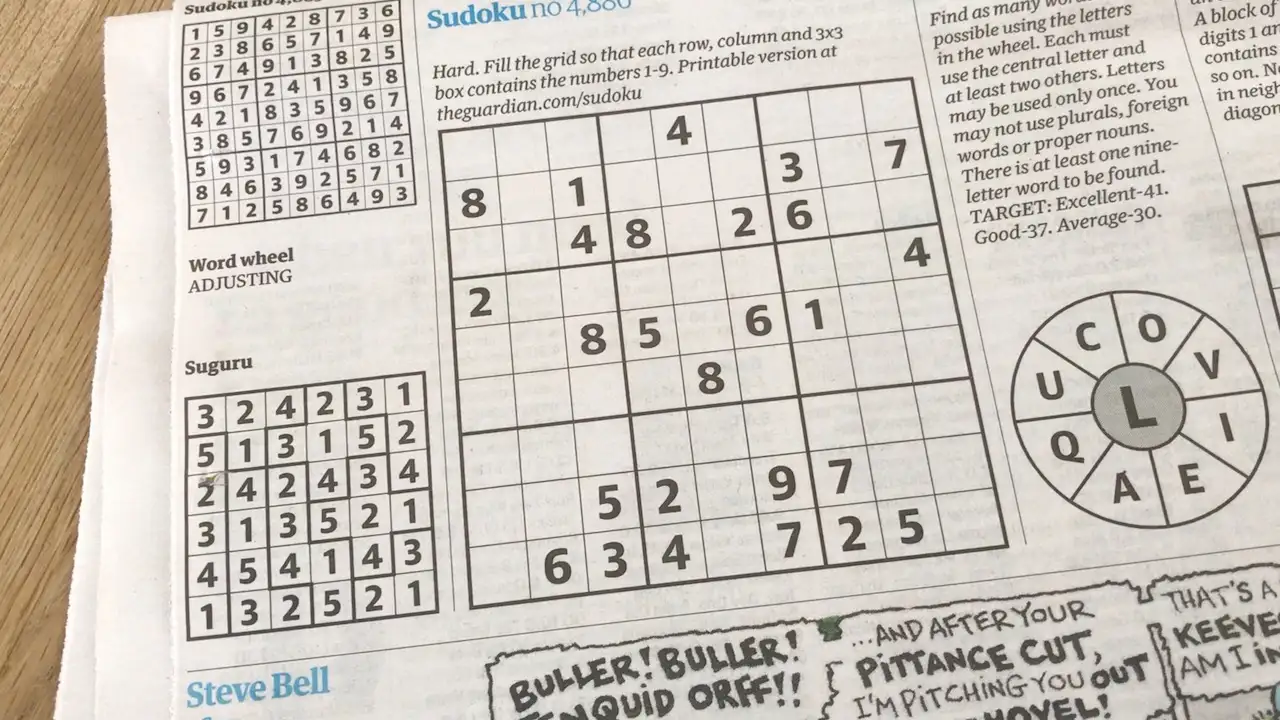
As a classically trained image processing guy, my first port of call is to remove redundant information.
We don’t care about colours, so we’ll convert the image to greyscale. As you can see we’ve not lost any useful information.
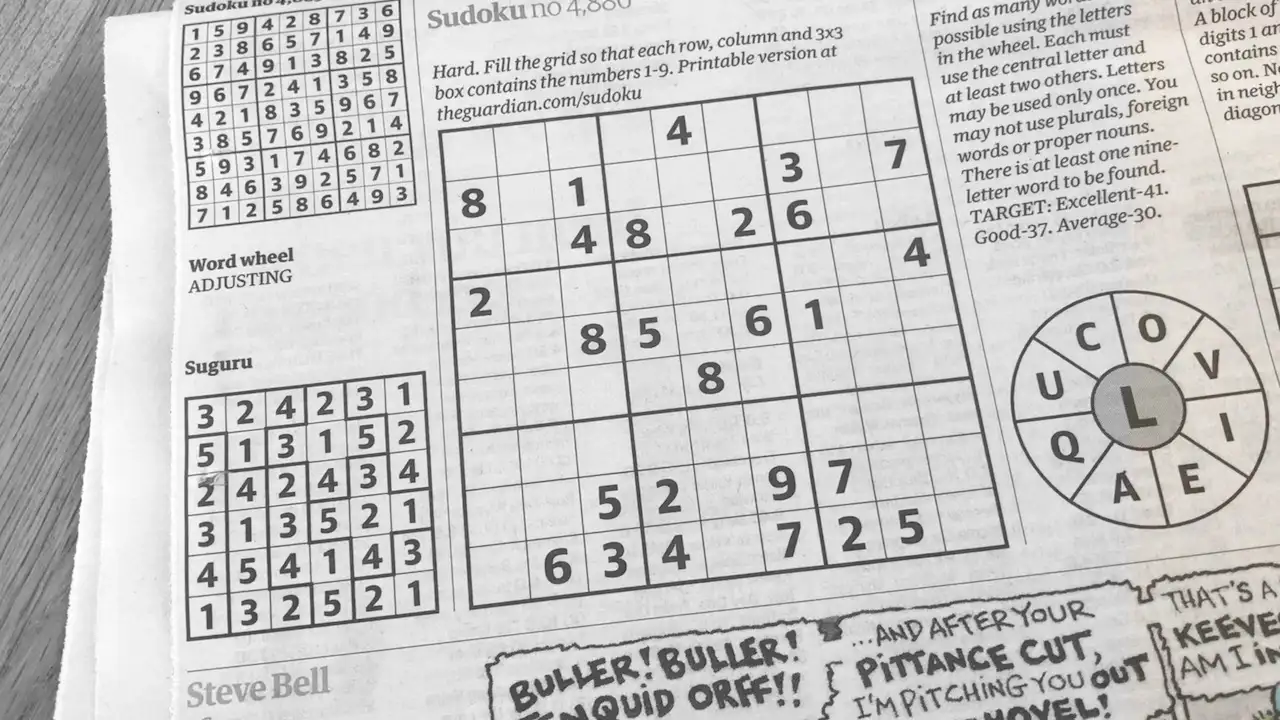
Looking at the image, we only ready care about paper and ink, so it makes sense to binarise the image and make black or white.
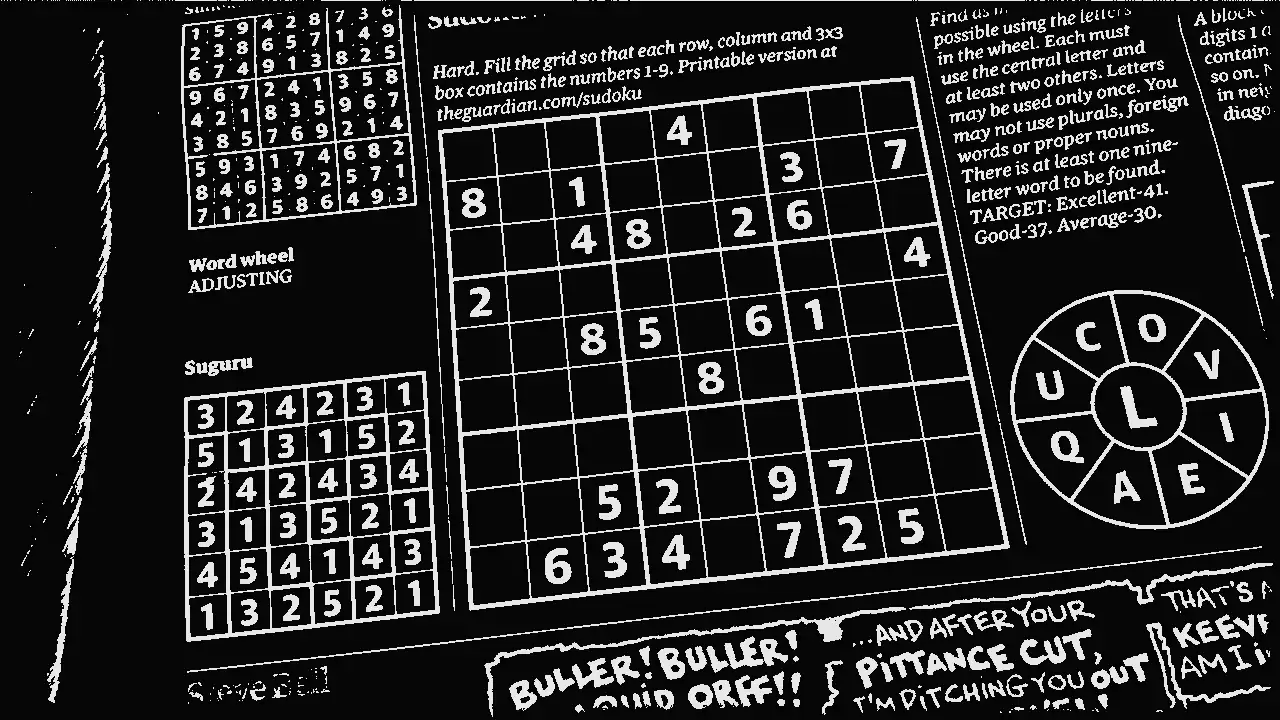
Next, we need to identify the blob that is the puzzle. Once we’ve got that we can extract the image of the puzzle and extract the contents of each box of the puzzle.
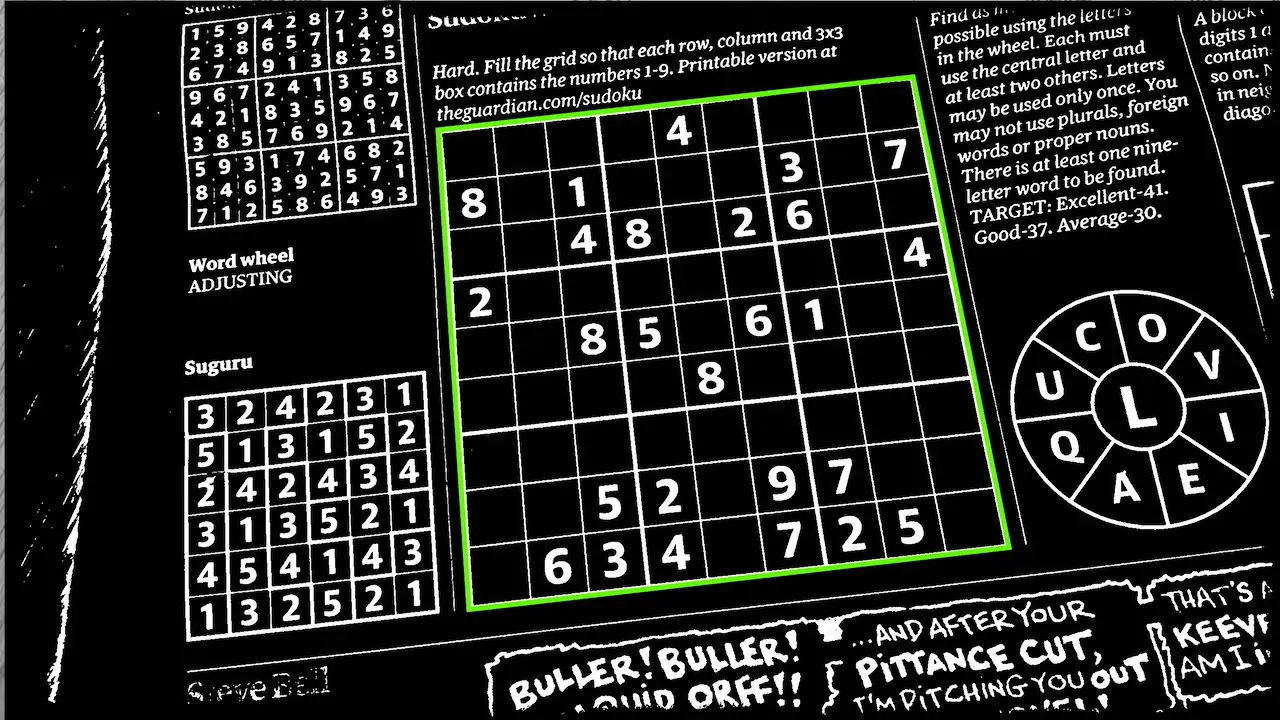
Apply some OCR to the contents of each box, solve the puzzle and our job is done.
It’s a pretty straightforward image processing pipeline!
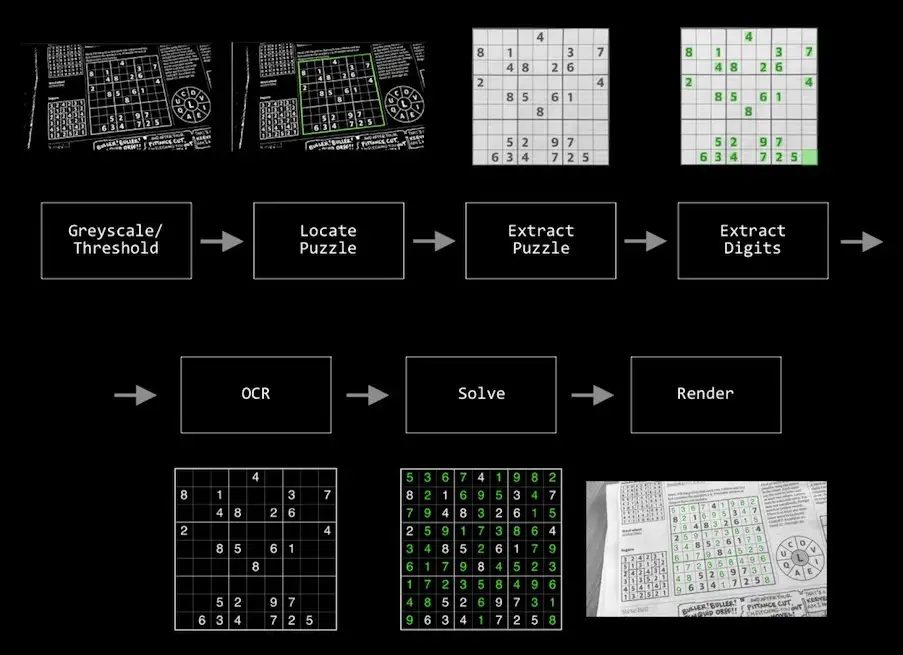
Let’s dive into each of these steps in turn and see how they work.
Convert to GreyScale
We’re taking a feed from the camera on the device. This comes into us as an RGB image. We’re not really interested in colour as we’re working with printed puzzles which will typically by printed in black and white.
So our first step is to convert from RGB to greyscale.
If we look at the standard formula for this we get this formula https://en.wikipedia.org/wiki/Grayscale.
Y = 0.299R + 0.587G + 0.114B
What’s interesting about this is that a large portion of the value is coming from the green channel. So we can apply a little shortcut to our RGB to greyscale conversion and just take the green channel of the image.
Threshold
We’re going to use morphological operations for locating the puzzle - typically these work on black and white binary images, so our next step is binarise our image.
This involves applying a threshold to separate out foreground from background pixels.
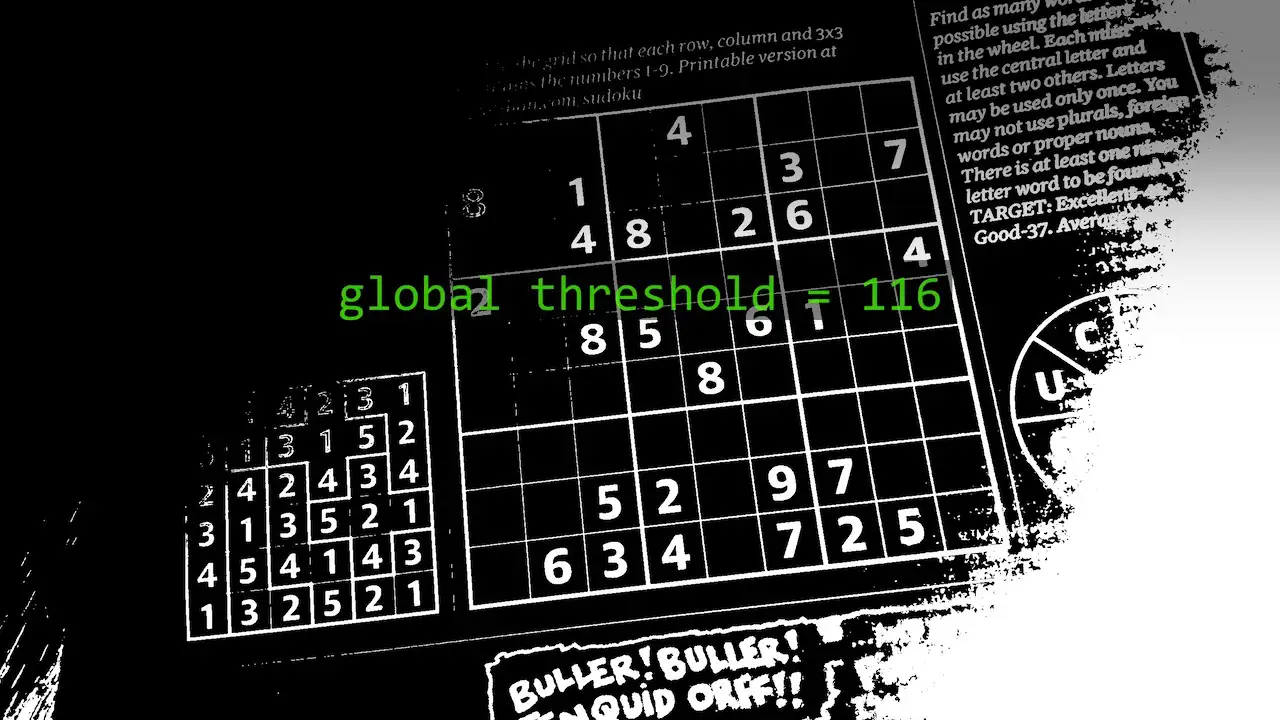
Trying to apply a global threshold to the image can result in very poor results - especially when lighting conditions are not good.
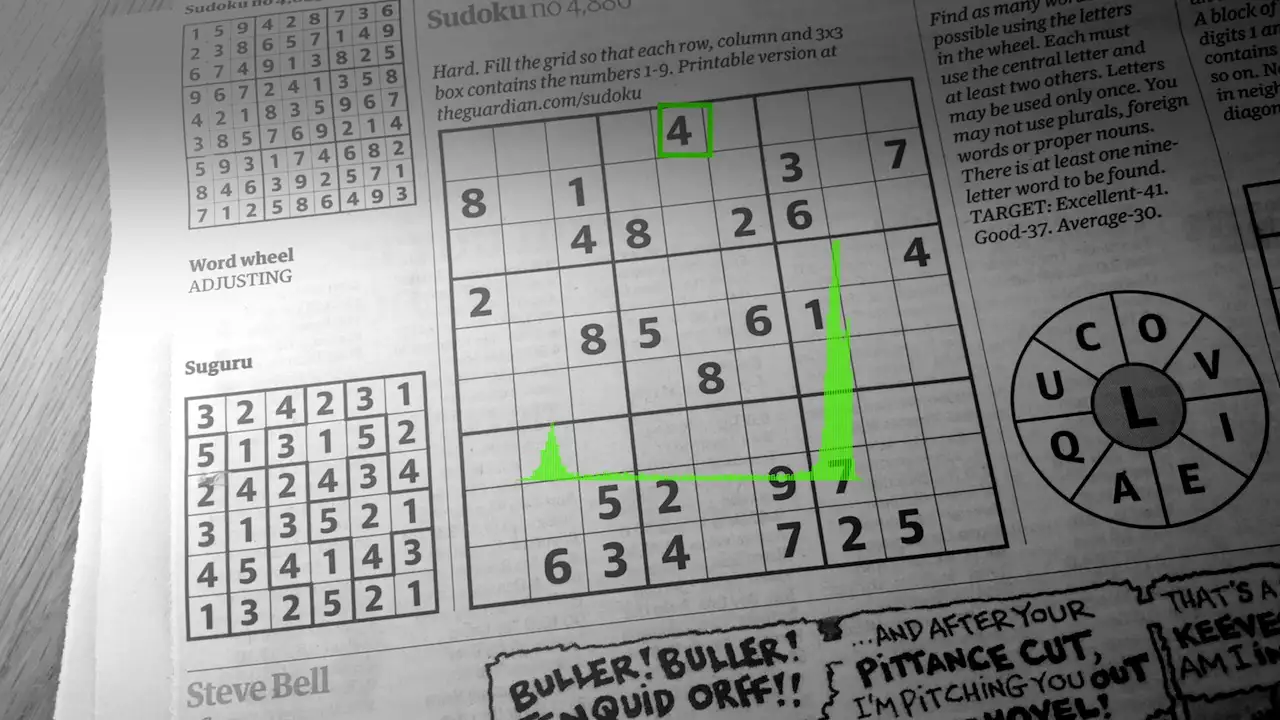
However, if we look at a small section of the image we can see from the histogram that we do have an obvious collection of ink pixels and paper pixels.
What we want to do is examine each pixel in the context of its surrounding area.
A simple way to do this is to apply a blur to the image and then compare the original image with this blurred image.
Doing this gives us a very clean segmented image even when lighting conditions are not ideal
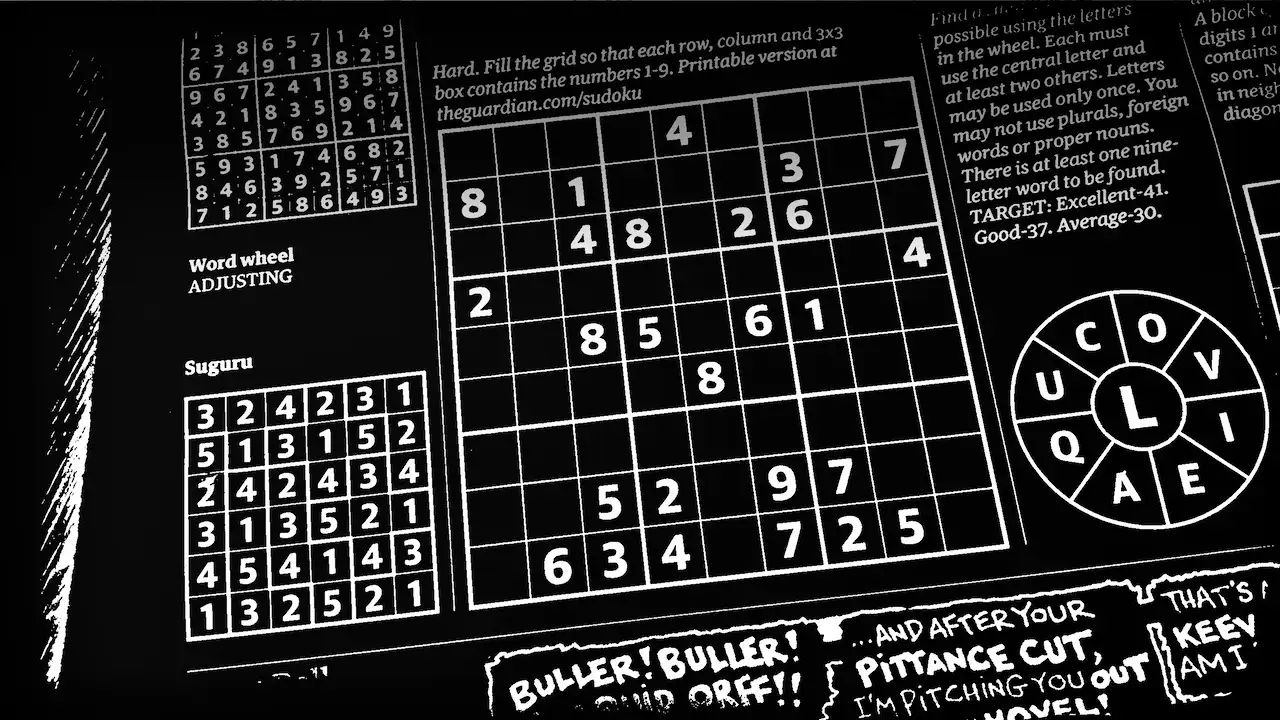
Puzzle location
We’ve now got a fairly clean image that contains our puzzle along with a bunch of random other printed elements. Typically you’d jump straight in here with something like a Hough transform to detect lines. However we can be a bit smarter about what we are doing and take a bit of a shortcut.
We know that whoever is taking the picture should be pointing the camera at a puzzle. So we can assume that the puzzle would be the largest object in the image and also have the most number of pixels. We can also apply other heuristics such as aspect ratio to filter out elements that probably aren’t a puzzle.
If we scan the image pulling out all connected components the connected component that contains the puzzle should be the one with the most points.
Doing this lets us isolate the puzzle grid.
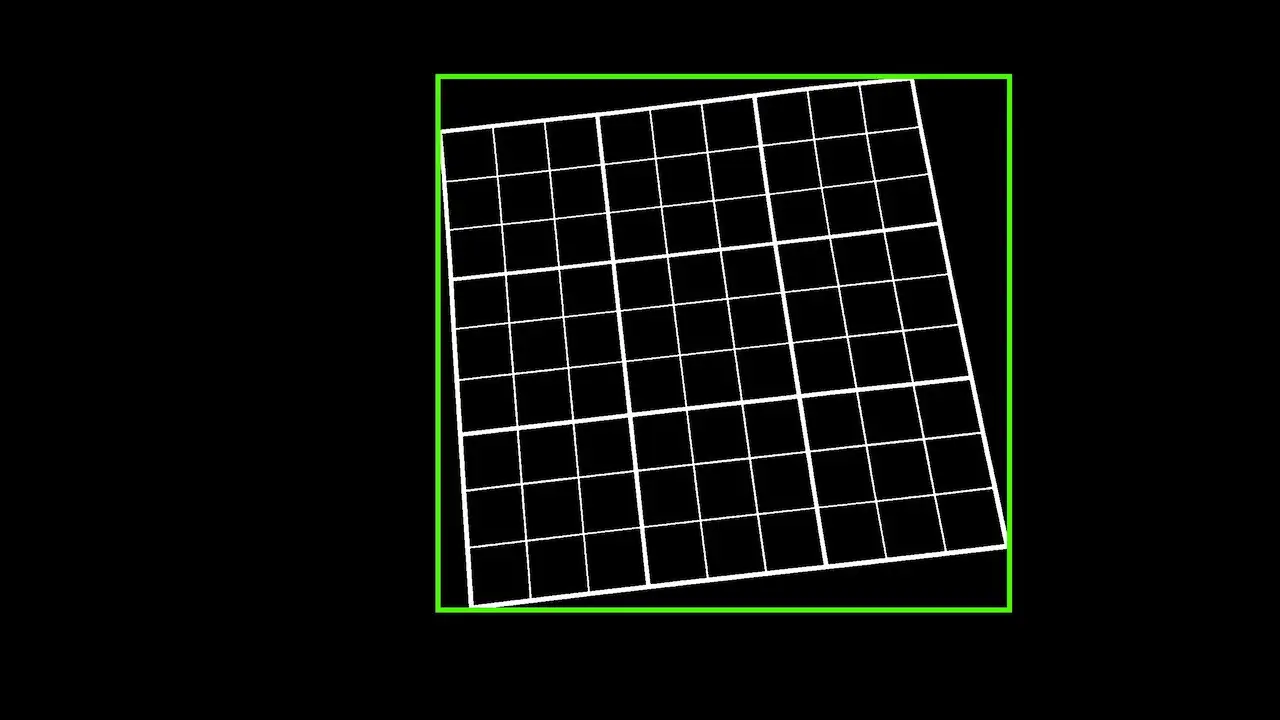
Corner detection
With the puzzle grid identified we now need to identify the four corners of the puzzle. Once again we can apply a fairly simple heuristic to this problem. The pixels that are in the four corners should have the smallest Manhatten distance from the corners of the max extents of the extracted component.
Running this algorithm for all four extents of our located puzzle gives us the four corners.
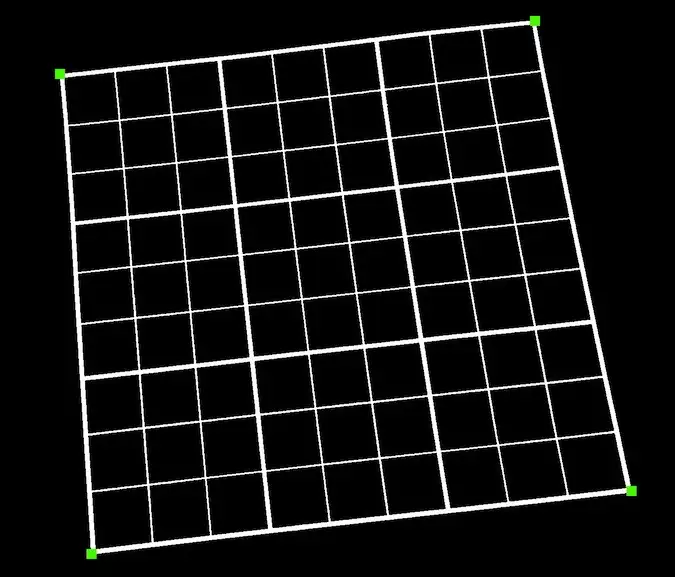
Extract the puzzle image
We know where the puzzle is in our image. We have the location of the four corner points.
To extract the puzzle image we formulate our problem into one of a homographic transform.
We want to map from the camera image of the puzzle to an ideal image of the puzzle that is not distorted by perspective or rotations.
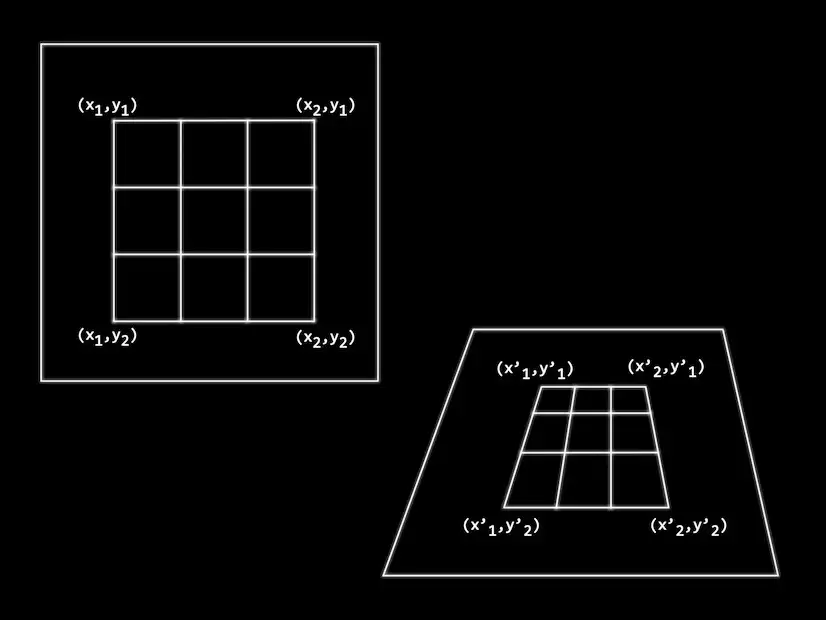
We do this by computing a homography between the two planes. The formula shown can be transformed into this - as you can see we need four points - this maps nicely onto the corner points that we’ve already located.
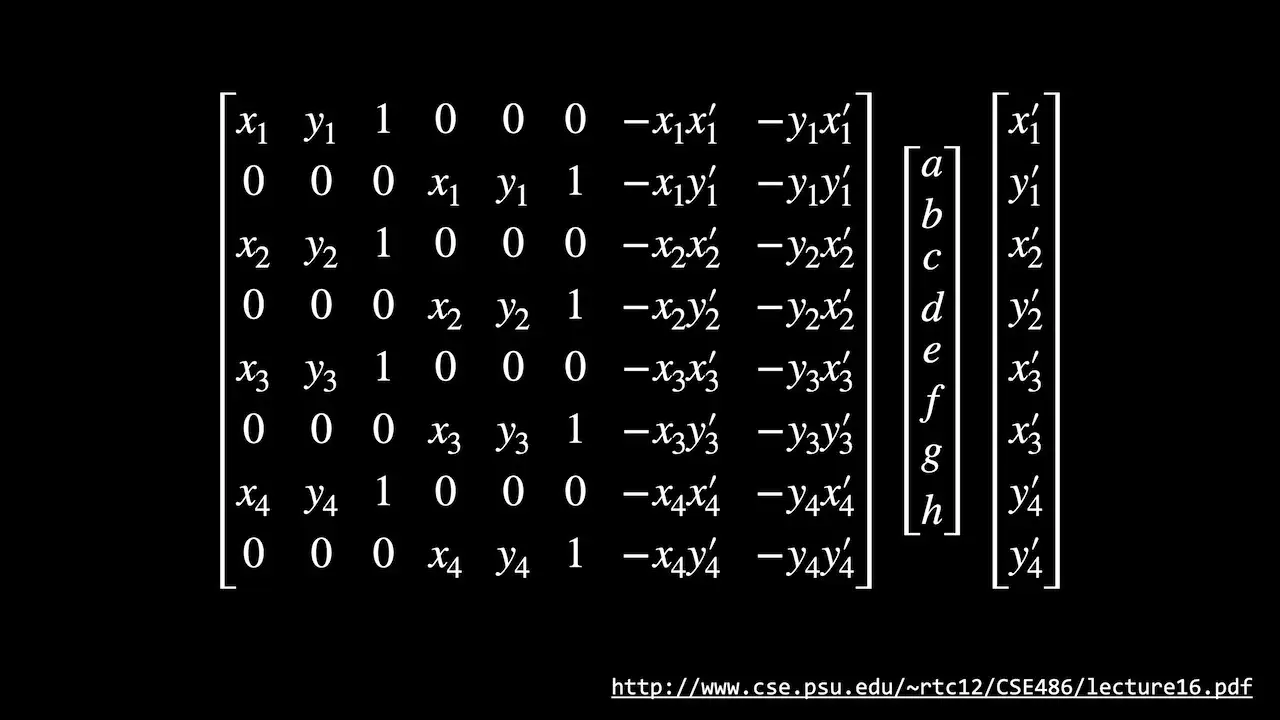
If we rewrite the matrices algebraically we can find h using this algorithm.
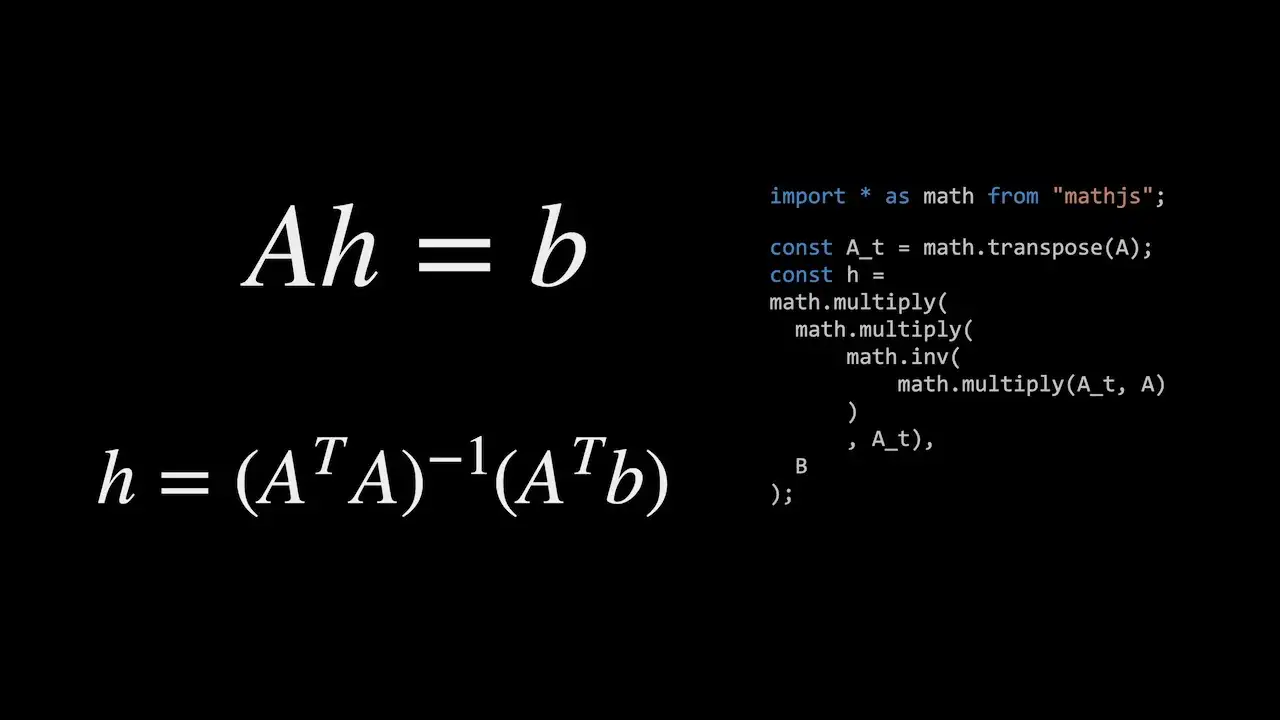
You can find more details on how to do this here - https://web.archive.org/web/20150316191717/http://alumni.media.mit.edu/~cwren/interpolator/
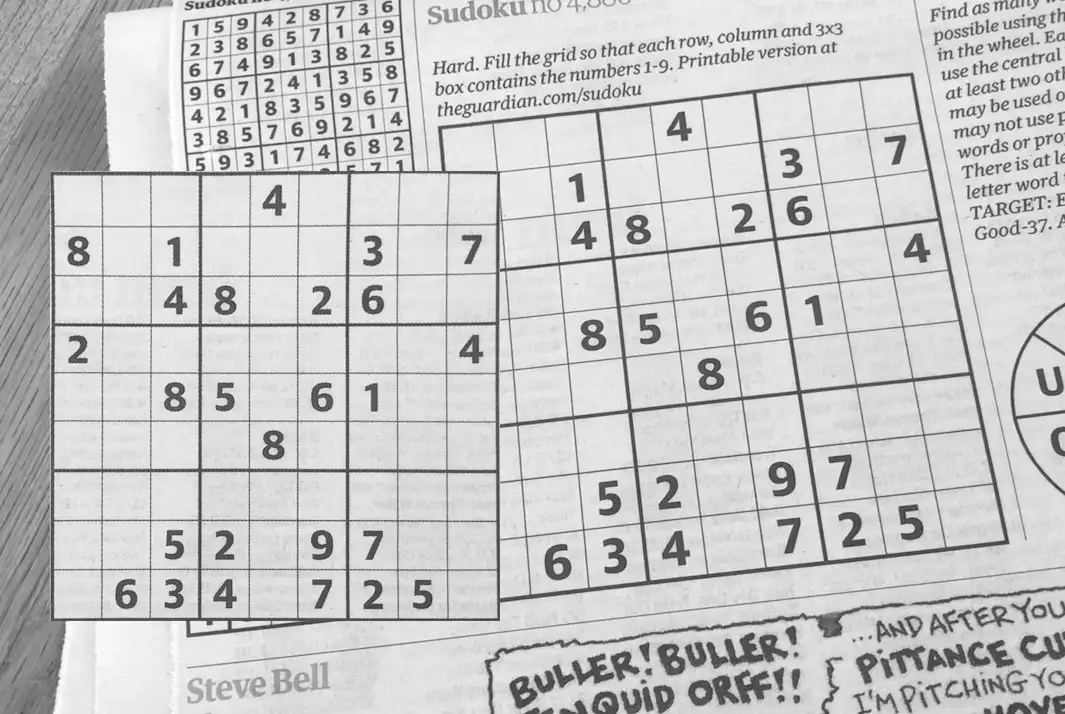
Now that we have the homography between our ideal image and the camera image we can map pixels between images.
This gives us a nice square puzzle image from the camera image.
Extract each box
Once we’ve got the square puzzle image we need to extract the contents of each individual cell. We can use the thresholded version of the image for this.
Looking at each box in turn we extract the bounds of any connected region starting from the centre of each cell. We can then use this bounds to extract an image from the square greyscale image.
If there is no connected region in the centre of the cell then we know that it is empty.
We now have an image for each populated cell of the puzzle.

Apply OCR to each box image
We’re going to use a neural network to perform OCR on each image. I’m going to use TensorFlow to train the network and then TensorFlow js to run the network in the browser.
Our neural network is going to be trained to recognise the digits 1 through 9.
I’ve synthesized a large number of training examples from a wide selection of fonts rendering a greyscale image of each digit.
I’ve added a small amount of blur and some Gaussian noise to each image. Hopefully this will provide a reasonable representation of what we will be getting in a live environment.
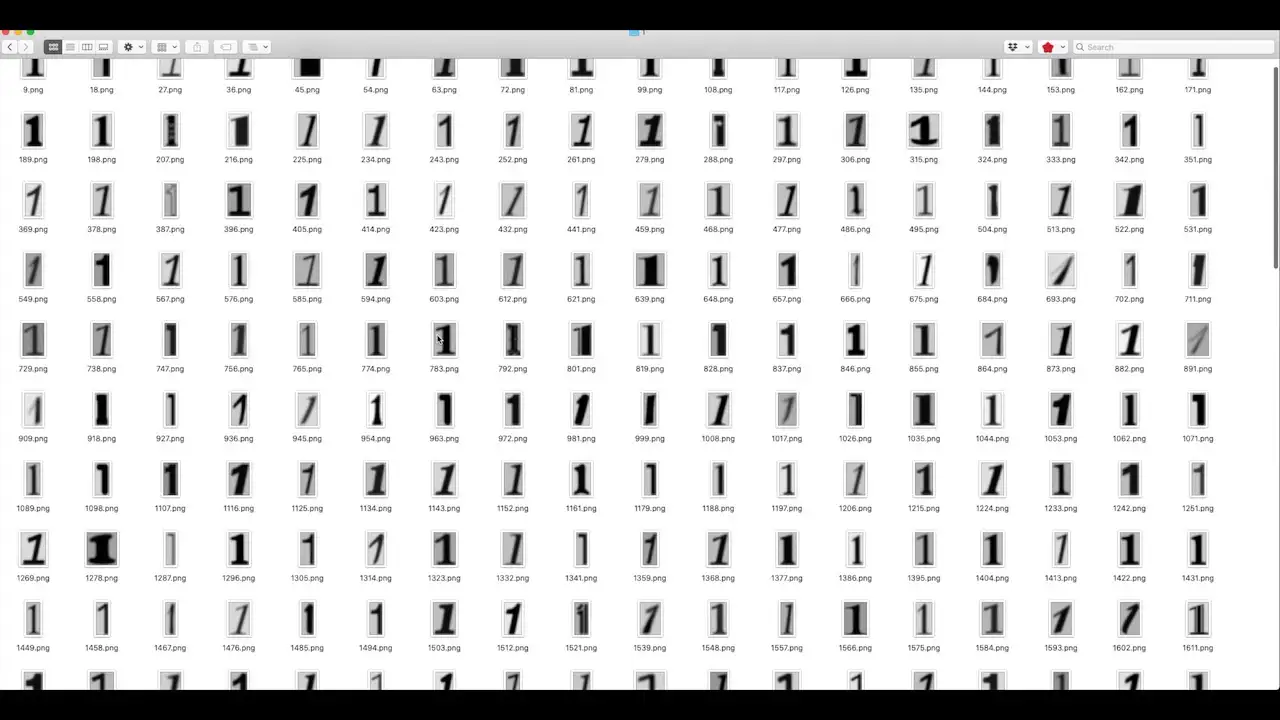
I’ve also separated out 10% of the images into a testing data set that we can use to evaluate how well our network performs.
Training
I’m using an interactive Jupyter notebook to train the network - this is available in the GitHub repository. You’ll also find more information on the training in the YouTube video.
I perform some image normalisation and resize the input images to 20 by 20 pixels - we need to remember to also do this in the javascript code so that it matches.
I’m also augmenting our training data to help the network generalise. This will add some random mutations to our input data set.
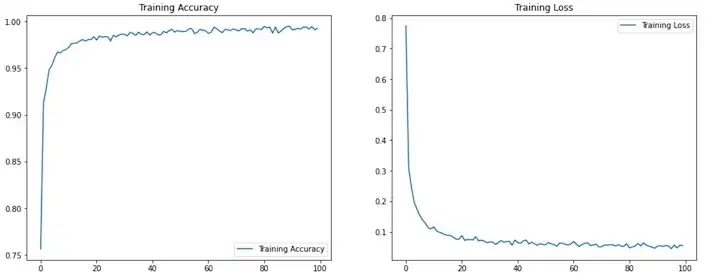
Running the training we can see that we have pretty good accuracy on both training and validation.

Looking at the confusion matrix we can see that “1”s and “7”s are currently getting confused.
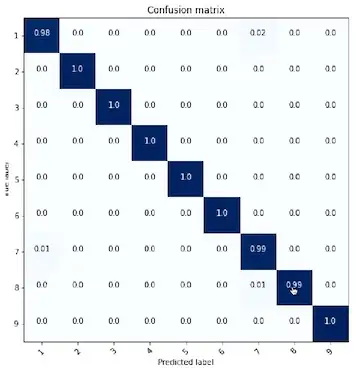
Looking at the failed images I’m pretty happy with the performance. I think the fonts that it is failing on would not be used in the real world so I’m happy to ignore these failures.

As I’m happy with the neural network structure I’m going to train it on all the data and use the resulting network in my production code.
Solving the puzzle
We can solve a sudoku puzzle using Donald Knuth’s application of Dancing Links to his Algorithm X for solving the exact cover problem.
Dancing links uses the seemingly very simple realisation that we can remove and put back nodes from a doubly linked list.

We can see that when we remove node B from the list it still has pointers back to the nodes that used to link to it.
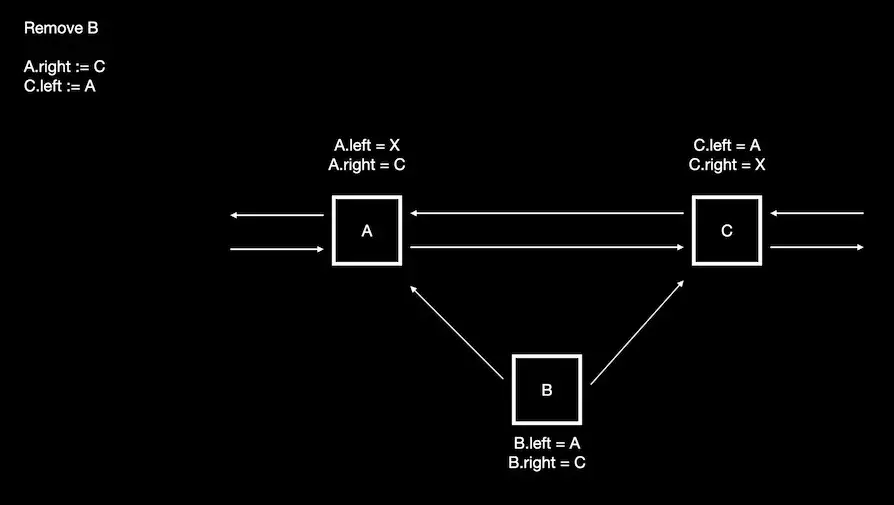
This means that node B contains all the information required to add it back into the list.
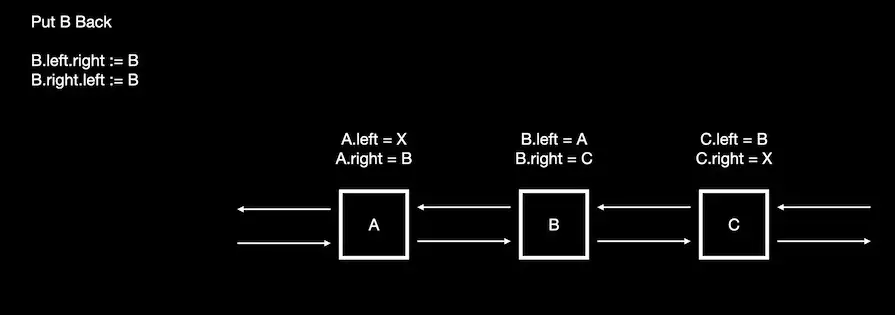
I go into more detail in the video around Algorithm X and you can find a good description in the WikiPedia artical.
Dancing links solves the problem of backtracking in an efficient way.
We can encode the sparse matrix used by Algorithm X as a doubly linked circular list going left and right for the rows and up and down for the columns.
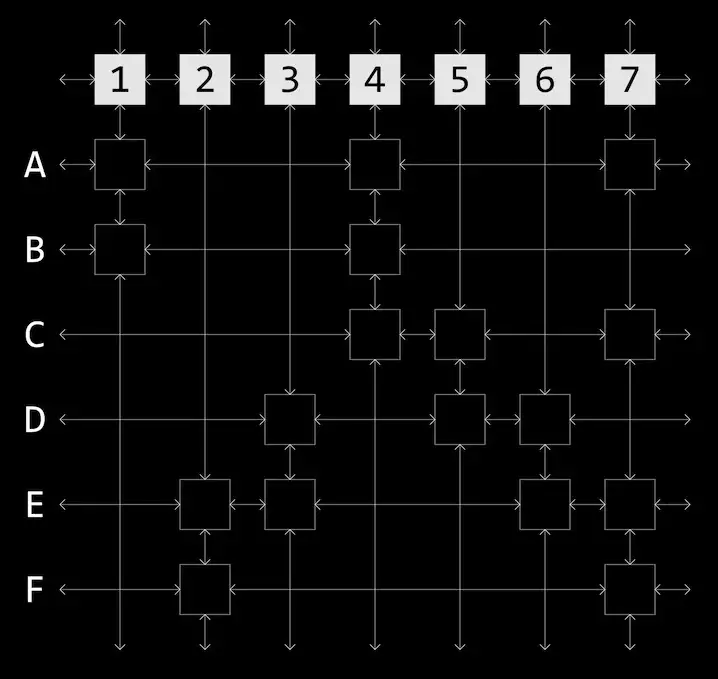
Since these are now linked lists we can use fact that we can efficiently remove and re-add elements to perform the column and row removals and to backtrack if needed.
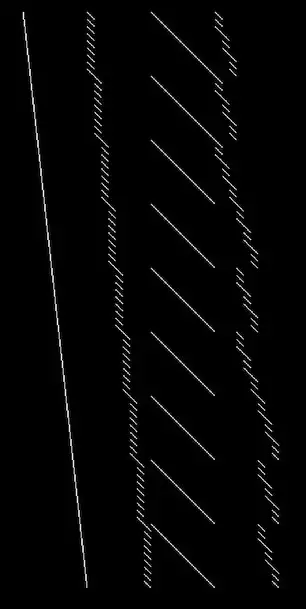
We can take advantage of this algorithm by recoding our sudoku puzzle as an exact coverage problem. Translating a puzzle into a set of constraints gives us a sparse matrix of 729 rows by 324 columns.
Here’s what a sudoku puzzle looks like when turned into a set of constraints.
Displaying the results
To render our results we could draw our text into a square image and then project each pixel onto the image coming from the camera. This would be quite computationally intensive.
Alternatively for each puzzle cell we could take an imaginary line through the centre of each cell. We can then project that using our homographic transform and use this project line to calculate an approximate height and angle for the cell.
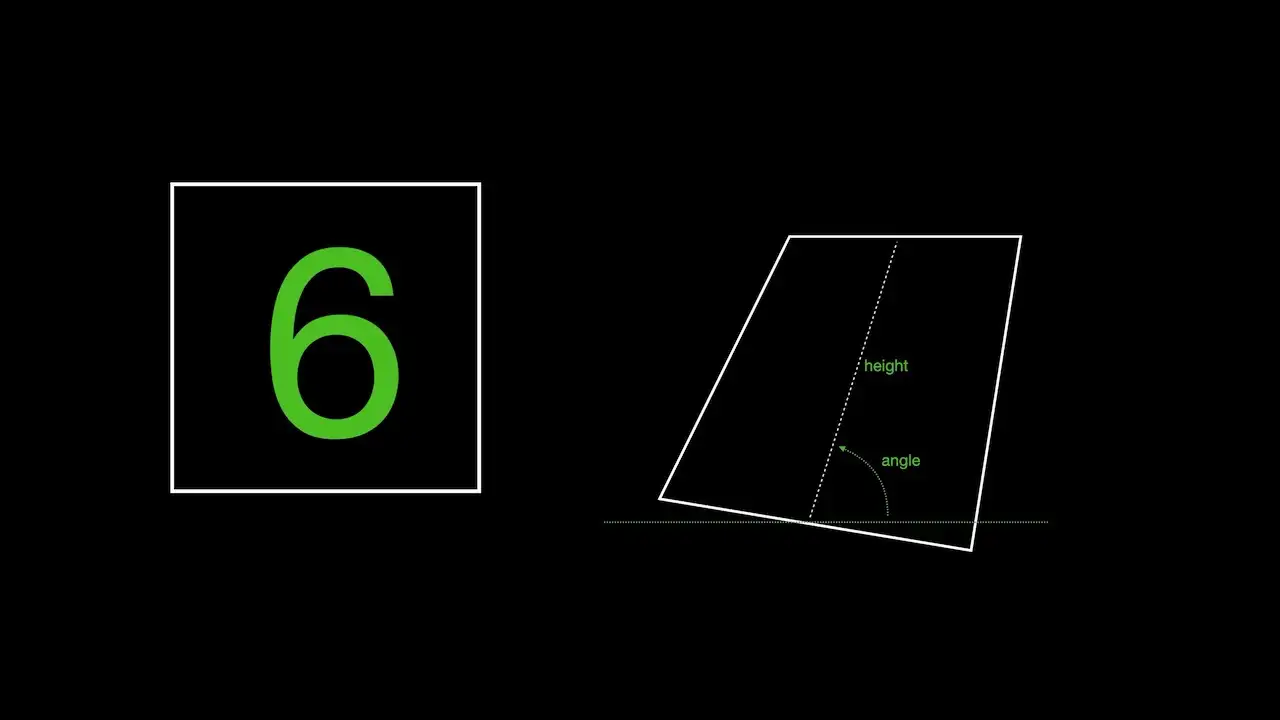
We then simply draw the text at the projected location of the cell with the calculated height and angle.
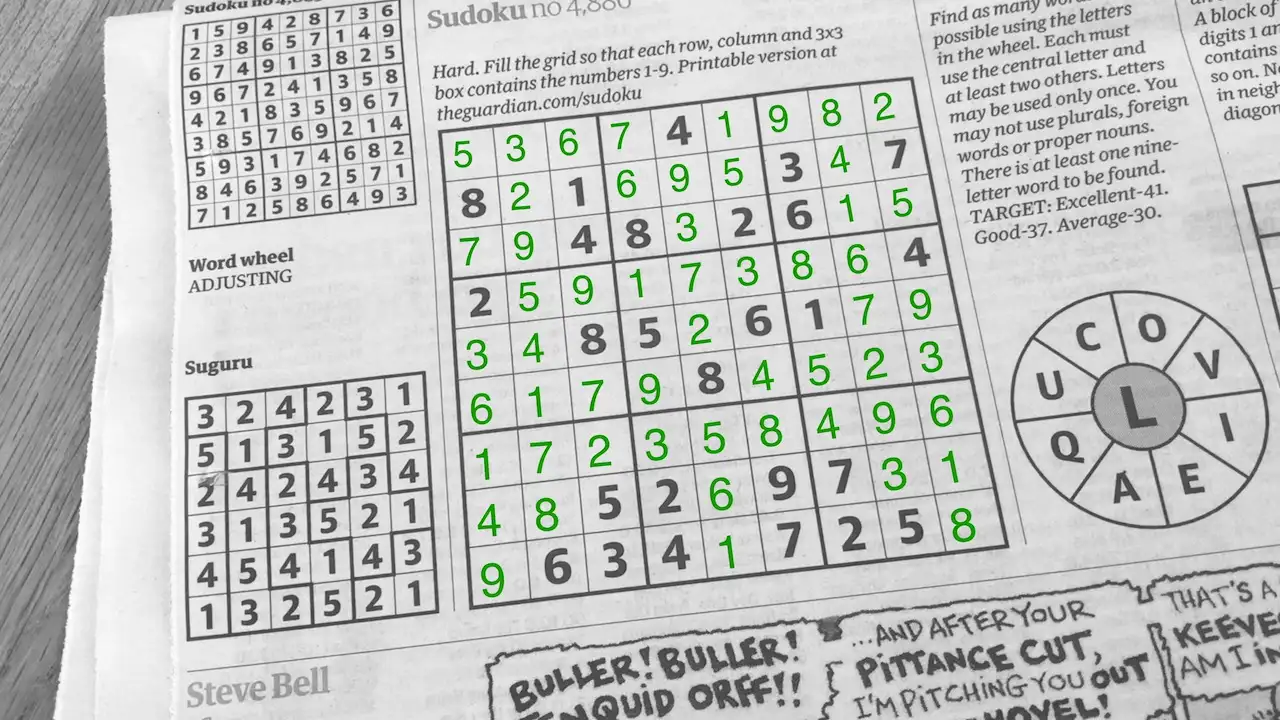
Checkout the video to see how well it works along with a lot more detail of all these steps: