In this fourth step we create a new Rails application, scaffold a model and deploy the application out to Elastic Beanstalk from the command line. We connect this application up to our RDS instance and show that it connects successfully with the dev database.
The first thing we should do is make sure we are running the same version of ruby as our Elastic Beanstalk environment. I am using rbenv for this purpose:
rbenv local 2.3.3
We then create a new rails app with postgresql as the database:
rails new DemoApp --database postgresql
Since we are going to be deploying the dev version of our application we should switch to a new “develop” branch:
cd DemoApp
git add .
git commit -m "Initial Commit"
git checkout -b develop
We can now make some changes to our application to make it suitable for deployment in the cloud. Edit the file config/database.yml and change the production entry to:
production:
  <<: *default
  url: <%= ENV['DATABASE_URL'] %>
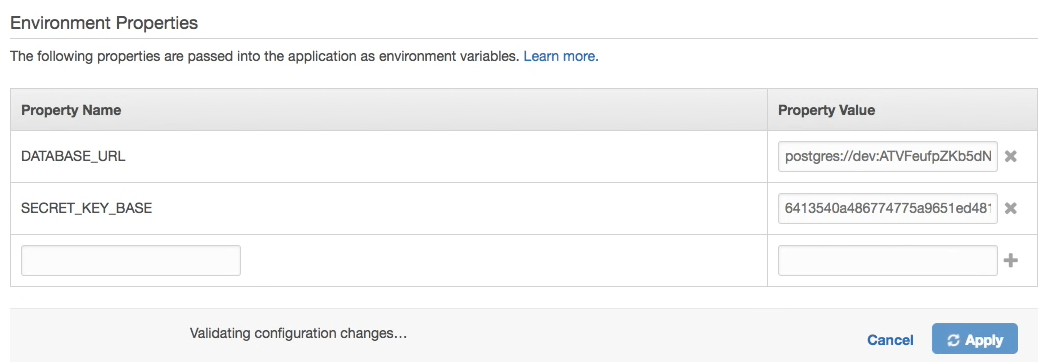
This will pull the connection string for our database from an environment variable called DATABASE_URL.
To setup this environment variable we go the Configuration tab of our Elastic Beanstalk Application. While we are there we should also add an entry for SECRET_KEY_BASE and generate a new secret by running:
rails secret

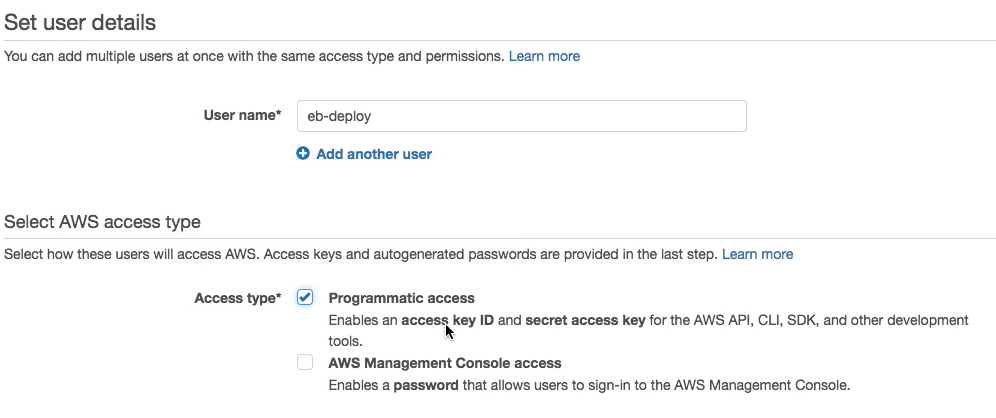
We now need to create some credentials for deploying our application. In AWS find the IAM services and create a new user with programmatic access:

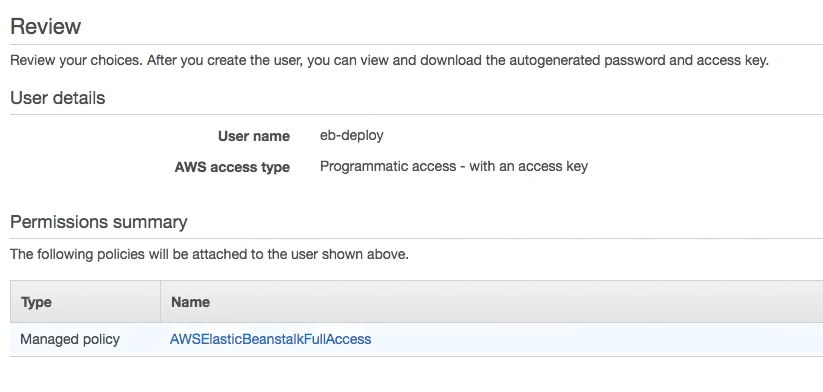
On this user select the “Attach existing policies directly” and find the ElasticBeanstalkFullAccess policy. Later you may want to adjust this policy to reduce the amount of access our deployment user has.
We should end up with a user that looks like:

Create the user and copy the Access Key Id and Secret Access Key:

Back on you local machine you can now configure the AWS CLI for deployment. You may need to install the AWS CLI from here (aws) and here (eb).
Run the following commands (you may want to give the profile a different name):
aws configure --profile demo
We can now start configuring our application for deployment. Run the following command:
eb init --profile demo
You will be prompted for the region you are using - make sure to use the region that matches the work you have done in the previous steps. Once you have picked a region you should see a list of available applications. Choose the application you set up in step 2.
You will also be asked if you want to use “AWS CodeCommit” for this walk through we won’t be using this service, instead we will be using GitHub and CircleCI. I’ll be blogging about CodeCommit in the near future so stay tuned!
The eb command will create a new folder in out project called .elasticbeanstalk. Inside this folder it create a config.yml file. This will look something like:
branch-defaults:
  develop:
    environment: Dev-env
environment-defaults:
  Dev-env:
    branch: null
    repository: null
global:
  application_name: Demo-Application
  default_ec2_keyname: null
  default_platform: arn:aws:elasticbeanstalk:eu-west-1::platform/Puma with Ruby 2.3 running on 64bit Amazon Linux/2.3.3
  default_region: eu-west-1
  instance_profile: null
  platform_name: null
  platform_version: null
  profile: demo
  sc: git
  workspace_type: Application
This tells Elastic Beanstalk that it should deploy our develop branch to the environment Dev-env or application Demo-Application. There is one further change we need to make - the eb command modifies our git ignore and the config.yml file is accidentally ignored by git. We want to commit this file so that our CI server can deploy to Elastic Beanstalk. Add an extra line to our .gitignore file to include the config.yml file.
!.elasticbeanstalk/config.yml
Commit all the changes to git and we are now ready to deploy. In the demo video we scaffold out a quick model so we can test the database connection. You may wish to do the same.
Once you have made any additional changes you want to make we are ready to deploy. Make sure you commit everything to git (eb will only deploy code that is committed) and then run the deploy command.
git add .
git commit -m "I made some changes"
eb deploy --profile demo
The eb command will now take our code and deploy it out to our Elastic Beanstalk environment. Once it has finished deploying test the application to make sure it is functioning as you would expect it to.
We now have a dev environment up and running. We can clone this environment to create a production environment:

Once the clone has completed go into the new environment configuration and change the DATABASE_URL setting to point to the production database. You should also update rails secret so that it is different from the one used in dev.
We can now modify our .elasticbeanstalk/config.yml to specify the deployment settings for our master environment. In the branch defaults of the file add an entry for the master branch:
  master:
      environment: prod-env-name
Commit the changes to git and checkout the master branch. Merge develop into master and we are ready to deploy production:
git add .
git commit -m "Add production deployment"
git checkout master
git merge develop
eb deploy --profile demo
All being well we should now deploy out to our new production environment.
In the next step we will setup CircleCI to deploy automatically when a commit is pushed to develop or master.