View All Posts
read
Want to keep up to date with the latest posts and videos? Subscribe to the newsletter
HELP SUPPORT MY WORK: If you're feeling flush then please stop by Patreon Or you can make a one off donation via ko-fi
#3D PRINTING #DIY #ELECTRONICS #FLAME LAMP #LED #PCB #WLED #WS2812

I built this flame lamp back in 2020 - it look pretty good, but the construction was a bit suspect. I was still mostly using breadboard back then and, although it had 300 LEDs, the resolution was pretty low.

Previous version of the flame lamp

I really did quite like the construction of it though - it looks like some kind of movie prop. If you want to delve into a bit of history there’s a video here documenting the design and build.

Anyway, it died at some point. I’m not sure if it was the dodgy wiring, or the electronics that gave up the ghost, but rather than try and troubleshoot I decided to build a new version.

These flexible WS2812 LED panels have become pretty popular over the past few years. The ones I’m using for this project are these 32x8 pixel panels.

Flexible LED Panels

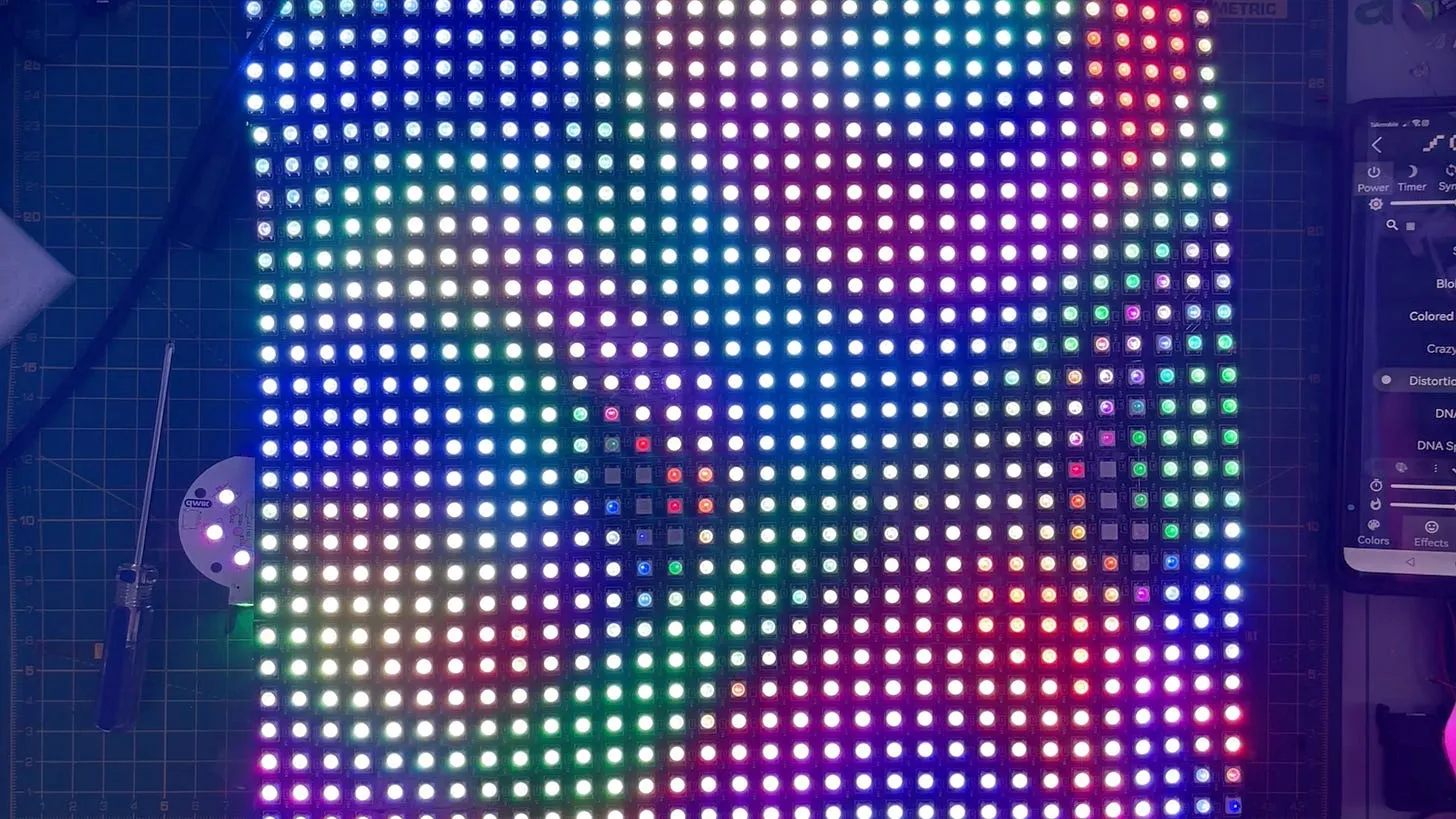
With four of these connected together we get 32x32 pixels - which gives us 1024 LEDs. So about 3 times the resolution of the original flame lamp.

To drive the display I’m using the same PCB I used for the Crystal Balls project. You can find the KiCad project for this board here on GitHub.

I designed these PCBs to be pretty flexible. They can power the LEDs from the USB/Battery. Or they can have the LEDs powered externally and tap off five volts from the panel.

PCB and jumpers

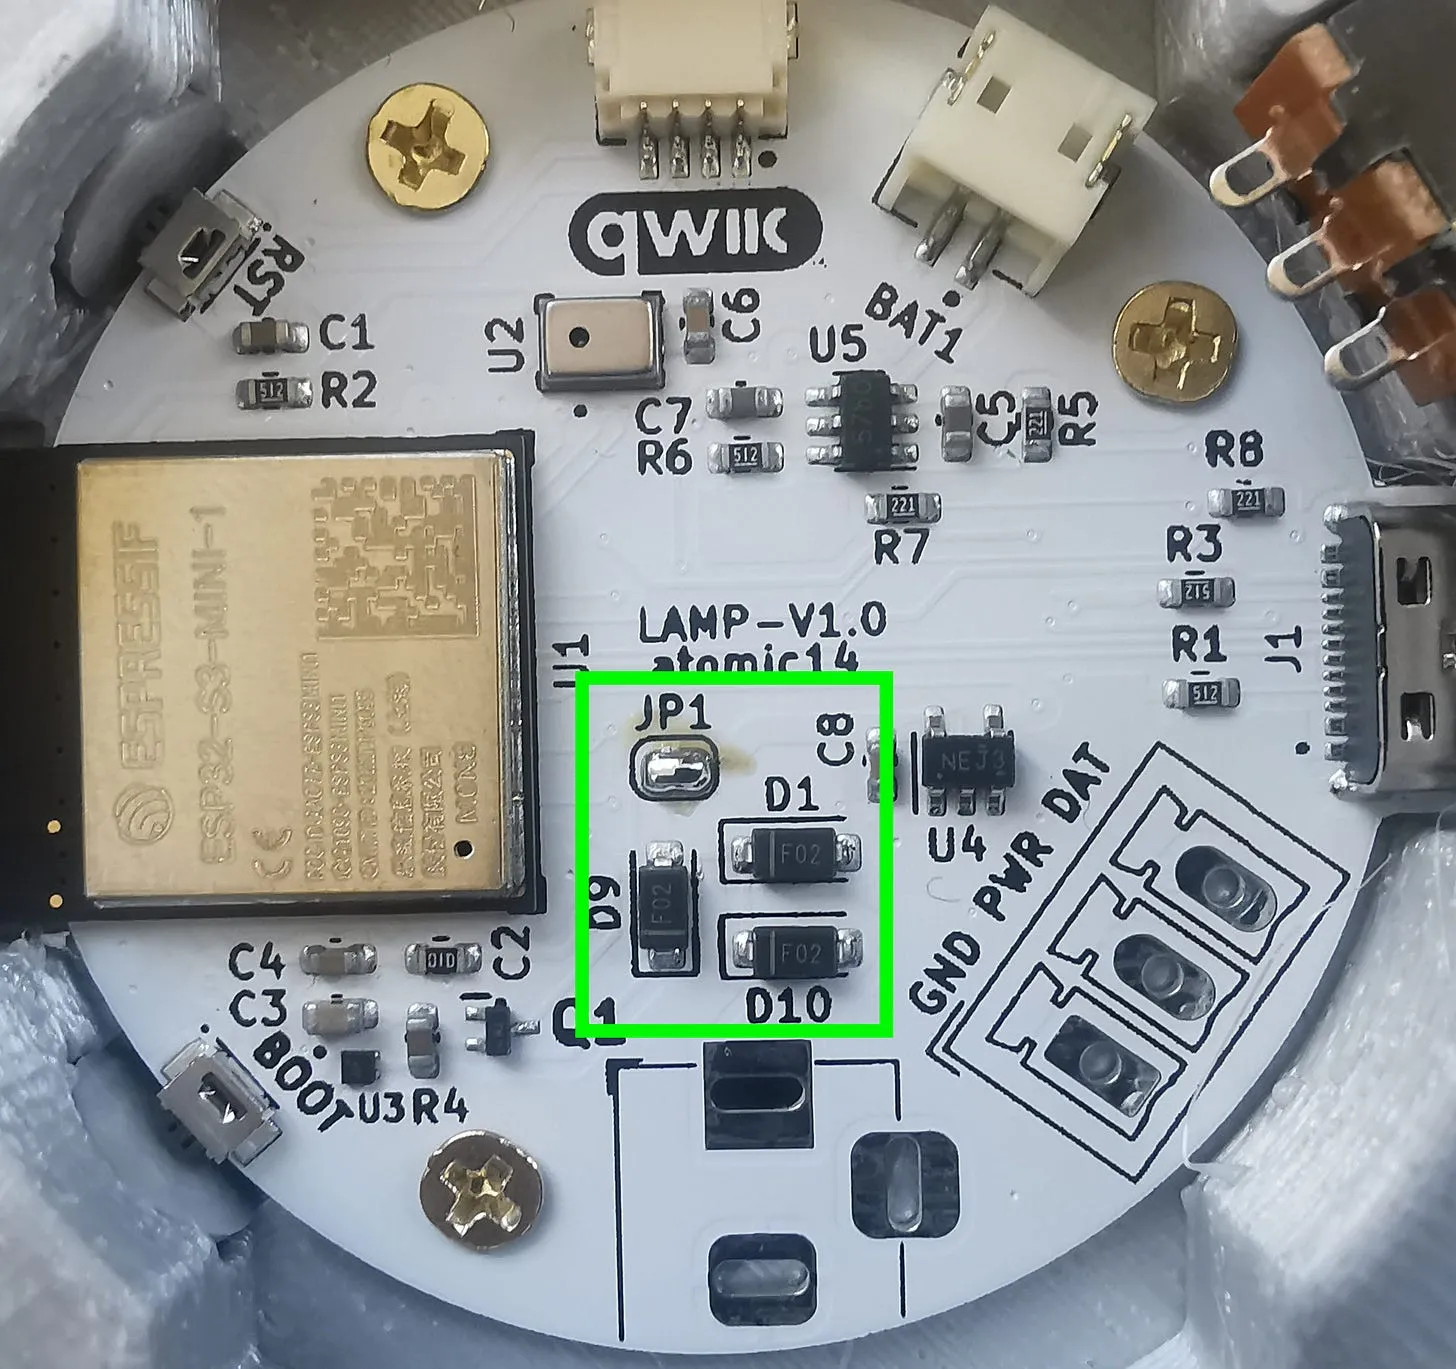
The jumper JP1 controls where the power comes from - in the configuration show the LEDs are powered from the USB socket or battery. Removing the jumper sets things up so that external power is used for the LEDs and we tap off this to power the rest of the electronics.

Power Injection

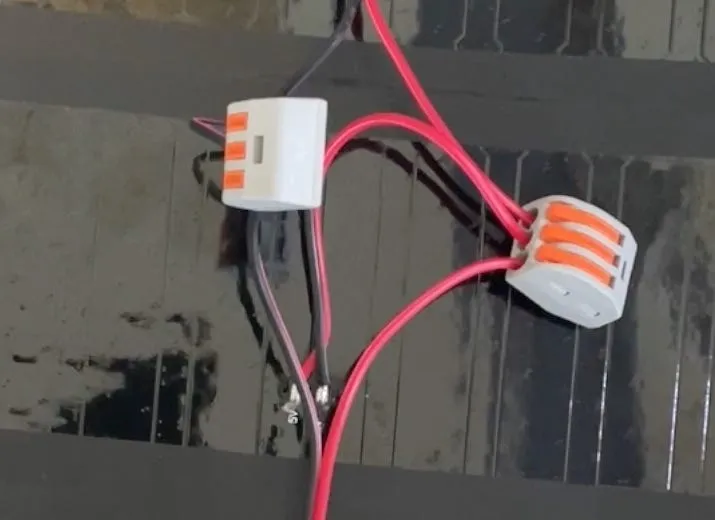
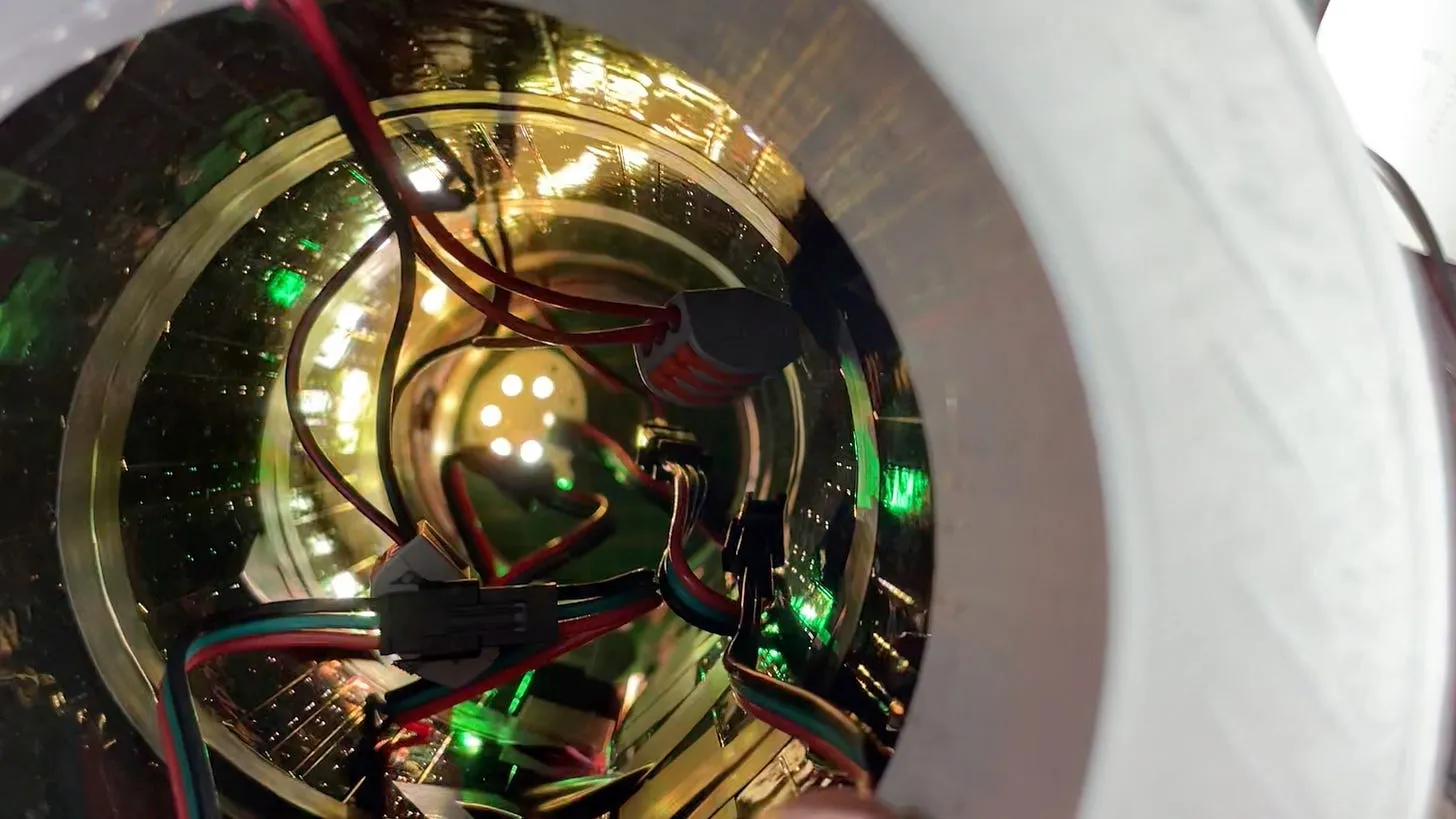
The panels come with additional power lines in the middle so I’ve connected all of these together to prevent any voltage drop. In theory with all the LEDs running at full brightness we could draw 30-50Amps!

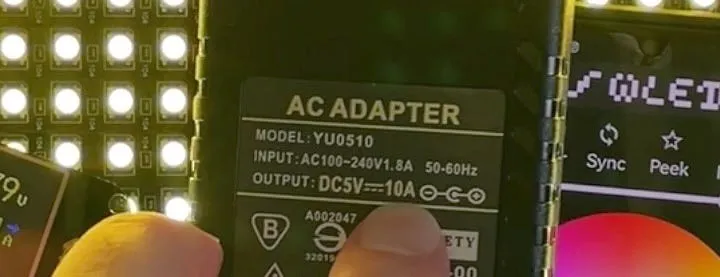
The power supply I’m using can only supply 10A - so I’m using the WLED software to limit the maximum current draw.

Power Supply

I’m also a little bit concerned about how hot everything will get if I run it at full whack.

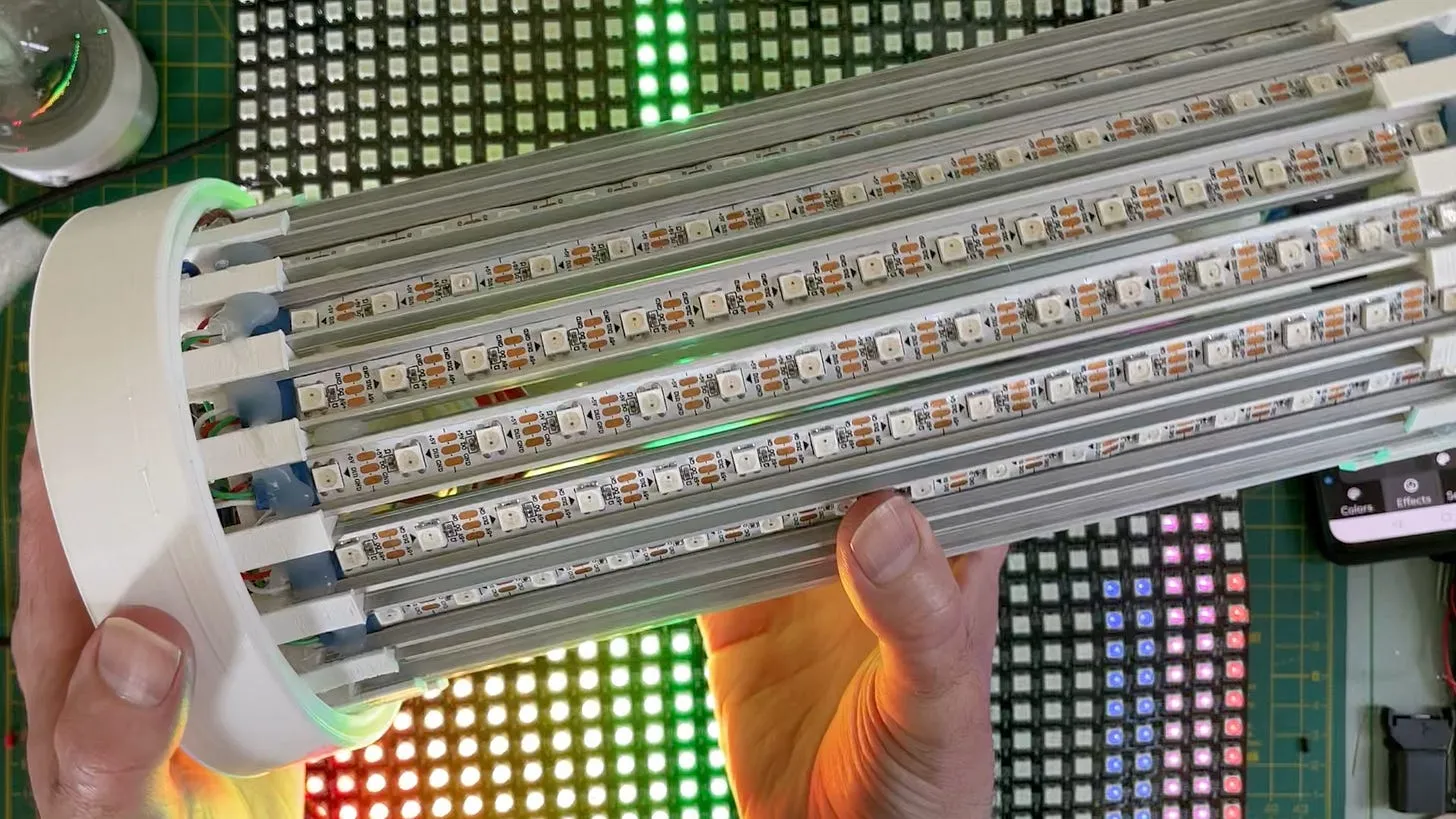
Getting everything into a tube to fit inside the lamp shade did prove to be a bit of a challenge. The panels are flexible, but they quite like being flat. I need to revisit some of the 3D printing and think again on how to hold everything in place.

Rolled Up

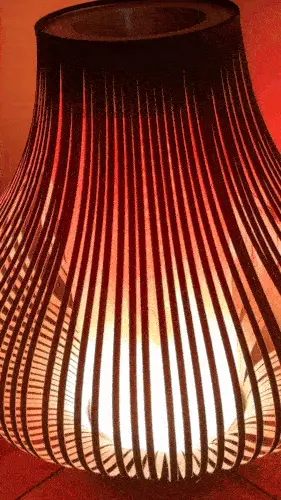
But the final result is pretty good. Using the WLED software we can use all the build in effects - including the very nice fire effect.

Flame Lamp

You can watch the full explainer video here:

And if you don’t understand the text in the into “The results of this experiment were… you can almost see the fire sprites dancing in the flames, the Phoenix rising from the ashes… Jim Morrison… The Doors… Jerry Garcia… The Grateful Dead…” skip to 4:32 in this video.

#3D PRINTING #DIY #ELECTRONICS #FLAME LAMP #LED #PCB #WLED #WS2812

Related Posts

Look at my shiny crystal balls - Just upgraded my basic AliExpress crystal balls with some tech wizardry - I've thrown in an ESP32-S3-MINI, a mic, and made them battery powered. Thanks to WLED software, they're now smart and responsive! Shared the KiCAD project for fellow tinkerers. Check out my video to see these balls in action!
The PCBs are in production - what have I messed up? - After some stress and trepidation, I finally took the plunge and sent my PCB design off for manufacturing. My design centers around building a large seven-segment clock with LED filaments. Jumping hurdles such as voltages, pin usage, and limiting the load on my power supply, I've settled on the ESP32 as the system's heart and come up with a final circuit design. While doing this, I've quickly realized I could improve my layout and fixed a small mistake. Also, I've prepared for either types of LED filaments - the high-voltage ones or the larger, 3v ones. However, I did bungle up a couple of things on the enable line of the shift registers and board layout. But hey, this is a learning curve, right? Can't wait to get the boards and see what other exciting errors surface!
Self Organising WS2811 LEDs - I've successfully used addressable WS2811 LED strings and an ESP-CAM board to create an adjustable lighting system. The best part is that the image processing code can be duplicated in JavaScript which allows you to use a plain dev board to drive the LEDs instead of needing a camera on your ESP32 board. If you want to replicate this project, you'll need your own ESP32 dev board and some addressable LEDs. After figuring out the location of each LED in 2D space, it's easy to map from each LED's x and y location onto a pattern you want to show on the frame buffer. Desiring to keep it accessible, I've posted detailed instructions and my sample code on GitHub, making sure anyone with basic knowledge can undertake this fun technological DIY project!
Interesting LED Curtain - Dove into hacking an LED curtain and discovered that despite lacking visible daisy chaining, it's hackable! With LEDs pre-programmed for their position, it can receive collective data and recognize individual signals. Flashed WLED firmware onto an ESP32 and, voila, it lit up beautifully, even supporting 2D grid patterns for cool visuals. The key components: a BLE SoC, buffer IC for level shifting, and a curious way of LED data handling that's cleverly efficient.
Hue Light Hack - In a fun-filled deep dive into a Philip's Hue Color light bulb, I disassembled, analyzed, and ultimately restored it to working order. Over the course of the hack, I dismantled the bulb’s interior, from the aluminum PCB to the tiny ICs on the logic board, gave a detailed breakdown of their functions and even reverse engineered the signals controlling the colors. Most of the colors worked out pretty well, except for the dodgy yellow. Also, I tried running the hacked bulb setup with my old Moonlamp project. It was a great challenge and an exciting journey!

Related Videos

1024 LEDs - WLED Flame Lamp - Today we're elbow-deep in LEDs for another exciting project — we're building a high-resolution flame lamp! Kick-starting the endeavour with a 1024-pixel LED matrix, we proceed to throw in the towel with a faulty old flame lamp boasting a mere 300 LEDs. Mislabelled PCBs and questionable diodes keep us on our toes, making this undertaking a little more Sparky than usual. With the help of competitive soldering skills, a beefy 5V power supply and a 3D printer, we channel our inner Edison to bring our LED matrix to light. After a pinch of struggle, our LED matrix rollercoasters into a tube shape, faintly resembling our coveted flame lamp. Tune in to bask in the warm (or cool) glow of our LED flame lamp.
DIY Flame Lamp - Learn how to create a flame effect lamp using WS2812B LEDs, aluminum channels, and 3D printing to repurpose a broken lamp in this engaging and informative video.
Look at My Shiny Crystal Balls - Custom ESP32 PCB With WLED. - Step right up, folks, for the grand unveiling of my shiny new crystal balls – yes, crystal balls. I've transformed ordinary AliExpress pieces into juggernauts of light and color, all powered by the splendid WLED software. Dive deep with me into the nitty-gritty of the underlying electronics and come face-to-face with the true beauty of voltage measurements (I promise, it's more riveting than it sounds). While the original circuit boards from AliExpress might not thrill, my beefed-up version invites gasps of wonder, with microphone-controlled LEDs throwing light in a million dazzling ways. Join me as I chronicle my journey through schematic revisions, components selection, and technological trickery – in short, the wild ride that has led to this epic macOS light show.
Most Interesting Addressable LEDs that I've Ever Seen - So, I got this nifty 2x2 meter 400 LED curtain and immediately went to work dismantling it. The LED strands are tapped off the main wire, rather than daisy-chained, which is a departure from the norm. Turns out, these LEDs are pre-programmed, allowing them to intelligently latch onto the right serial data. Unraveling the control unit, we see an IR receiver and other key components responsible for driving the LED strings. Despite my misgivings about deciphering in-built Bluetooth characteristics, I hooked the circuit back up with our dependable WLED software and got some amazing grid patterns. Interestingly, the LEDs operated smoothly at 3.3V. All in all, a fun exploration of hacking this LED curtain.
Supersize Seven Segment Clock - Learn about the process of assembling a large LED filament clock in this hands-on project video, covering both hardware and software aspects. Watch as the creator troubleshoots and implements improvements throughout the build, resulting in a functional and impressive timepiece!
HELP SUPPORT MY WORK: If you're feeling flush then please stop by Patreon Or you can make a one off donation via ko-fi
Want to keep up to date with the latest posts and videos? Subscribe to the newsletter
Blog Logo

Chris Greening


Published

> Image

atomic14

A collection of slightly mad projects, instructive/educational videos, and generally interesting stuff. Building projects around the Arduino and ESP32 platforms - we'll be exploring AI, Computer Vision, Audio, 3D Printing - it may get a bit eclectic...

View All Posts