🌈 ESP32-S3 Rainbow: ZX Spectrum Emulator Board! Get it on Crowd Supply →
View All Posts
read
Want to keep up to date with the latest posts and videos? Subscribe to the newsletter
HELP SUPPORT MY WORK: If you're feeling flush then please stop by Patreon Or you can make a one off donation via ko-fi
#DIY #ELECTRONICS #ESP32 #HIGH VOLTAGE #LEDS #NIXIE TUBES #WAVEFORMS

Well, we haven’t blown ourselves up yet! Apologies for the long gap between videos, it’s been hectic here with holidays and getting the ESP32 Rainbows all packed and sent off to mouser.

Nicely packaged up ESP32 Rainbow

They are now hopefully somewhere over the atlantic heading to the mouser distribution center in the US.

Tell us about the video…

I’m still playing around with high voltages. In the previous video we were looking at this board:

High voltage board

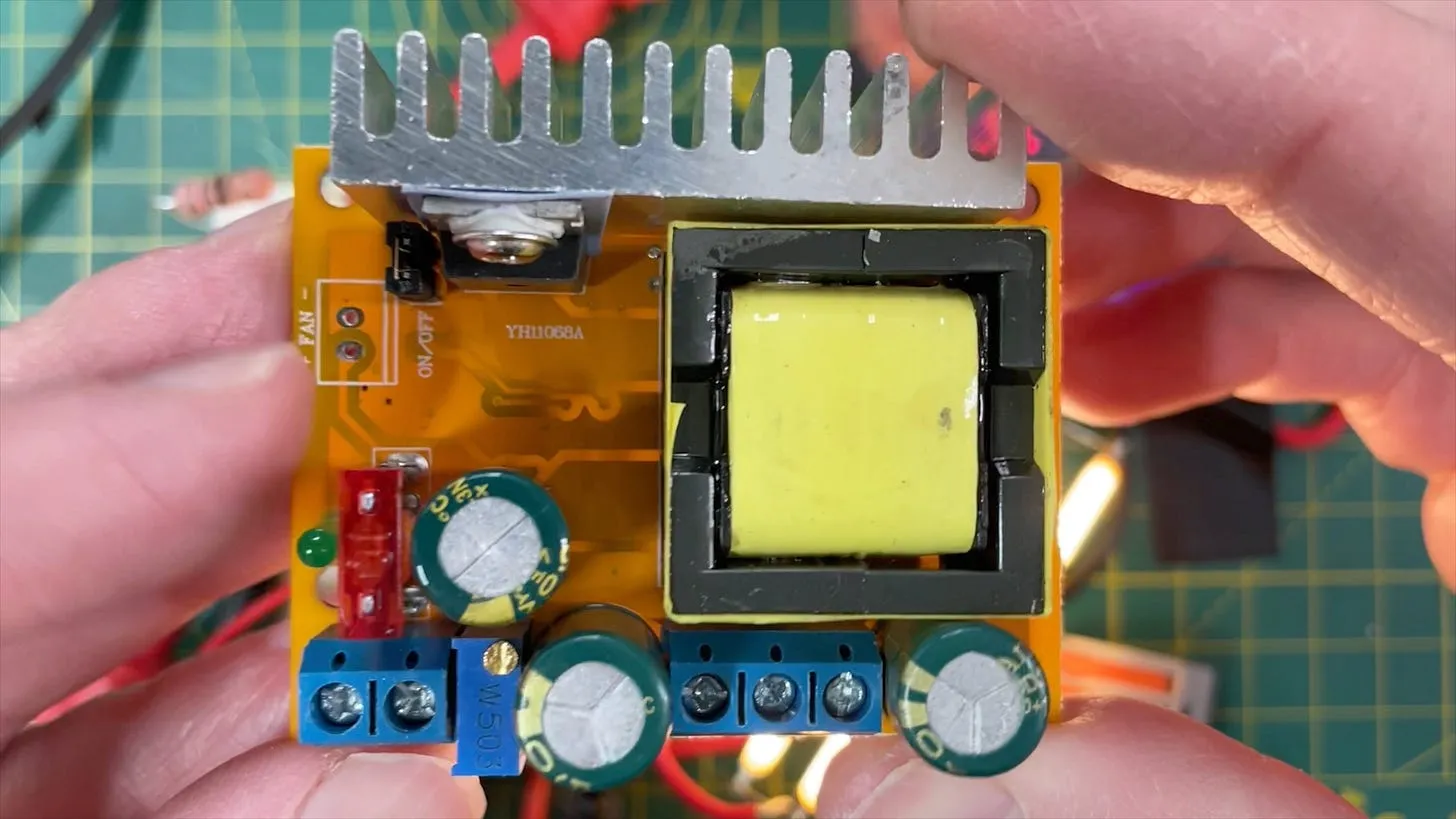
It seemed to be having some issues so I thought further investigation was required. Looking at the oscilloscope when driving my LEDs I found a pretty horrendous waveform.

That’s a lot of ripple

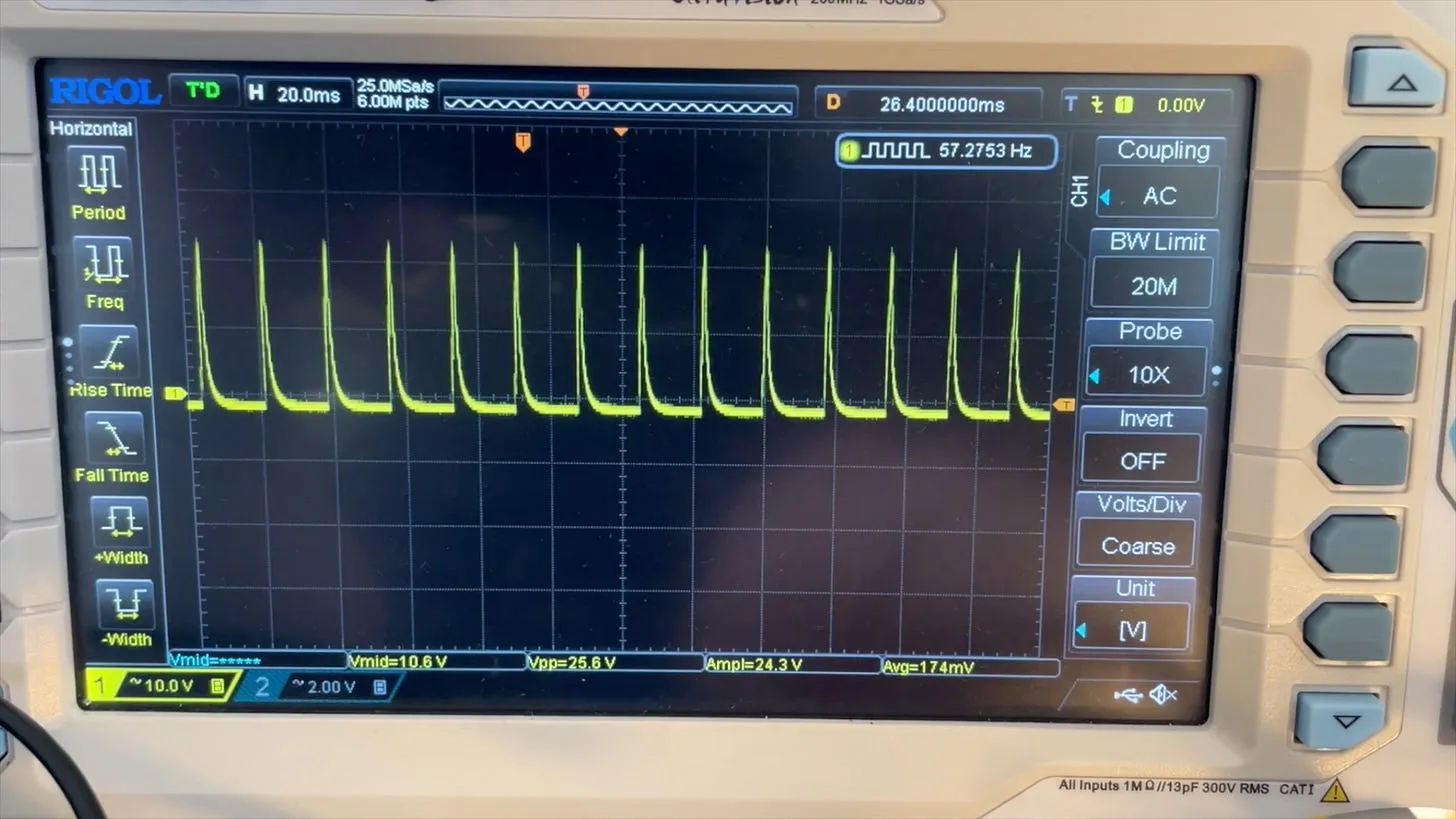
There are spikes of around 25 volts - which explains the terrible flicker on the LED filaments.

I wanted to give it a proper go though and got to thinking that maybe it didn’t like the low current, or driving a load like the LEDs - so I got myself some beefy resistors to try it out with.

Beefy resistors

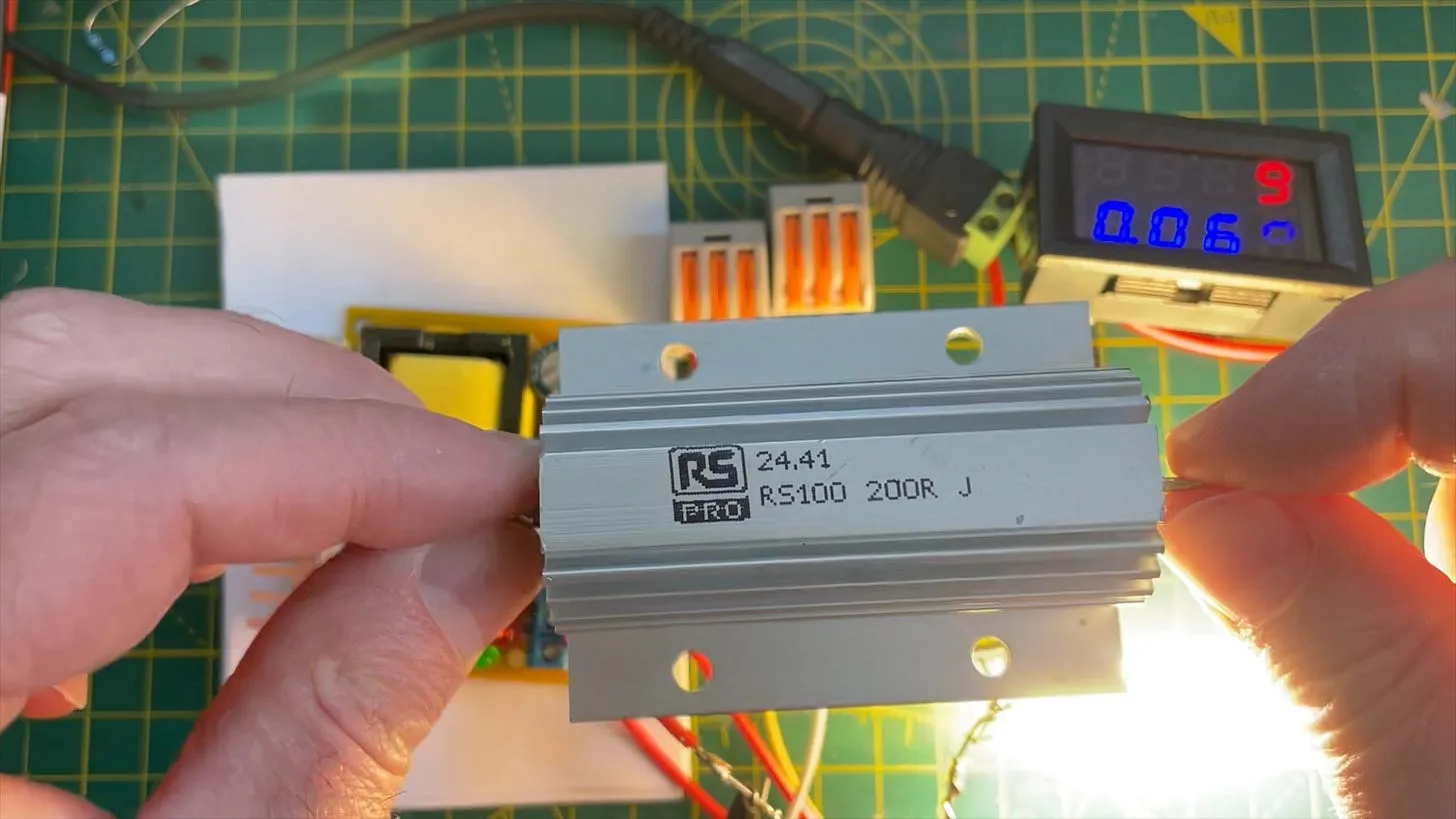
I tried it out with two of these in series to give us a load of 400 ohms. Unfortunately with this I still got a pretty bad ripple on the output. So I’m not convinced these particular high voltage boards are the right ones for me.

Fortunately, I found some other boards - they are designed for driving nixie tubes - but they also seem to work pretty well with driving LEDs.

Nice and smooth

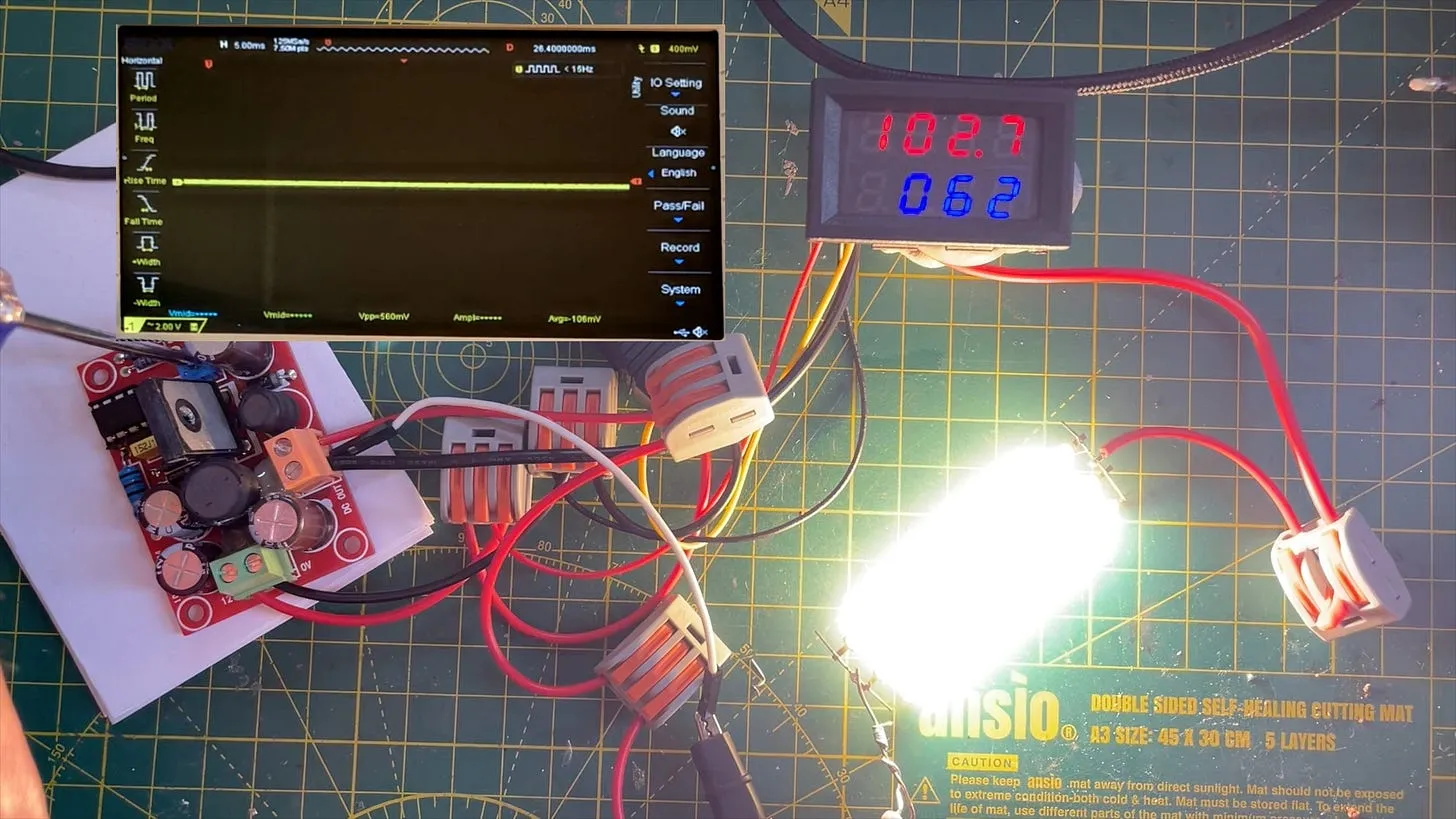
Not bad - over 100 volts at 60mA with pretty much no ripple at all!

It is quite fun to play with the original boards though - you can get some pretty bonkers voltages out of them.

Jeepers! 787 volts

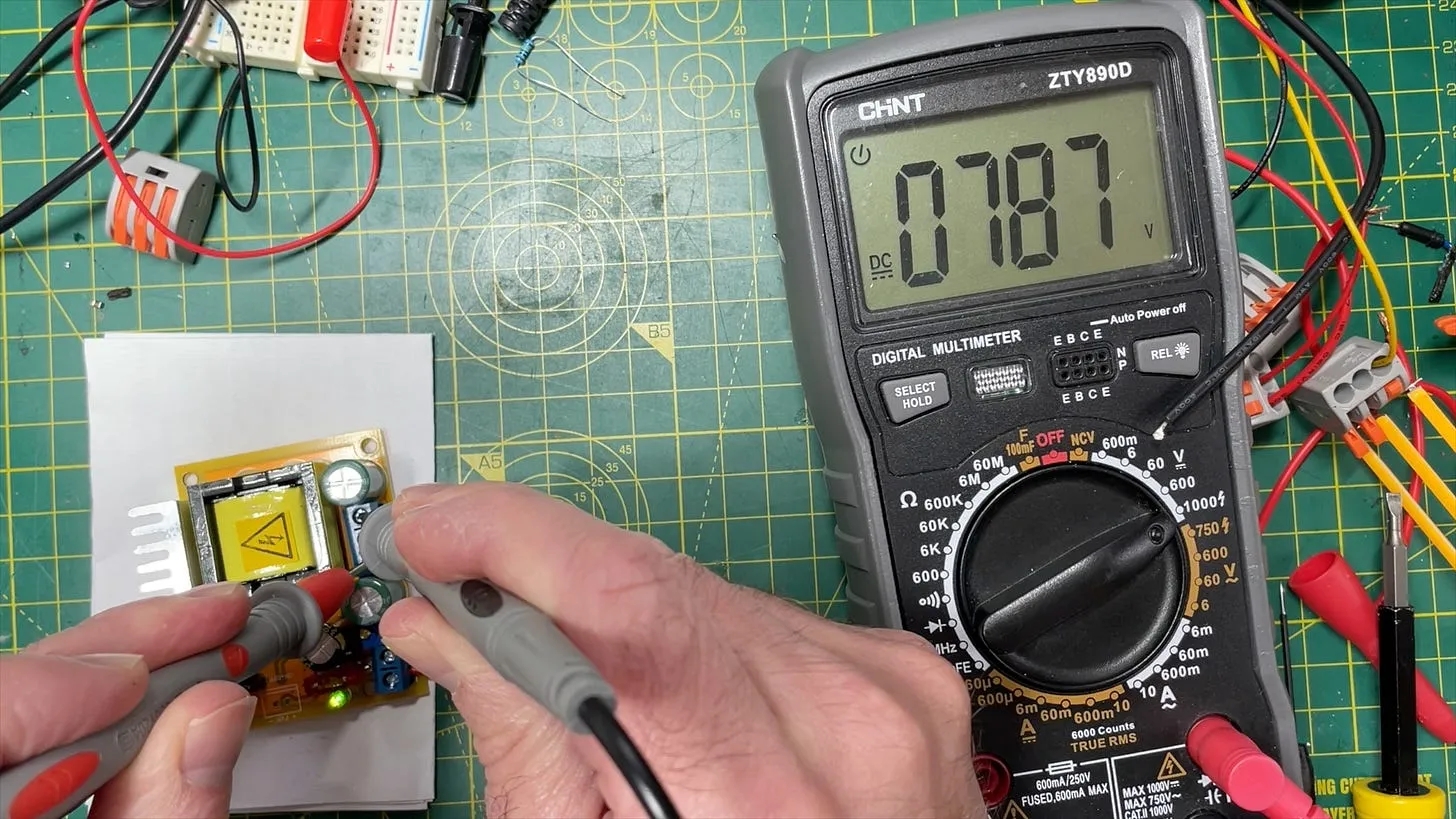
Yep - that’s 787 volts!

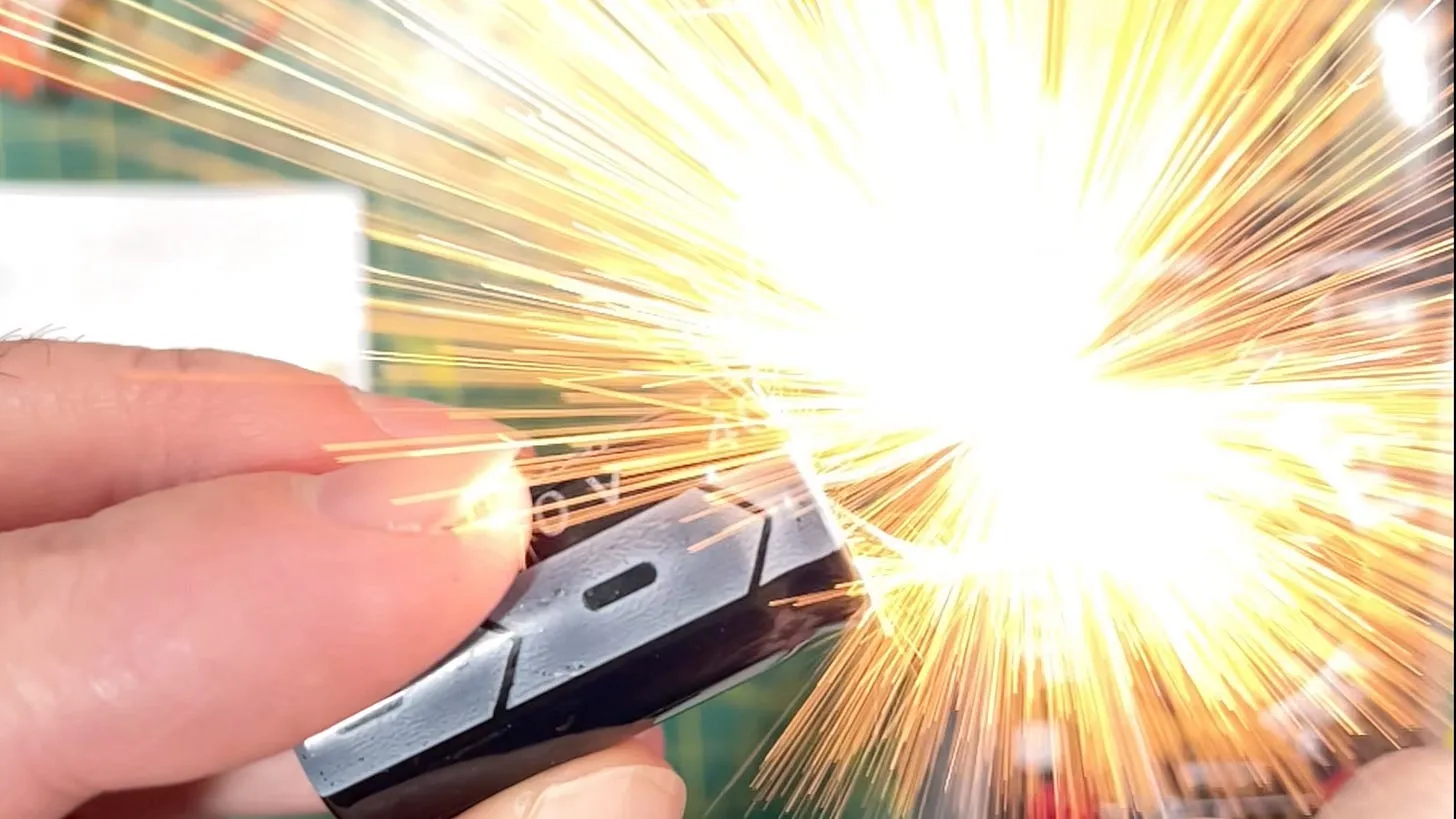
And you can get some great sparks from high voltage capacitors :)

Sparks fly!

#DIY #ELECTRONICS #ESP32 #HIGH VOLTAGE #LEDS #NIXIE TUBES #WAVEFORMS

Related Posts

The PCBs are in production - what have I messed up? - After some stress and trepidation, I finally took the plunge and sent my PCB design off for manufacturing. My design centers around building a large seven-segment clock with LED filaments. Jumping hurdles such as voltages, pin usage, and limiting the load on my power supply, I've settled on the ESP32 as the system's heart and come up with a final circuit design. While doing this, I've quickly realized I could improve my layout and fixed a small mistake. Also, I've prepared for either types of LED filaments - the high-voltage ones or the larger, 3v ones. However, I did bungle up a couple of things on the enable line of the shift registers and board layout. But hey, this is a learning curve, right? Can't wait to get the boards and see what other exciting errors surface!
Danger danger high voltage - In this blog post, I explore my experiments with high-voltage circuits, trying to light up LED filaments salvaged from broken light bulbs. Despite some explosive mishaps with capacitors and MOSFETs, I decided to try a proper DC-DC converter. Unfortunately, the one I got turned out to be faulty, highlighting some rough soldering and component failures. I've ordered replacements and hope to successfully light the filaments soon. Follow along on my troubleshooting journey with plenty of learning curves!
Dave come see - it's beautiful man - Hey folks, I revisited my flame lamp project from 2020 and gave it a serious upgrade - we're talking a leap from 300 to a whopping 1024 LEDs thanks to these nifty flexible WS2812 panels. I've kitted it out with a versatile PCB from my Crystal Balls project, tackled power injection challenges and kept things cool with a current-limiting power supply. I had to wrestle with 3D printing and getting the panels to behave inside the lamp's tube, but the end result? A mesmerizing blaze of colors with gorgeous fire effect, all orchestrated by the WLED software. It's like my very own Phoenix rising from the 2020 ashes. Curious to see this electronic inferno come to life? Check out my videos for the full, fiery scoop!
I broke it and then i fixed it - Started off on a techie adventure with an RP2040 DVI board from Adafruit, aiming to get the pico-zxspectrum going. Things started acting haywire once the USB hub got involved, ending in a complete shutdown, intuitive diagnosis showed the power pin was a ghost town! After pin-pointing (and removing) the dead IC, I performed a delicate soldering operation to bless it with a new 3V3 regulator. Working the kinks out with the resolution led to a thrilling revival and, voila, we were back in business with DVI output and SD Card support!
No Power? No Problem! A Wireless Pi Doom Machine - In my latest wireless charging experiments, I got my hands on a set of wireless charging PCBs and dove into testing different voltage inputs and their efficiency levels. It was interesting to realise that the 5V input managed to provide a decent efficiency of 73%, while 12V input struggled and heated the receiver board excessively. With the perks and limits of this setup explored, I took a whirl at creating a wireless Pi Doom machine. It worked like a charm! However, I quickly noticed the need to split charging and boost board into two different modules - a project to look forward to. Half the fun is getting there! Check out the video [here](https://youtu.be/glCIuOoFm7U) for more detail on the project.

Related Videos

800 volt DC DC converter - In this video, I tinker with high-voltage circuits to light up LED filaments salvaged from broken light bulbs. Using a makeshift setup with a MOSFET, inductor, diode, and smoothing capacitor, I explore switching at high frequencies to achieve bright light. However, limitations with low-voltage capacitors led to some explosive results. I also experiment with a DC/DC converter to reach higher voltages, but it too failed, leading to a troubleshooting session under the microscope. Despite these setbacks, I'll keep tinkering and waiting for replacement parts to continue my experiment.
High voltage fun and games... or is it? - I've been diving into some exciting high voltage experiments with filaments scavenged from old Philips boards. After tinkering around with a YH11068A voltage generator, I'm now exploring a new version based on the MC34063 IC. Alongside, I've found a super handy voltage/current meter that's been a great help. If you enjoy my nerdy adventures and want to support my quest for more techy gadgets, check out my Patreon or pop by our new shop. Oh, and joining our Discord community or newsletter is a great way to stay in the loop!
Lots of Stuff - And a NEW PCB! It's a rare mailbag video. - In today's episode, I'm unboxing some goodies from PCB way - my super tiny esp32 breakout boards, which I'm planning to use to recreate a mini TV complete with speakers and a display. Also received some convenient adapter boards for easier testing. Excited to explore a new Arduino Nano esp32 based on a different, tinier module, and contrasting it with other products like the Tiny Pico. Also up for testing is a new mini wear electronic load compared to my old one, and an ATX power adapter for more USB ports. I'll be testing power banks, playing with inexpensive yellow displays and nunchucks for fun gaming projects, and testing out an RGB bead curtain with hackable possibilities. Also, under my ongoing experiments is a Raspberry Pi zero, turning into a 'Doom' playing device with added sound and game controllers. Finally, an air quality measuring device for detecting air particles, CO2 levels, humidity, temperature and other parameters is up for exploration as well. A whole array of fun projects queued up, so stay tuned!
Can You Spot the Problem? - Buckle up folks, this video is a thrilling one! There's everything from unboxing my new ESP32 TV boards that arrived from PCB Way to discovering some hidden issues. We're talking about some pesky problems, surprises, and even a potential catastrophic error that could've led to a disaster. The main dish is the high-speed SD card access over USB - ultimately achieving a whooping transfer rate! But, the journey is a roller-coaster ride, from the project completely failing initially, to some smart hacks and triumphant moments. All the peripherals worked well, from the display to the sound amplifier and even the infrared receiver. Despite the ups and downs, there's a lot to learn and that's what makes this video exciting! Can't wait to share the improvements I have in mind for turning the prototype into the ultimate all-in-one device. But first, let's address the elephant in the room - an ill-placed diode that's a ticking bomb, because you know, safety first!
1024 LEDs - WLED Flame Lamp - Today we're elbow-deep in LEDs for another exciting project — we're building a high-resolution flame lamp! Kick-starting the endeavour with a 1024-pixel LED matrix, we proceed to throw in the towel with a faulty old flame lamp boasting a mere 300 LEDs. Mislabelled PCBs and questionable diodes keep us on our toes, making this undertaking a little more Sparky than usual. With the help of competitive soldering skills, a beefy 5V power supply and a 3D printer, we channel our inner Edison to bring our LED matrix to light. After a pinch of struggle, our LED matrix rollercoasters into a tube shape, faintly resembling our coveted flame lamp. Tune in to bask in the warm (or cool) glow of our LED flame lamp.
HELP SUPPORT MY WORK: If you're feeling flush then please stop by Patreon Or you can make a one off donation via ko-fi
Want to keep up to date with the latest posts and videos? Subscribe to the newsletter
Blog Logo

Chris Greening


Published

> Image

atomic14

A collection of slightly mad projects, instructive/educational videos, and generally interesting stuff. Building projects around the Arduino and ESP32 platforms - we'll be exploring AI, Computer Vision, Audio, 3D Printing - it may get a bit eclectic...

View All Posts