After “vibe coding” a software-based vibing button in my last video, I decided to take things one step further: vibe-coding the actual hardware. The challenge? Let AI design a working ESP32-S3 development board, from scratch.
Tools of the Trade
For this experiment, I used Atopile — a tool that lets you define a hardware project using code and turns it into a KiCad PCB. I also enlisted Claude, an AI coding assistant that seemed to outperform Cursor for this task.
The Prompt
The board needed the basics: an ESP32-S3 module, USB-C power and data lines, a 3.3V regulator, reset and boot buttons, status LEDs, a quick connector, and the usual passives. I specified LCSC part numbers and 0603 sizes for resistors and capacitors, with GPIO 19 and 20 handling the USB data lines for proper differential routing.
Here’s the exact prompt I used:
I want to make an ESP32-S3 dev board.

We will need:
- ESP32-S3 module
- USB-C connector with 5.1K resistor on the CC lines
- 3.3V voltage regulator
- A red LED showing 5V is connected
- A green LED showing 3V3 is available
- A blue LED connected to a GPIO pin
- A QWIIC connector for peripherals
- Reset button
- Boot button
- Any additional passive components needed for the above
- There should be an RC circuit for the enable pin on the ESP32-S3 module

The USB-C should provide 5V power and the data lines should be connected directly to the ESP32-S3 module. Don't forget, there are normally 2 pins for each data line. These should both be connected to the ESP32-S3 module.

GPIO19 and GPIO20 on the ESP32-S3 module are USB D- and D+ respectively. Make sure these nets are labeled correctly so that differential routing works.

Use LCSC part numbers for all components. You will need to search the web for these. Use 0603 for all resistors and capacitors.

Use the command to add the component to the project.

echo "0" | ato create part -s <LCSC-ID>

Add each component one at a time to the main.ato file.

Run the ato build command after every change you make to check your work.

ato build

Be very careful with the pin names/numbers in the components - check that you are using the correct ones. Do not modify the components.
The AI took the prompt and started generating components and wiring instructions. To stay true to the spirit of “vibe coding,” I didn’t look at the code — I just kept saying “yes” and watched what happened.
The AI Journey (aka, Chaos Ensues)
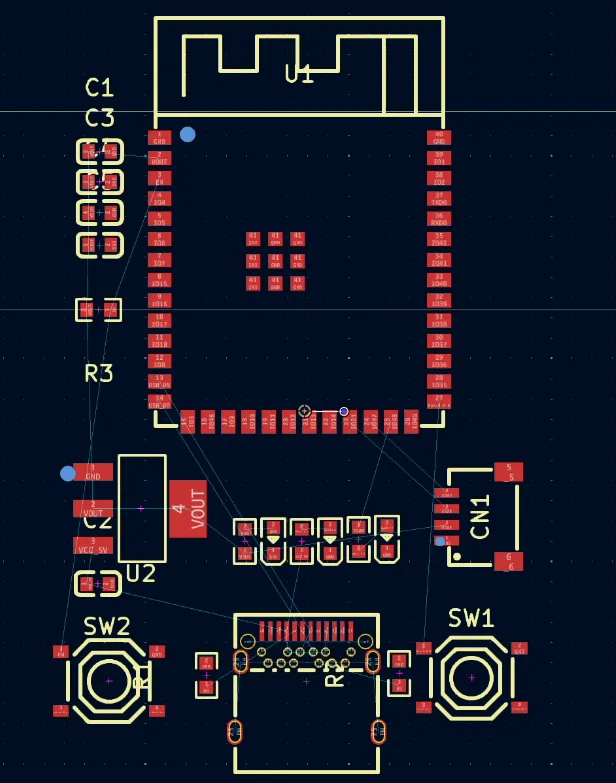
Initially, everything looked great. The build succeeded, all components were found and added. But when I opened KiCad… nothing was wired up.
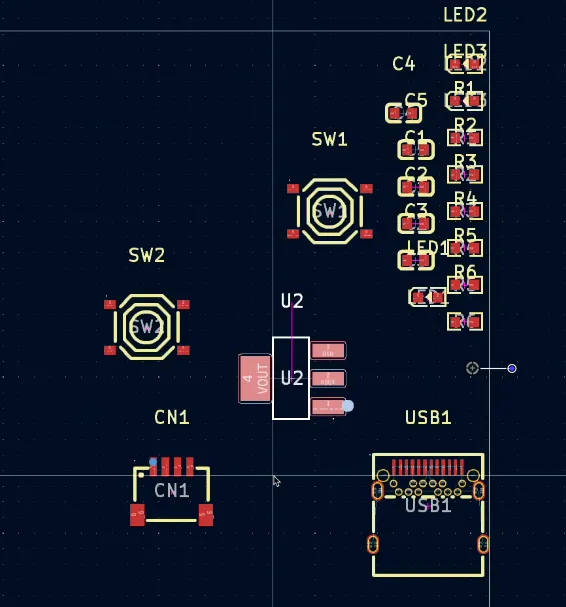
A quick nudge to Claude (“you forgot to connect anything”) got it back on track. After another build — success! Everything was wired.
Well, mostly.
It forgot a capacitor in the RC circuit on the EN pin. Again, a quick note to the AI and it was fixed. I swapped in a more sensible 10K resistor (it had chosen 330Ω for some reason), added some ground fills, and tidied up the layout.
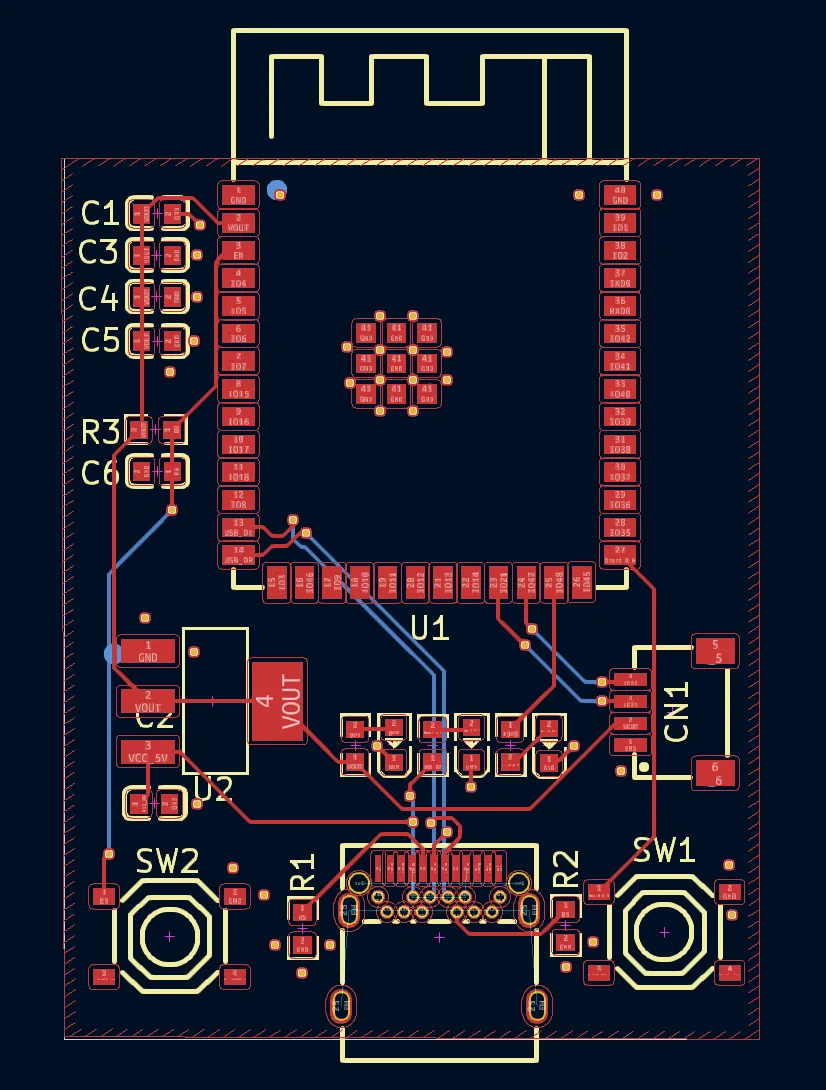
The Result
What we got was surprisingly functional:
-
AMS1117 regulator
-
Proper USB-C with CC resistors
-
Differential USB routing
-
Status LEDs
-
Decoupling caps galore
-
Reset and boot buttons
-
A functional RC circuit on EN
It’s not perfect (no schematic output yet unless you downgrade to KiCad 5), but as a first pass from an AI? Not bad at all.
Final Thoughts
Vibe-coding a PCB feels like the future. We’re close to being able to describe hardware in natural language and let the AI take care of the busywork. And while it’s not quite ready to replace a skilled engineer, it’s definitely ready to be your enthusiastic, if forgetful, assistant.
Next step? Should I send it off to PCBWay and see if it actually works?
Here’s the BOM for people interested in the components it picked:
| Designator | Footprint | Quantity | Value | Manufacturer | Part Number | LCSC Part # |
|---|---|---|---|---|---|---|
| C1, C2, C3 | C0603 | 3 | Samsung Electro-Mechanics | CL10A106MQ8NNNC | C1691 | |
| C4, C5, C6 | C0603 | 3 | YAGEO | CC0603KRX7R9BB104 | C14663 | |
| CN1 | CONN-SMD_4P-P1.00_SM04B-SRSS-TB-LF-SN | 1 | JST Sales America | SM04B-SRSS-TB(LF)(SN) | C160404 | |
| LED1 | LED0603-RD | 1 | Hubei KENTO Elec | Blue light 0603 | C2288 | |
| LED2 | LED0603-RD | 1 | Foshan NationStar Optoelectronics | NCD0603C1 | C84264 | |
| LED3 | LED0603-RD | 1 | Hubei KENTO Elec | KT-0603R | C2286 | |
| R1, R2 | R0603 | 2 | UNI-ROYAL | 0603WAF5101T5E | C23186 | |
| R3 | R0603 | 1 | TyoHM | RMC060310KFN | C269701 | |
| R4, R5, R6 | R0603 | 3 | UNI-ROYAL | 0603WAF3300T5E | C23138 | |
| SW1, SW2 | SW-SMD_4P-L5.1-W5.1-P3.70-LS6.5-TL_H1.5 | 2 | XKB Connectivity | TS-1187A-B-A-B | C318884 | |
| U1 | WIRELM-SMD_ESP32-S3-WROOM-1 | 1 | Espressif Systems | ESP32-S3-WROOM-1-N16R8 | C2913202 | |
| U2 | SOT-223-3_L6.5-W3.4-P2.30-LS7.0-BR | 1 | Advanced Monolithic Systems | AMS1117-3.3 | C6186 | |
| USB1 | TYPE-C-SMD_TYPE-C-24P-QCHT | 1 | SHOU HAN | TYPE-C 24P QCHT | C456013 |