🌈 ESP32-S3 Rainbow: ZX Spectrum Emulator Board! Get it on Crowd Supply →
View All Posts
read
Want to keep up to date with the latest posts and videos? Subscribe to the newsletter
HELP SUPPORT MY WORK: If you're feeling flush then please stop by Patreon Or you can make a one off donation via ko-fi
#16KB-FLASH #2-BIT-ADPCM #ADPCM #CH32V003 #EMBEDDED-AUDIO #HARDWARE-HACKING #LPC #MICROCONTROLLER #OPEN-SOURCE #PWM-DAC #RETRO-COMPUTING #RISC-V #SPEECH-SYNTHESIS #TALKIE #TI-TMS5220

TLDR: Yes, you can fit about 7 seconds of audio into 16K of flash and still have room for code. And you can even play LPC encoded audio on a 10 cent MCU.

There’s quite a lot more detail in this video (and of course you can hear the audio!).

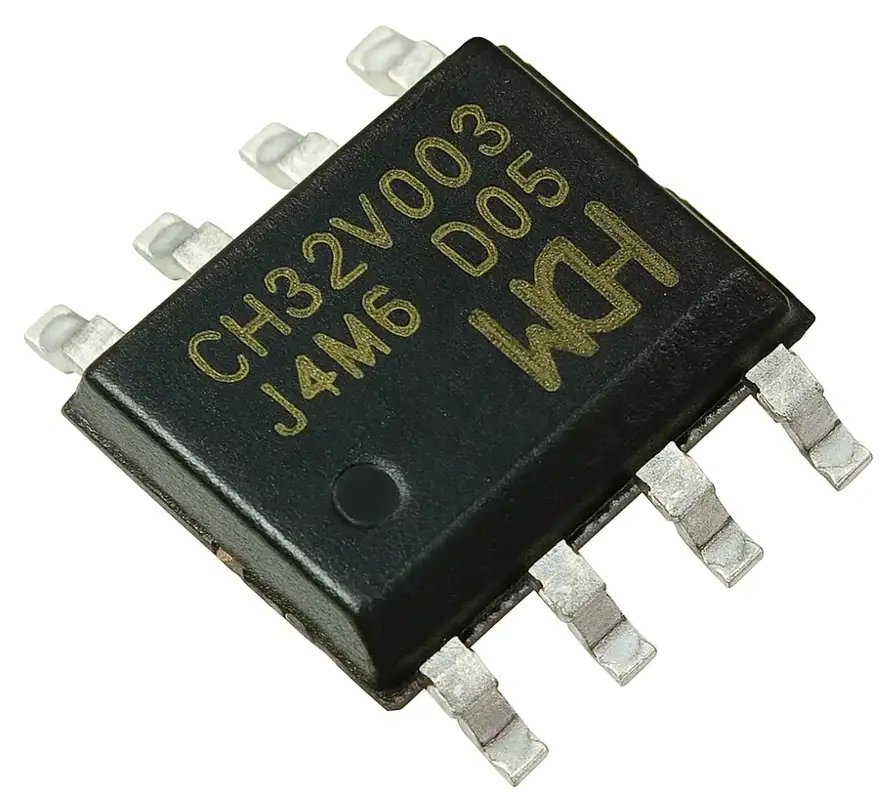
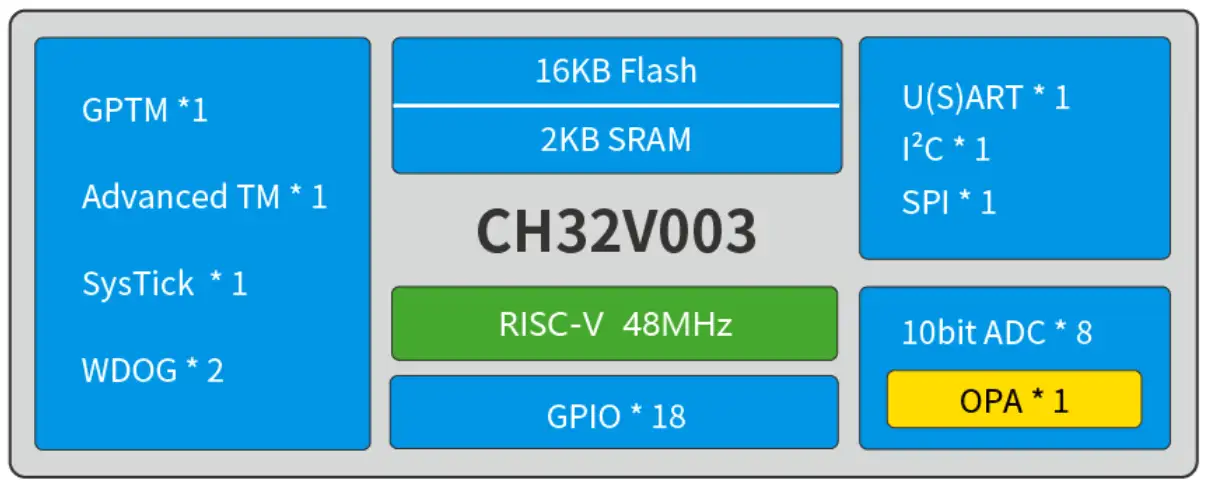
In the previous project, I had this ultra-cheap CH32V003 microcontroller playing simple tunes on a tiny SMD buzzer. It was just toggling a GPIO pin at musical note frequencies – 1-bit audio output – and it sounded surprisingly decent. That was a fun start, but now it’s time to push this little $0.10 MCU even further: can we make it actually talk?

CH32V003

Spoiler: Yes, we can! (well, there wouldn’t be much of a blog post if we couldn’t) This 8-pin RISC-V chip is now producing sampled audio data and spoken words. We’re really stretching the limits of what you can fit in 16 KB of flash.

16K Flash, 2K RAM

From Beeps to Actual Audio

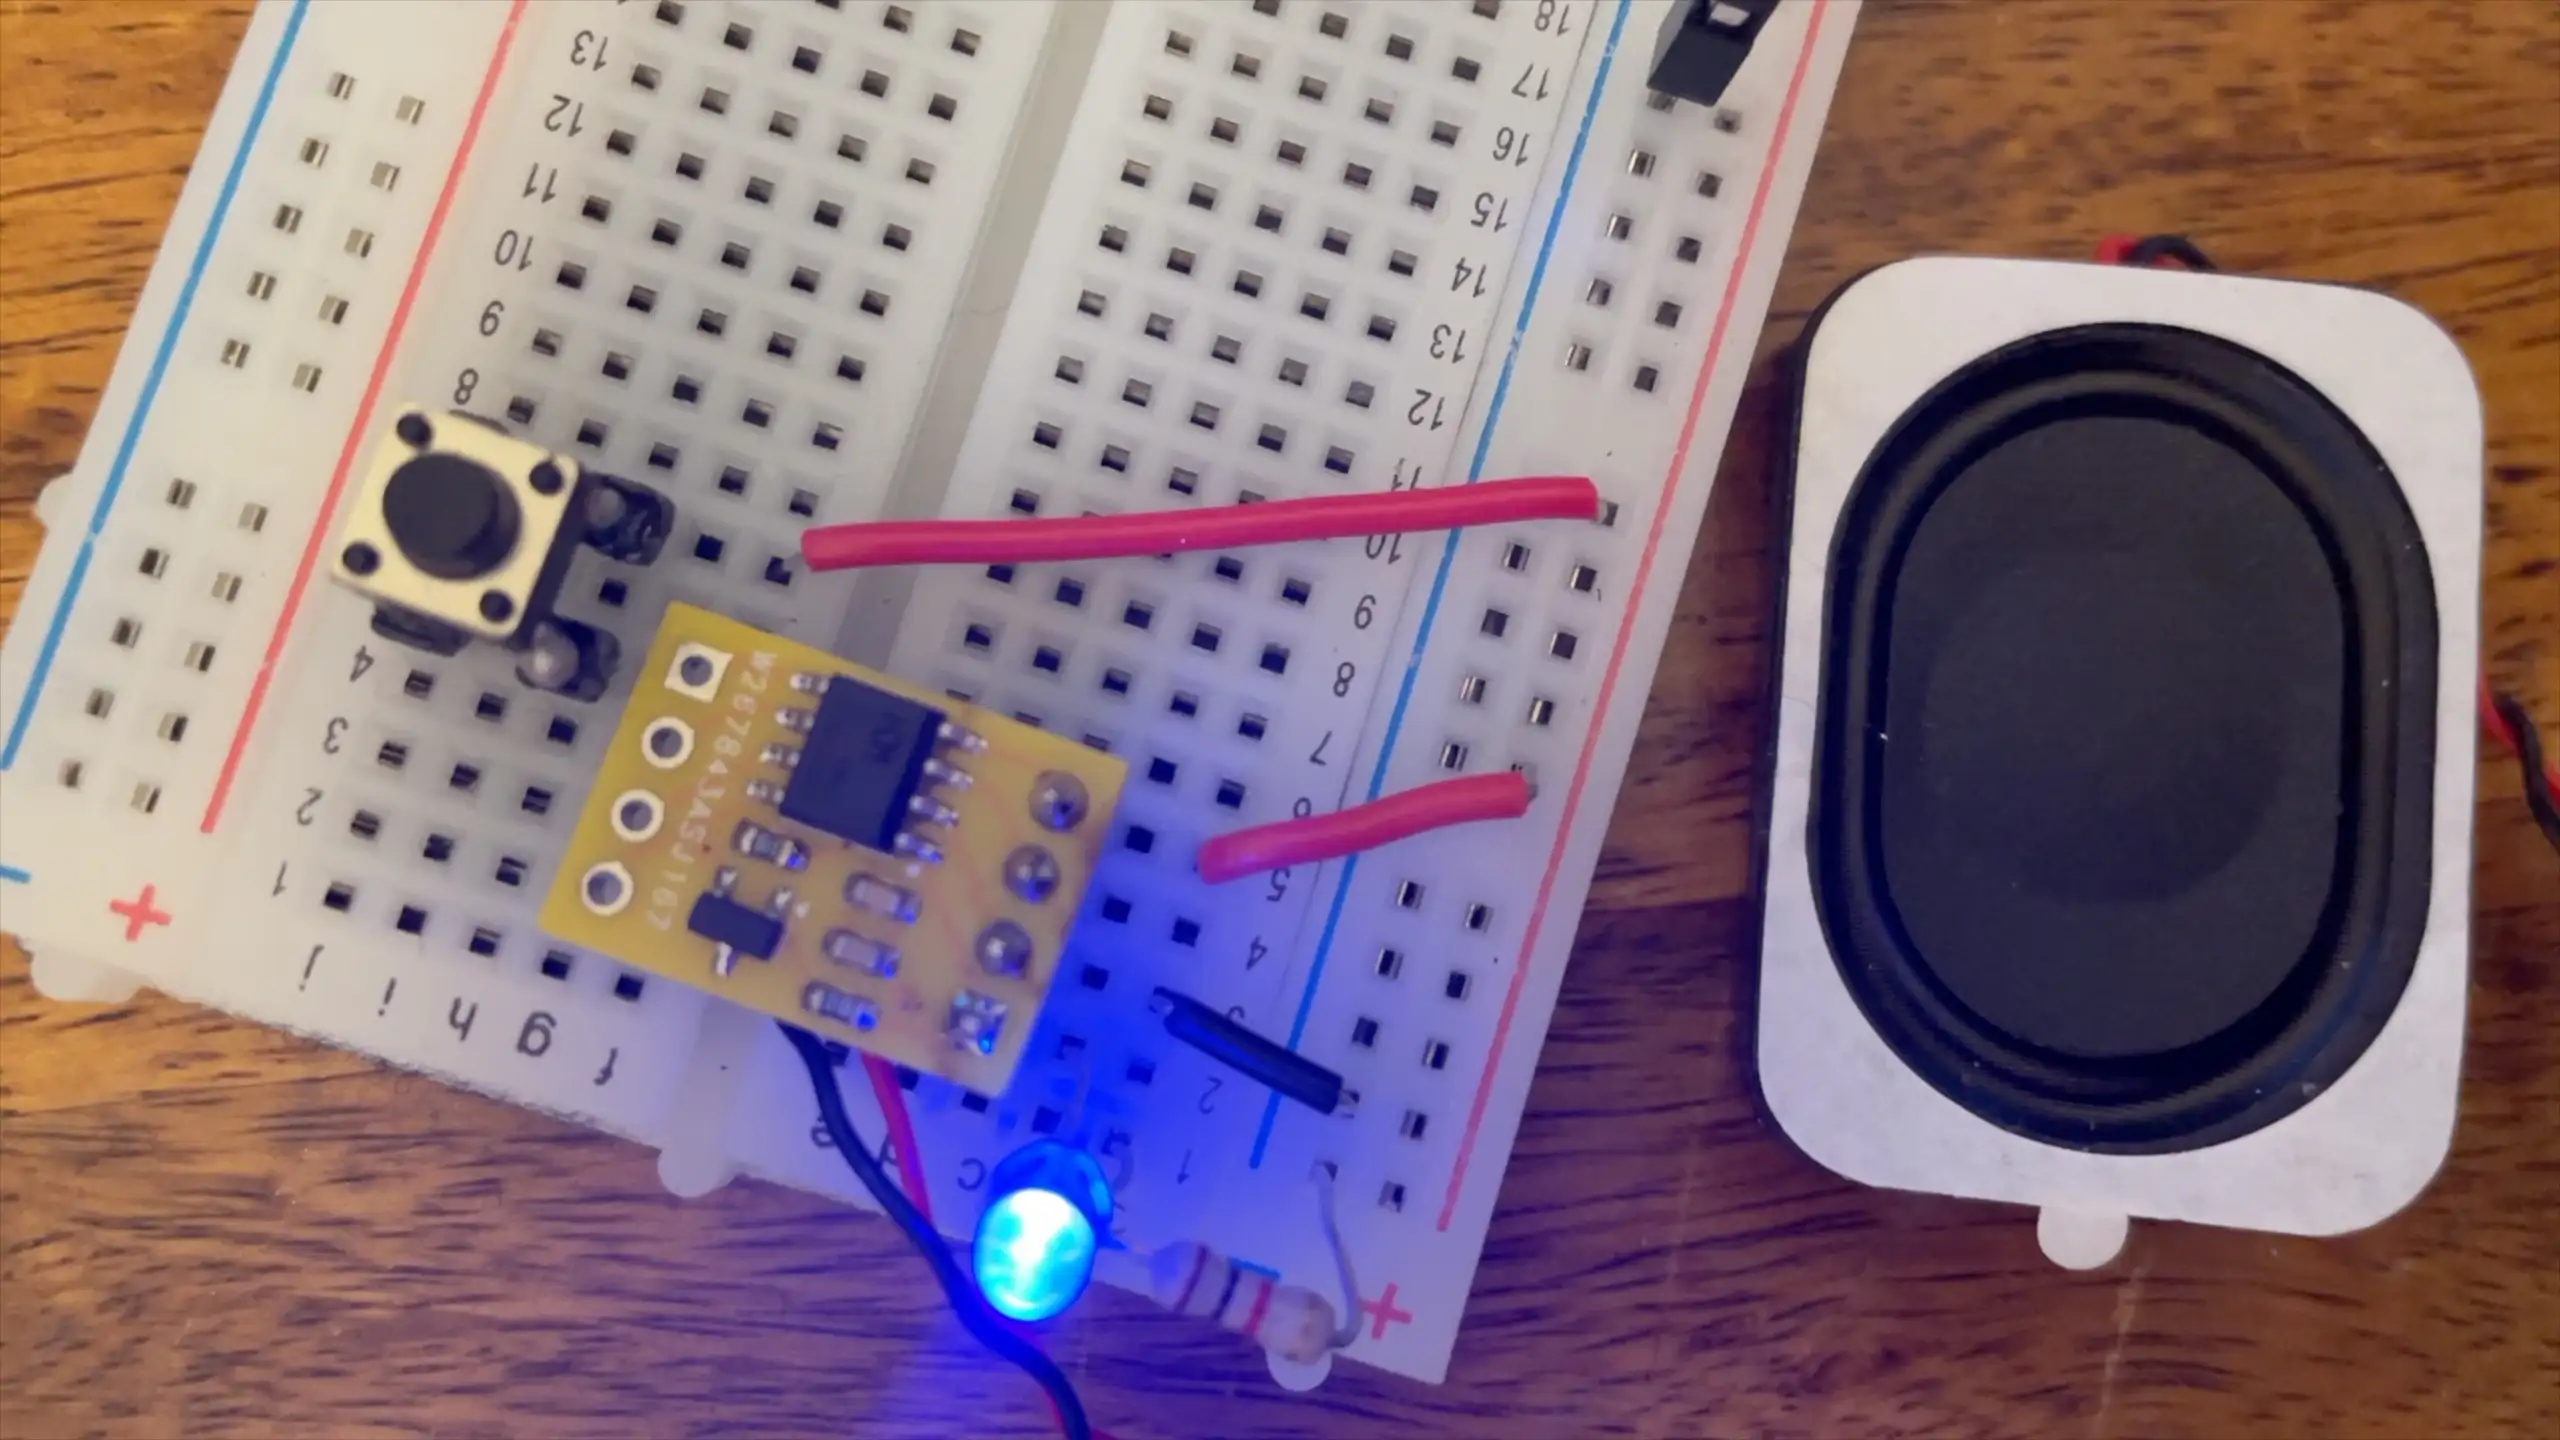
Moving from simple beeps to real audio meant using the microcontroller’s PWM output as a rudimentary DAC. Instead of just on/off beeping, I’m driving a waveform at an 8 kHz sample rate using a high-frequency PWM on the output pin. The hardware is the same tiny board as before – but I’ve swapped the small SMD buzzer for a small speaker. The buzer works too, but it’s quieter and very tinny.

New Speaker

The sample I wanted to test with is just over 6 seconds in length - it’s the iconic “Open the pod bay doors HAL…” sequence from 2001.

Open the pod bay doors

If we keep this audio at 16-bit PCM, 8kHZ, we’d need about 96KB – way beyond our 16 KB flash! And remember, that 16 KB has to hold both the audio data and our playback code. Clearly some aggressive compression is required.

Format Sample Rate Bits/Sample Size Fits in 16KB?
CD Quality 44.1 kHz 16-bit 529 KB ❌ 33× too big!
Phone Quality 16 kHz 16-bit 192 KB ❌ 12× too big!
Basic PCM 8 kHz 8-bit 48 KB ❌ 3× too big!
4-bit ADPCM (IMA) 8 kHz 4-bit 24 KB 1.5× too big
QOA (Quite OK Audio) 8 kHz 3.2-bit 19 KB Still too big!
2-bit ADPCM 8 kHz 2-bit 12 KB Fits!

I considered a few encoding options for compressing the audio.

  • 8-bit PCM: Simply using 8-bit samples at 8 kHz cuts size in half (to ~47 KB for 6s), but that’s still about 3× too large for our flash.
  • 4-bit ADPCM: Adaptive Differential PCM is a simple lossy compression that could quarter the size. In theory 6 seconds would be ~24 KB – much closer to fitting,
  • “Quite OK Audio” (QOA): This is nice codec that packs audio into about 3.2 bits per sample (roughly 1/5 the size of 16-bit PCM)
  • 2-bit ADPCM: Going even further with ADPCM, using only 2 bits per sample gives a 4:1 compression relative to 8-bit audio – that’s 75% storage savings.

2-bit ADPCM is definitely the winner here. Our 6-second clip shrinks to under 12 KB, which comfortably fits in flash with room for code. This looked like the winner, provided the audio quality was acceptable. The decoder for 2-bit ADPCM is also very lightweight (my implementation compiled to under just over 1K of code - 1340 bytes!). It’s definitely low quality - but it actually sounds surprisingly ok.

How does 2-bit ADPCM work?

It’s actually a very simple algorithm. Both the encoder and decoder maintain a predicted signal value and a step size index into a predefined table. Each 2-bit code tells the decoder how to adjust the current prediction and the step size index. In essence, we’re coding the difference between the real audio and our prediction, with only four possible levels (since 2 bits gives 4 values). After each sample, the algorithm adapts: if the prediction error was large, we move to a bigger step size (to allow larger changes); if the error was small, we use a smaller step size for finer resolution. This adaptive step is what makes it ADPCM (Adaptive Differential PCM).

Our codes are as follows:

  • 00 (0): Go down by 1 step - subtract the step size from our current prediction
  • 01 (1): Go up by 1 step - add the step size to our current prediction
  • 10 (2): Go down by 2 steps - subtract the 2 x step size from our current prediction
  • 11 (3): Go up by 2 steps - add the 2 x step size to our current prediction

2-bit ADPCM Compression

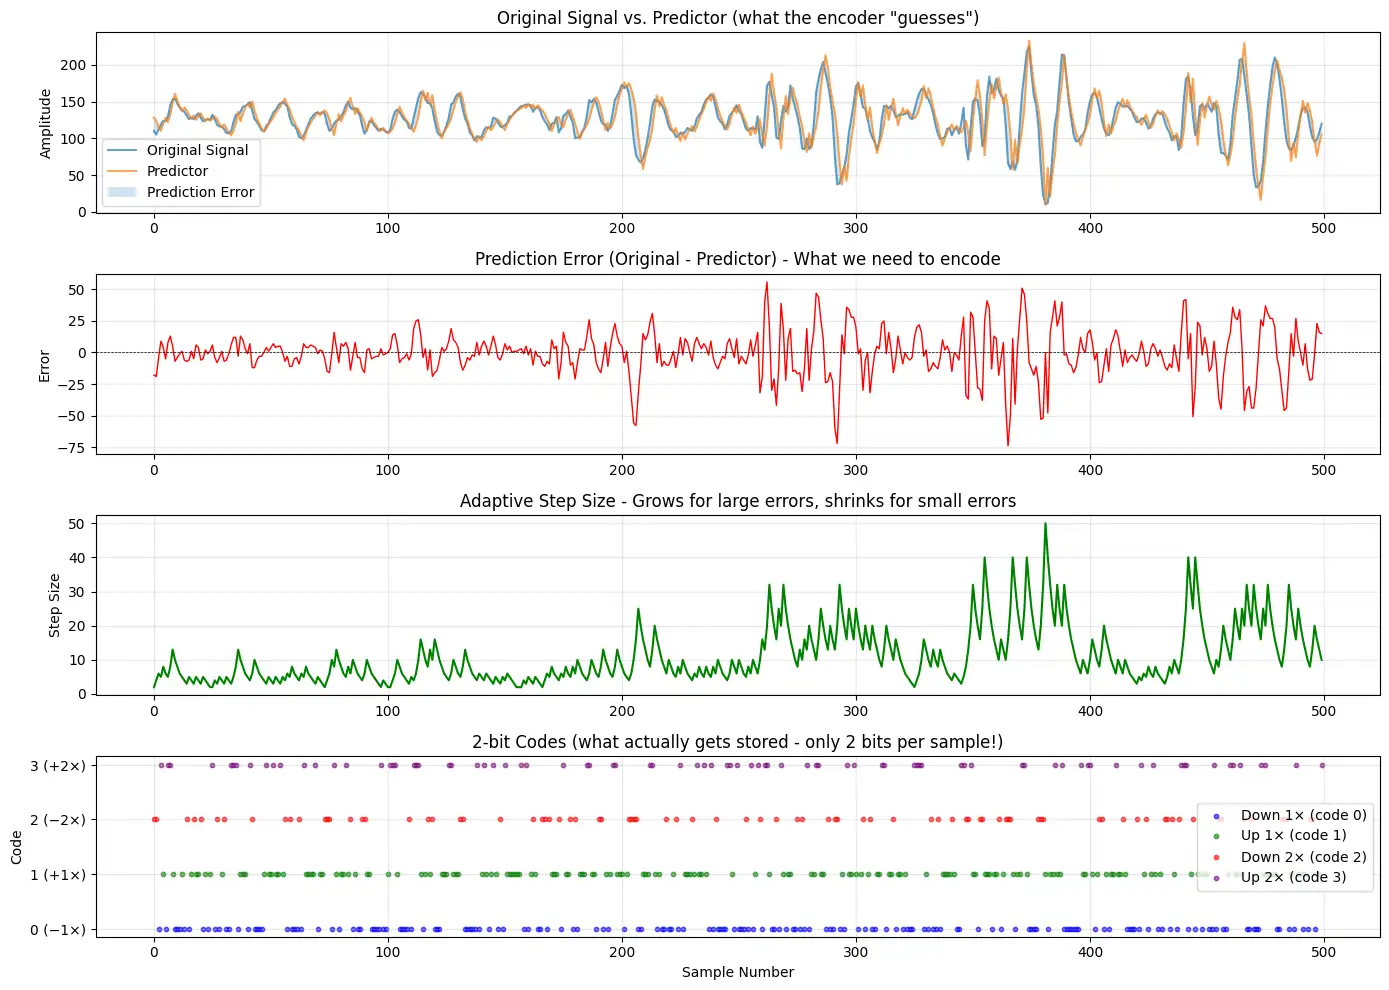
Even with this very high level of compression, the predicted waveform manages to track the original audio surprisingly well. The above graph shows a small snippet of the audio: the blue line is the original waveform and the yellow line is the ADPCM decoder’s output.

They’re not identical (and we wouldn’t expect them to be), but the general shape is preserved. When you play it back through the little speaker, it’s recognizable and surprisingly good.

To make my life easier, I built a quick conversion tool to encode WAV files into this 2-bit ADPCM format. The tool lets me drag-and-drop a WAV, and it gives you the files with the data that can ve dropped into the firmware code.

2-bit ADPCM Buzzer Studio

LPC Speech Synthesis

Six seconds of audio is cool, but what about longer phrases or even arbitrary speech? Storing anything much longer with raw or ADPCM audio would quickly fill the 16K of flash.

For my second experiment, I tried something different: instead of recorded waveform audio, I used an old-school speech synthesis approach. This leverages the fact that spoken language can be encoded very compactly by modeling the human voice, rather than storing the raw sound. Specifically, I integrated a library called Talkie.

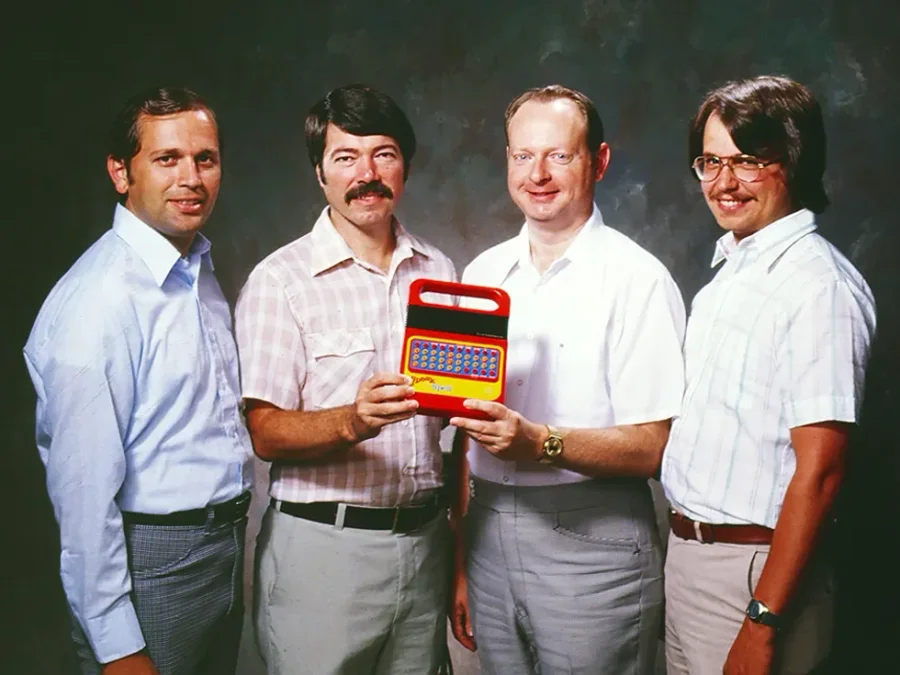
Talkie is a software implementation of the Texas Instruments LPC speech synthesis architecture from the late 1970s. This was implemented in a variety of chips, most commonly the TMS5220 and TMS5100 speech chips.

TMS5220 and TMS5100 Variants

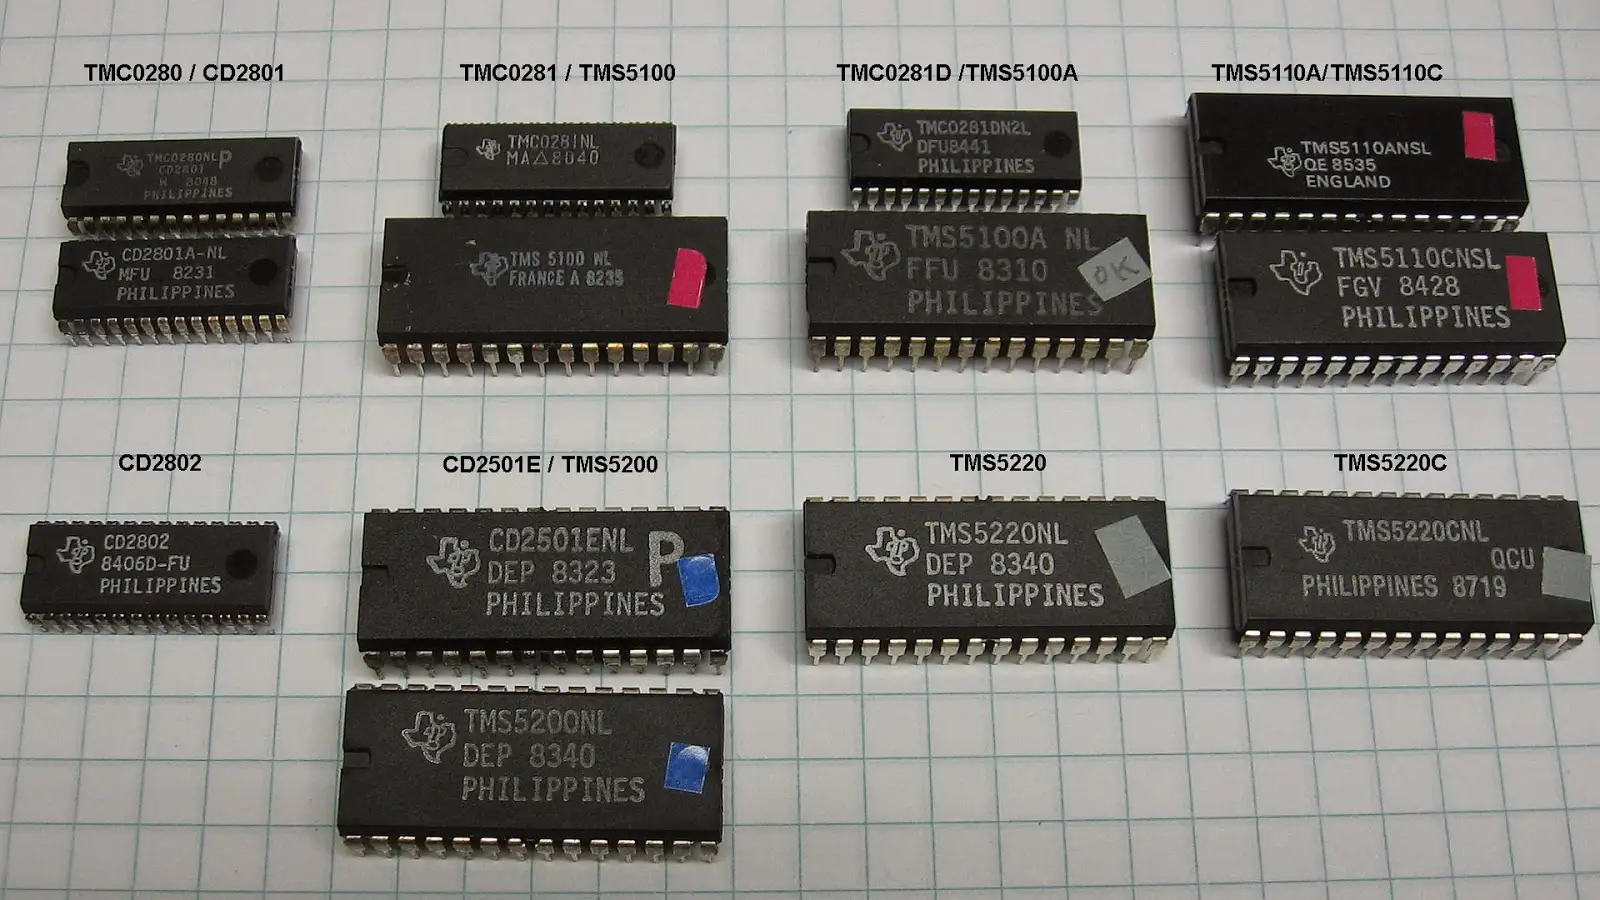
These were used in things like the original Speak & Spell, arcade games like early Star Wars, and speech add-ons for home computers (e.g. the BBC Micro).

Speak and Spell

The Talkie library (originally by Peter Knight, later added to by Adafruit) comes with a big set of examples and vocabulary. It’s also possible to extract examples from old ROMs from arcade games.

Each phrase or word only takes a few hundred bytes or even less, so you can fit quite a lot of speech into a few kilobytes of flash. The trade-off is that the voice has a very computer-esque timbre – think of the Speak & Spell’s voice. It’s clearly synthetic, but still understandable.

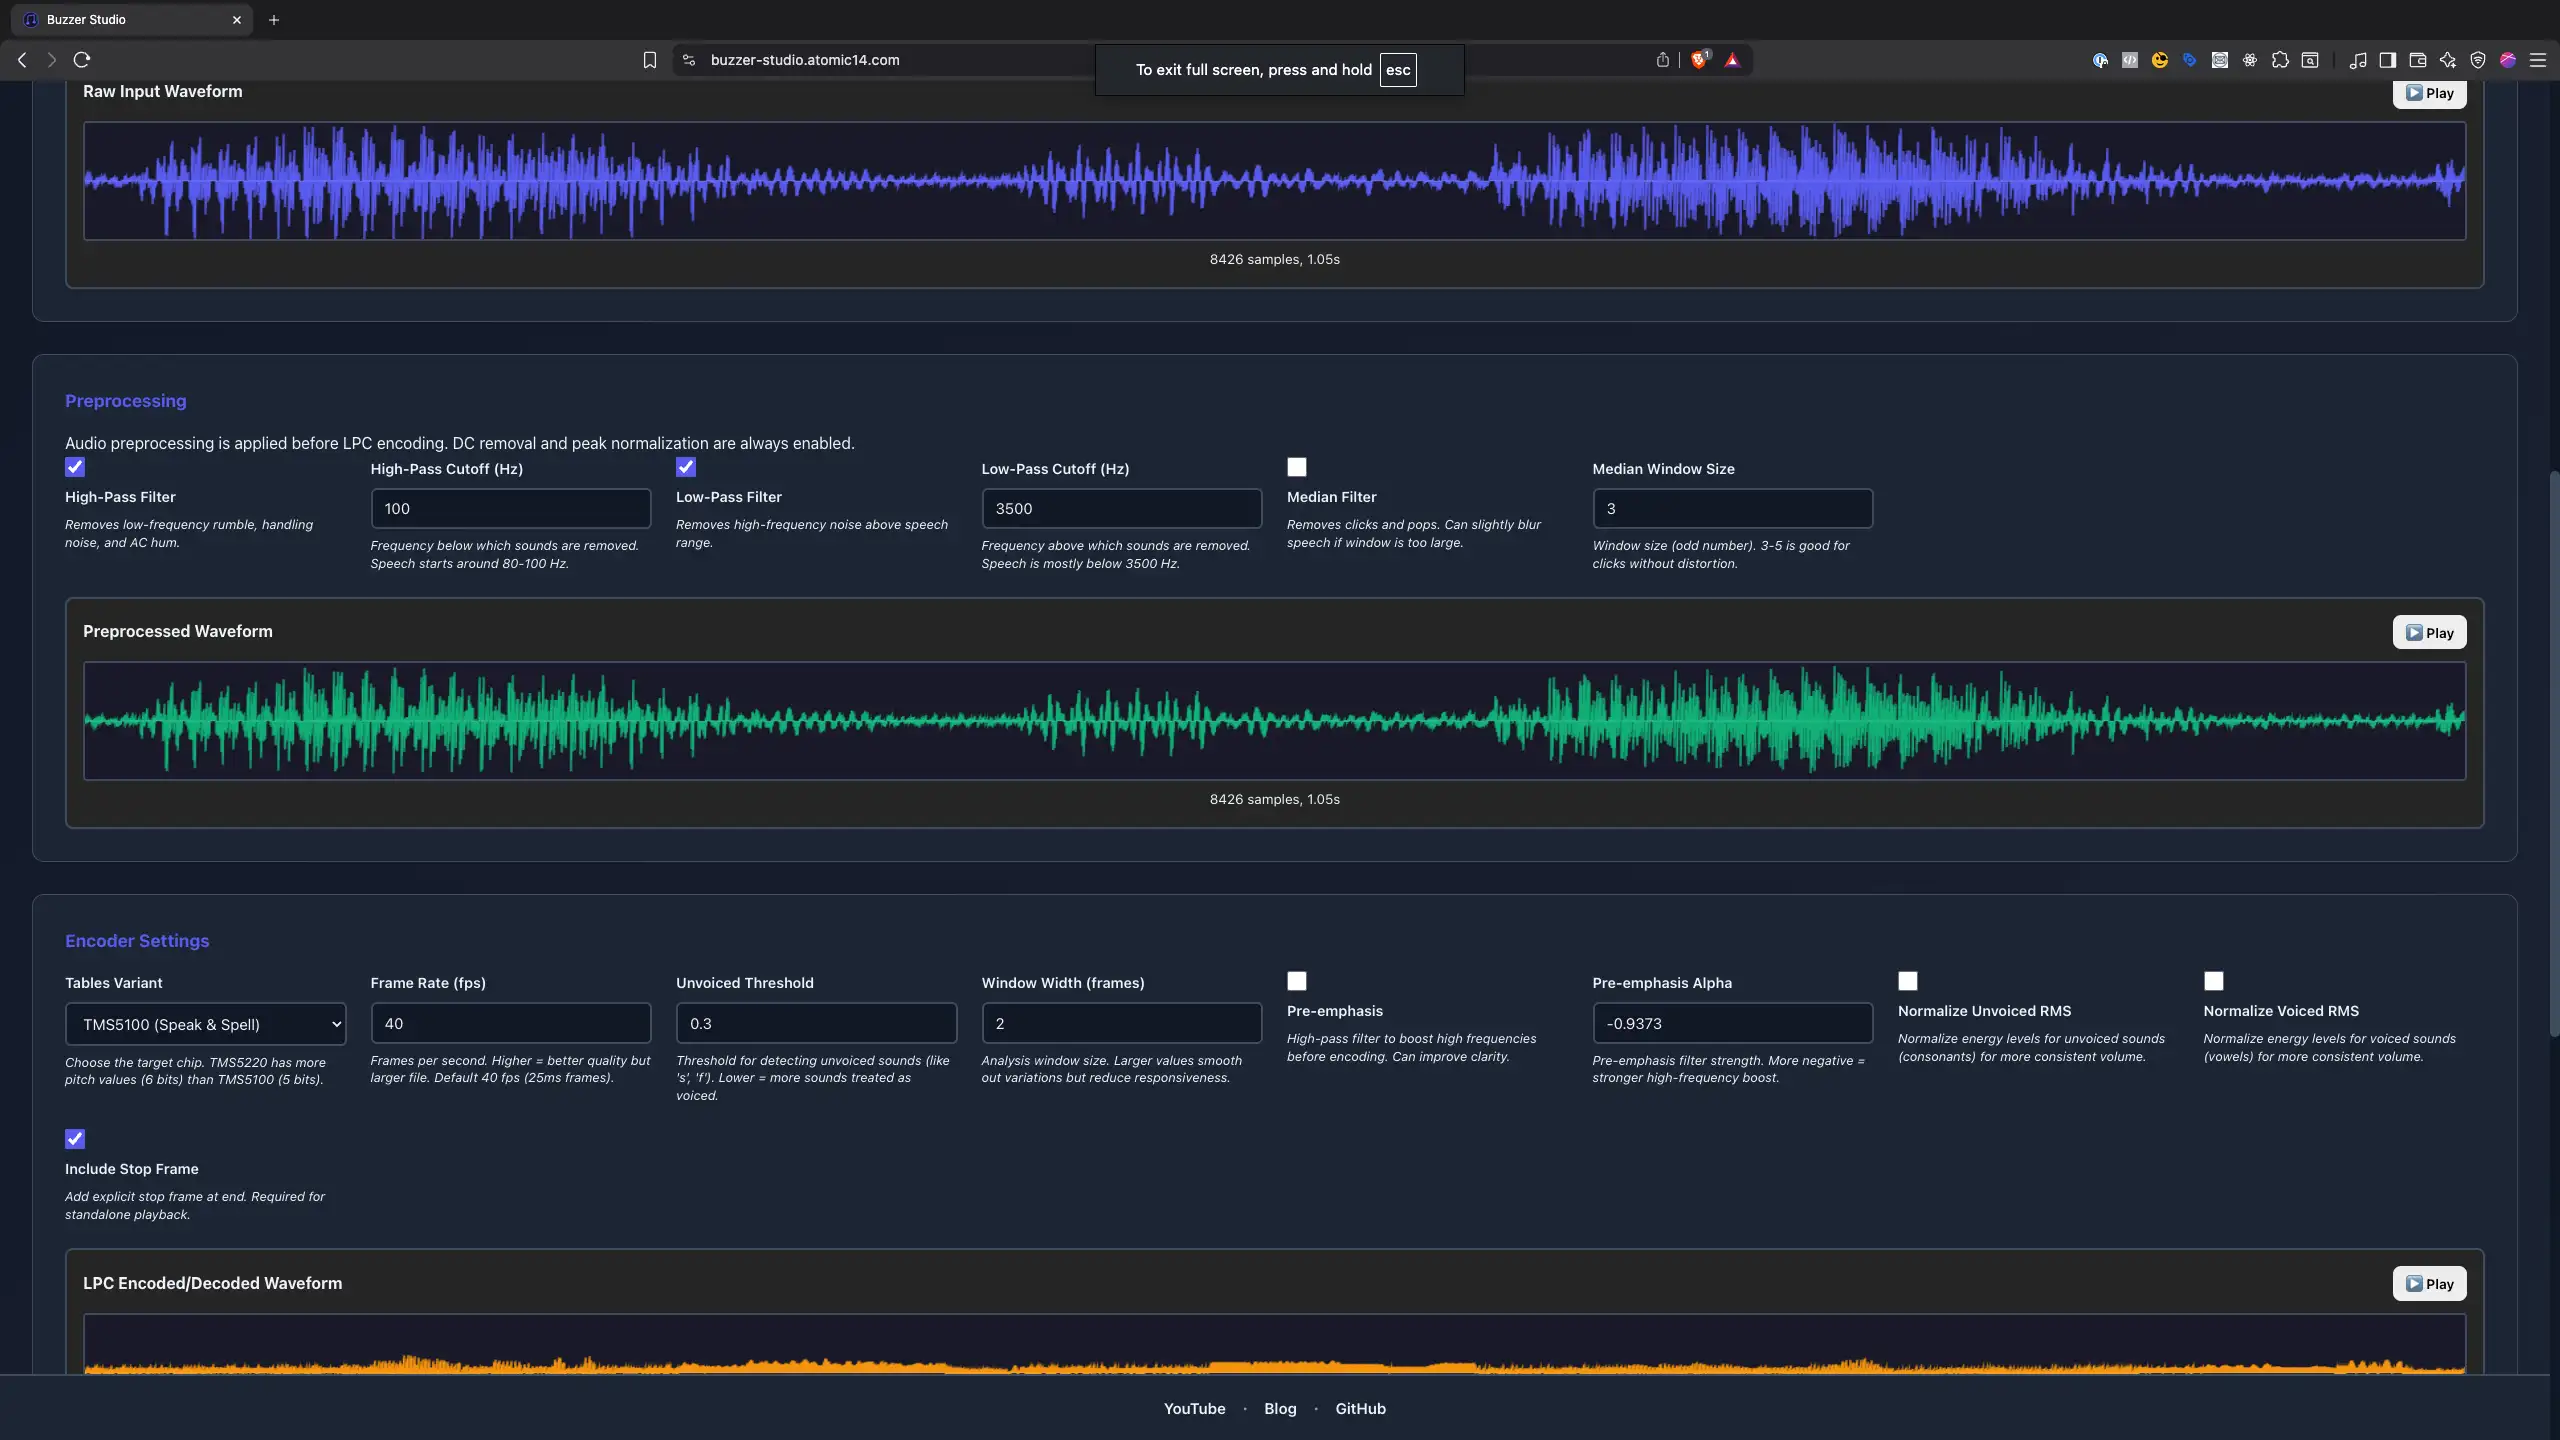
To say custom sentences not in the library, you either concatenate the available words/phonemes (which can be clunky), or you need to generate new LPC data. The original tools for this are a bit obscure – there’s BlueWizard (a classic Mac app) and PythonWizard (a command-line tool with TK GUI) which can analyze WAV files and produce LPC data.

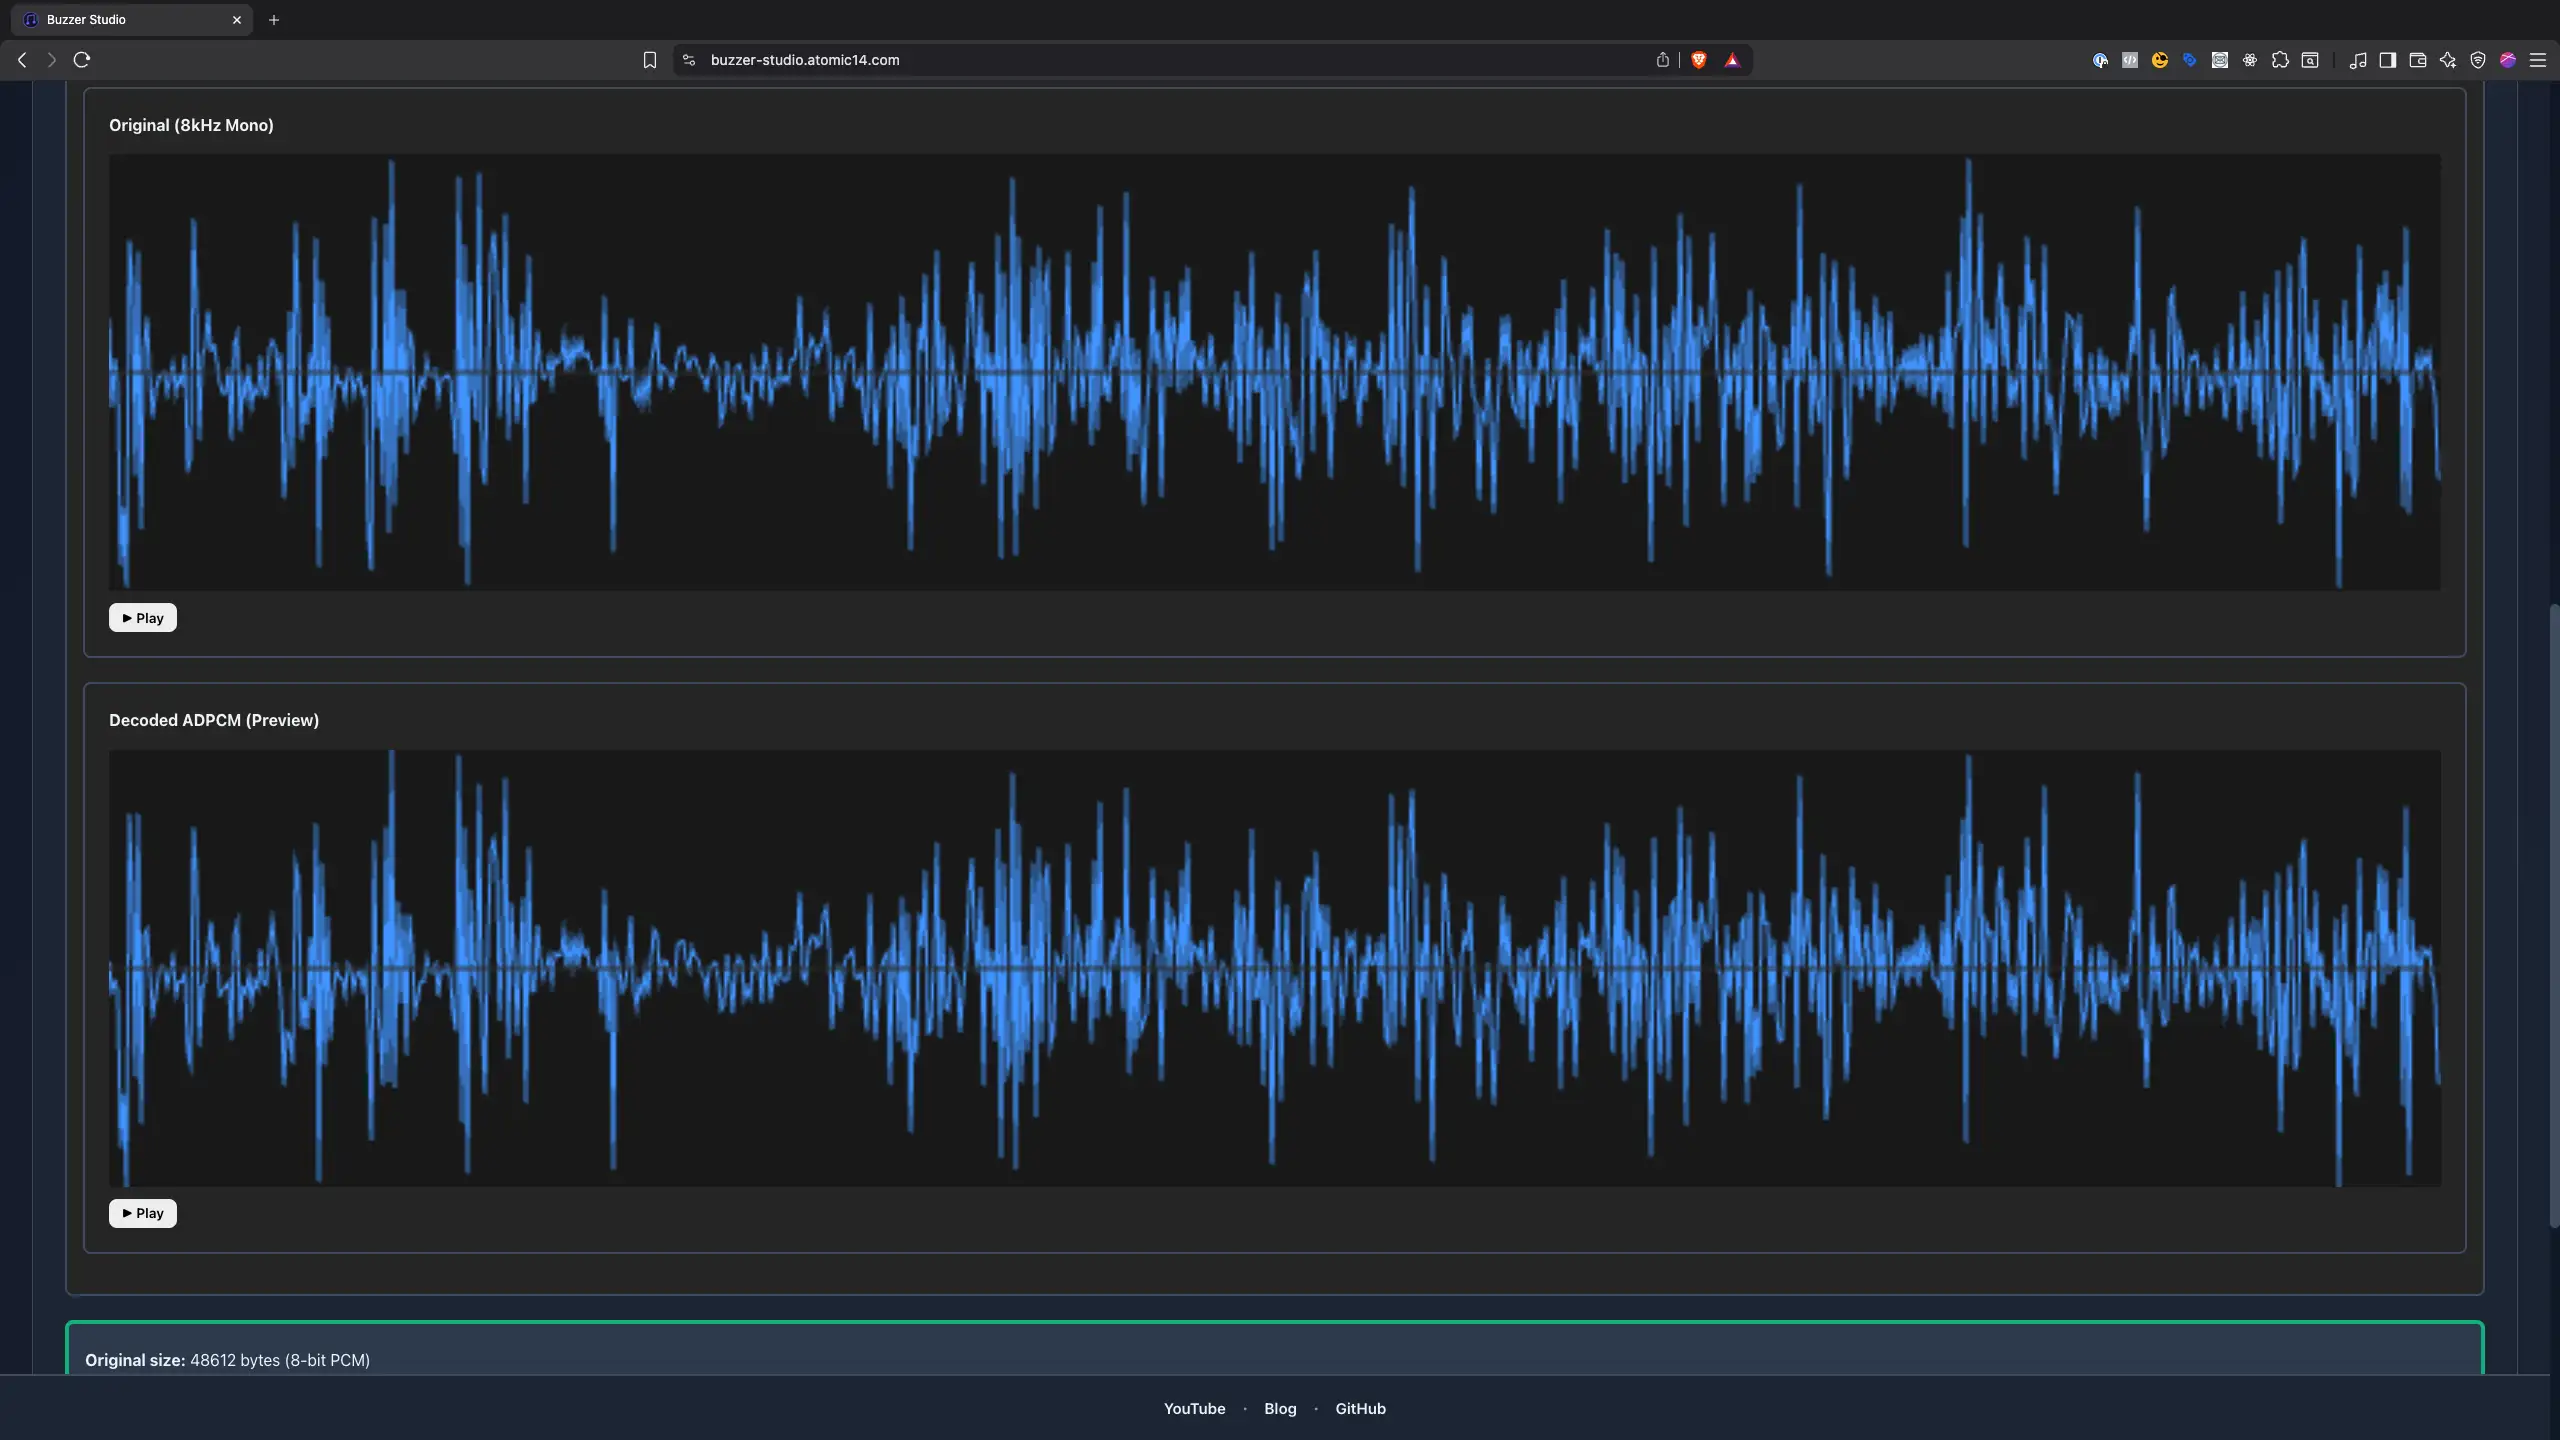
I gave both a try with some success (and a few headaches setting them up). In the end, I cheated a bit and used an AI coding assistant to help me create a streamlined online tool for this.

The result is a little web app where I can upload a recording of, say, my own voice, and it outputs the LPC data. It even lets me play back the synthesized voice in-browser to check it.

LPC Encoder

So there we have it – our 10¢ microcontroller now has a voice! By using 2-bit ADPCM compression, we can store short audio clips (up to around 8 seconds) even in 16 KB of flash, and play them back via PWM with decent fidelity.

And with the Talkie LPC speech synthesis, we can make the device “speak” lots of words and phrases with only a tiny memory footprint.

If you want to hear it for yourself, check out the video demo linked at the top of this post. In the video, you’ll see (and hear) the WarGames clip and the Star Wars quotes running on the hardware. It’s honestly amazing what these cheap little MCUs can do. We’re really pushing the boundaries of cheap hardware here.

You can find all my code on GitHub in this repository.

#16KB-FLASH #2-BIT-ADPCM #ADPCM #CH32V003 #EMBEDDED-AUDIO #HARDWARE-HACKING #LPC #MICROCONTROLLER #OPEN-SOURCE #PWM-DAC #RETRO-COMPUTING #RISC-V #SPEECH-SYNTHESIS #TALKIE #TI-TMS5220

Related Posts

10 Cent Music Machine - I built a tiny coin‑cell music board around the $0.10 WCH CH32V003J4M6 (8‑pin, 48MHz RISC‑V, 16K flash/2K RAM). The PCB is just 16.3×11.7mm with a piezo buzzer and transistor, and in standby it sips 7–8µA. I did hit a snag: playback caused 130mA peaks that browned out a CR2032. A LiPo fixed it, but I really wanted coin‑cell, so I upped the buzzer’s base resistor to 10k, dropping peaks to 56mA and average to ~7mA—now it runs happily (and loudly) from a coin cell. Pro tip: if standby bricks programming, wlink can erase via power-off mode. I’m bit‑banging audio, published a simple MIDI→buzzer tool with a 1‑bit SFX generator, and all the code’s on GitHub.
E32-S3 no DAC - No Problem! We'll Use PDM - In this post, I tackle the lack of a DAC on the ESP32-S3 by demonstrating how to use Pulse Density Modulated (PDM) audio with Sigma Delta Modulation to achieve analog audio output. I explore the simplicity of creating a PDM signal and its reconstruction into an audio signal using a low pass filter, even an RC filter, though a more sophisticated active filter is recommended. I guide through using both a timer and the I2S peripheral on the ESP32 for outputting PDM data, noting the quirks and solutions for each method. And I wrap up with how straight PDM signals can drive headphones or work with various amplifiers, including the MAX98358 or SSM2537, exhibiting the versatility of PDM in audio applications with the ESP32-S3.
16 bit mini handheld video arcade - Disassembling a 16-bit mini handheld video arcade revealed a fairly uncomplex interior with most of the functionality being handled by a blob chip on a single-sided PCB. Despite the simplicity, the impressive design manages to fit 156 games into flash storage on a multi-layered daughter board, which helps simplify the main board's design. While not as hackable as hoped, the teardown provided an interesting glimpse into the device's construction.
Decoding AVI Files for Fun and... - After some quality time with my ESP32 microcontroller, I've developed a version of the TinyTV and learned a lot about video and audio streaming along the way. Using Python and Wi-Fi technology, I was able to set up the streaming server with audio data, video frames, and metadata. I've can also explored the picture quality challenges of uncompressed image data and learned about MJPEG frames. Together with JPEGDEC for depth decoding, I've managed to effectively use ESP32's dual cores to achieve an inspiring 28 frames per second. Discussing audio sync, storage options and the intricacies of container file formats for video storage led me to the AVI format. The process of reading and processing AVI file headers and the listing subtype 'movi' allowed me to make significant headway in my project. All in all, I'm pretty chuffed with my portable battery powered video player. You can check out my code over on Github!
A Life in Tech - The Early Years - I was fortunate enough to enter the world in 1971 alongside Intel's 4004 microprocessor – a moment that ushered in the digital era as we know it. Although a bit of an educational renegade, my curiosity steered me down a path filled with ZX Spectrums, Christmas wish lists, dangerously strewn cables and a legion of half-disassembled childhood toys. In spite of the haphazard approach to my intellectual explorations, I eventually managed to grasp the fundamentals of assembly language and savoured the glory of publishing a small utility, all whilst navigating the complex prepubescent minefield of Dungeons & Dragons. Looking back, I wish I could've broken out of my shell to learn more from my peers and mentors. Still, I cherish these nerdy memories and the doors they opened for me in life...

Related Videos

10¢ Talking Chip - CH32V003 Speaks! - I got a 10‑cent MCU literally talking. With just 16K of flash and 2K of RAM, I used PWM and a tiny transistor amp to play 6+ seconds of audio at 8 kHz by compressing it with super‑simple 2‑bit ADPCM—4:1 compression and a decoder in under 2 KB. I built a handy WAV‑to‑2‑bit‑ADPCM tool to make it easy. For longer phrases, I switched to the Talkie library (TI LPC speech synthesis from the TMS5220/TMS5100 era—think Speak & Spell and classic arcades), and I even made a web tool and player for generating and previewing LPC data. It’s wild what you can squeeze out of a 10‑cent MCU. Also, PCBWay did the boards—link below.
10¢ MCU Music Hack - CH32V003 - I spun some tiny WCH boards at PCBWay around an 8‑pin MCU (48 MHz, 16k flash, 2k RAM) to beep tunes off a coin cell. I tried hand-soldering, then used my paste-dispensing PCB printer—expired paste still worked great. Standby sips under 8 µA, but it locks out programming; a WLink flash wipe rescued me. Wake draws ~3.3 mA, and audio peaks hit ~130 mA (~13–14 mA average), which browned out the coin cell. A tiny 80 mAh LiPo with a TP4056 (modded to ~100 mA) proved the design, then swapping the buzzer’s base resistor from 1k to 10k tamed it to ~56 mA peak and just over 7 mA average—coin cell friendly and still loud. I’m bit-banging audio for now (PWM/timers later). I also made a quick MIDI-to-note tool and a one-bit SFX generator. These boards are heading into my next project—stay tuned.
ESP32-S3 USB UAC Audio Device - does it work? - Time for an audio project: I took my PCBWay ESP32‑S3 board for a spin—fixed the common anode/cathode LED mix‑up, verified the IMU and battery charger, then tested an I2S PDM mic and tiny speaker with a Web Serial Audio Studio (scope, spectrogram, tuner). I also turned it into a USB UAC device in ESP‑IDF: the mic is clean, but speaker over UAC is crackly (Mac/Windows toggle oddity); direct I2S WAV playback is perfect, so the hardware passes QA.
We don't need a DAC - ESP32 PDM Audio - In this video, I've made some fascinating explorations with the ESP32 S3 chips and TinyS3 boards from Unexpected Maker. Intriguingly, even without a DAC converter, S3 chips can produce an audio waveform. I've played around with a basic RC filter to reconstruct the analogue audio signal from a PDM signal. The result was quite impressive for a board without a native DAC! I also discussed the possibility of creating a simple amplifier using just a MOSFET as a switch. Finally, I gave a peek into some of my new boards from PCBWay and looked at how Delta Sigma modulation can be played with to recover original data. It's all quite a fun foray into the world of circuitry and audio signals!
Streaming Video and Audio over WiFi with the ESP32 - In this video, we dive into a hardware hack combining several components to create my version of the TinyTV, complete with a remote control, and video streaming over Wi-Fi. We challenge the speed of image display, using different libraries and tweaking performance for optimal results. We explore Motion JPEG or MJPEG to decode and draw images quickly, and even reach about 28 frames per second. We also catered audio using 8-bit PCM data at 16kHz, and deal with syncing both video and audio streams. Finally, we add some interactive elements allowing us to change channels and control volumes, with a classic static animation thrown in for good measure. There's a few hiccups along the way, but that's part of the fun, right?
HELP SUPPORT MY WORK: If you're feeling flush then please stop by Patreon Or you can make a one off donation via ko-fi
Want to keep up to date with the latest posts and videos? Subscribe to the newsletter
Blog Logo

Chris Greening


Published

> Image

atomic14

A collection of slightly mad projects, instructive/educational videos, and generally interesting stuff. Building projects around the Arduino and ESP32 platforms - we'll be exploring AI, Computer Vision, Audio, 3D Printing - it may get a bit eclectic...

View All Posts