🌈 ESP32-S3 Rainbow: ZX Spectrum Emulator Board! Get it on Crowd Supply →
View All Posts
read
Want to keep up to date with the latest posts and videos? Subscribe to the newsletter
HELP SUPPORT MY WORK: If you're feeling flush then please stop by Patreon Or you can make a one off donation via ko-fi
#BLINK #DEV BOARD #ELECTRONICS #EPAD #ESP32 #ESP32-S3 #FIRMWARE FLASHING #HAND SOLDERING #MACOS #PCB ASSEMBLY #REFLOW #SMD #SOLDER PASTE #USB #YOUTUBE

I finally got some time to assemble the ESP32-S3 dev boards we designed in this post.

I ordered a stencil with the PCBs - this is by far the easiest way to do SMD assembly at home.

Solder Paste

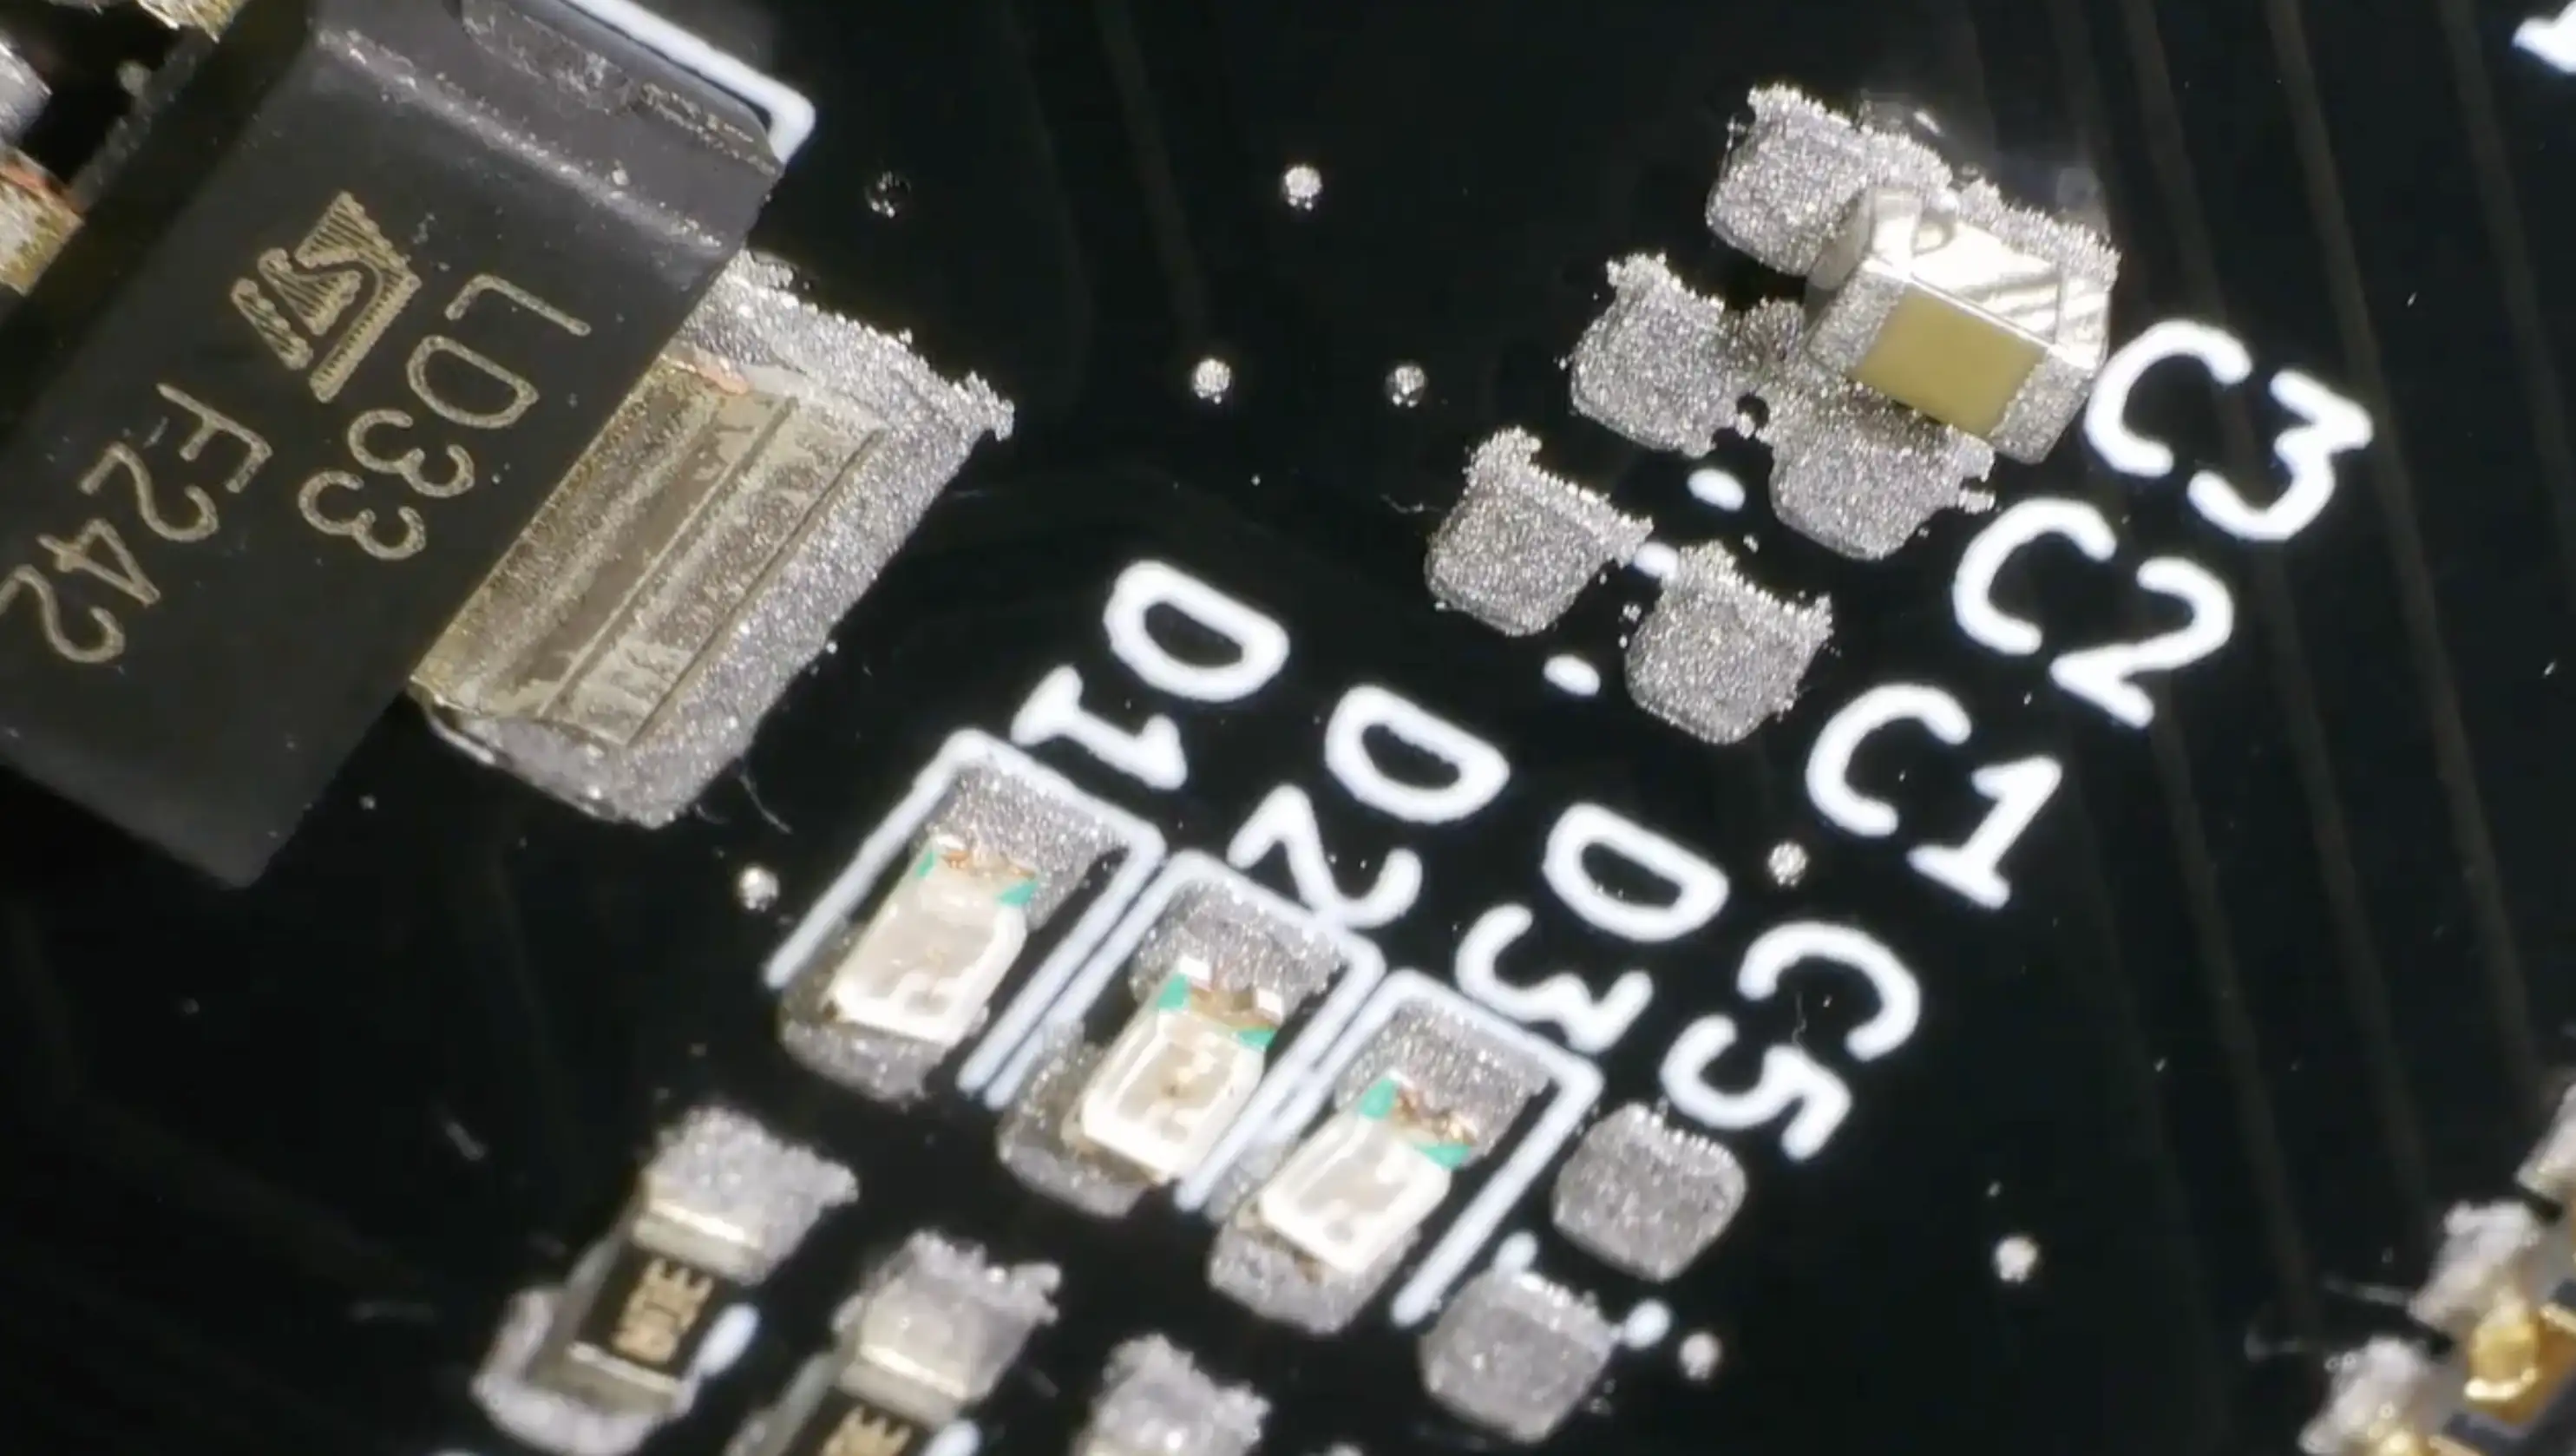
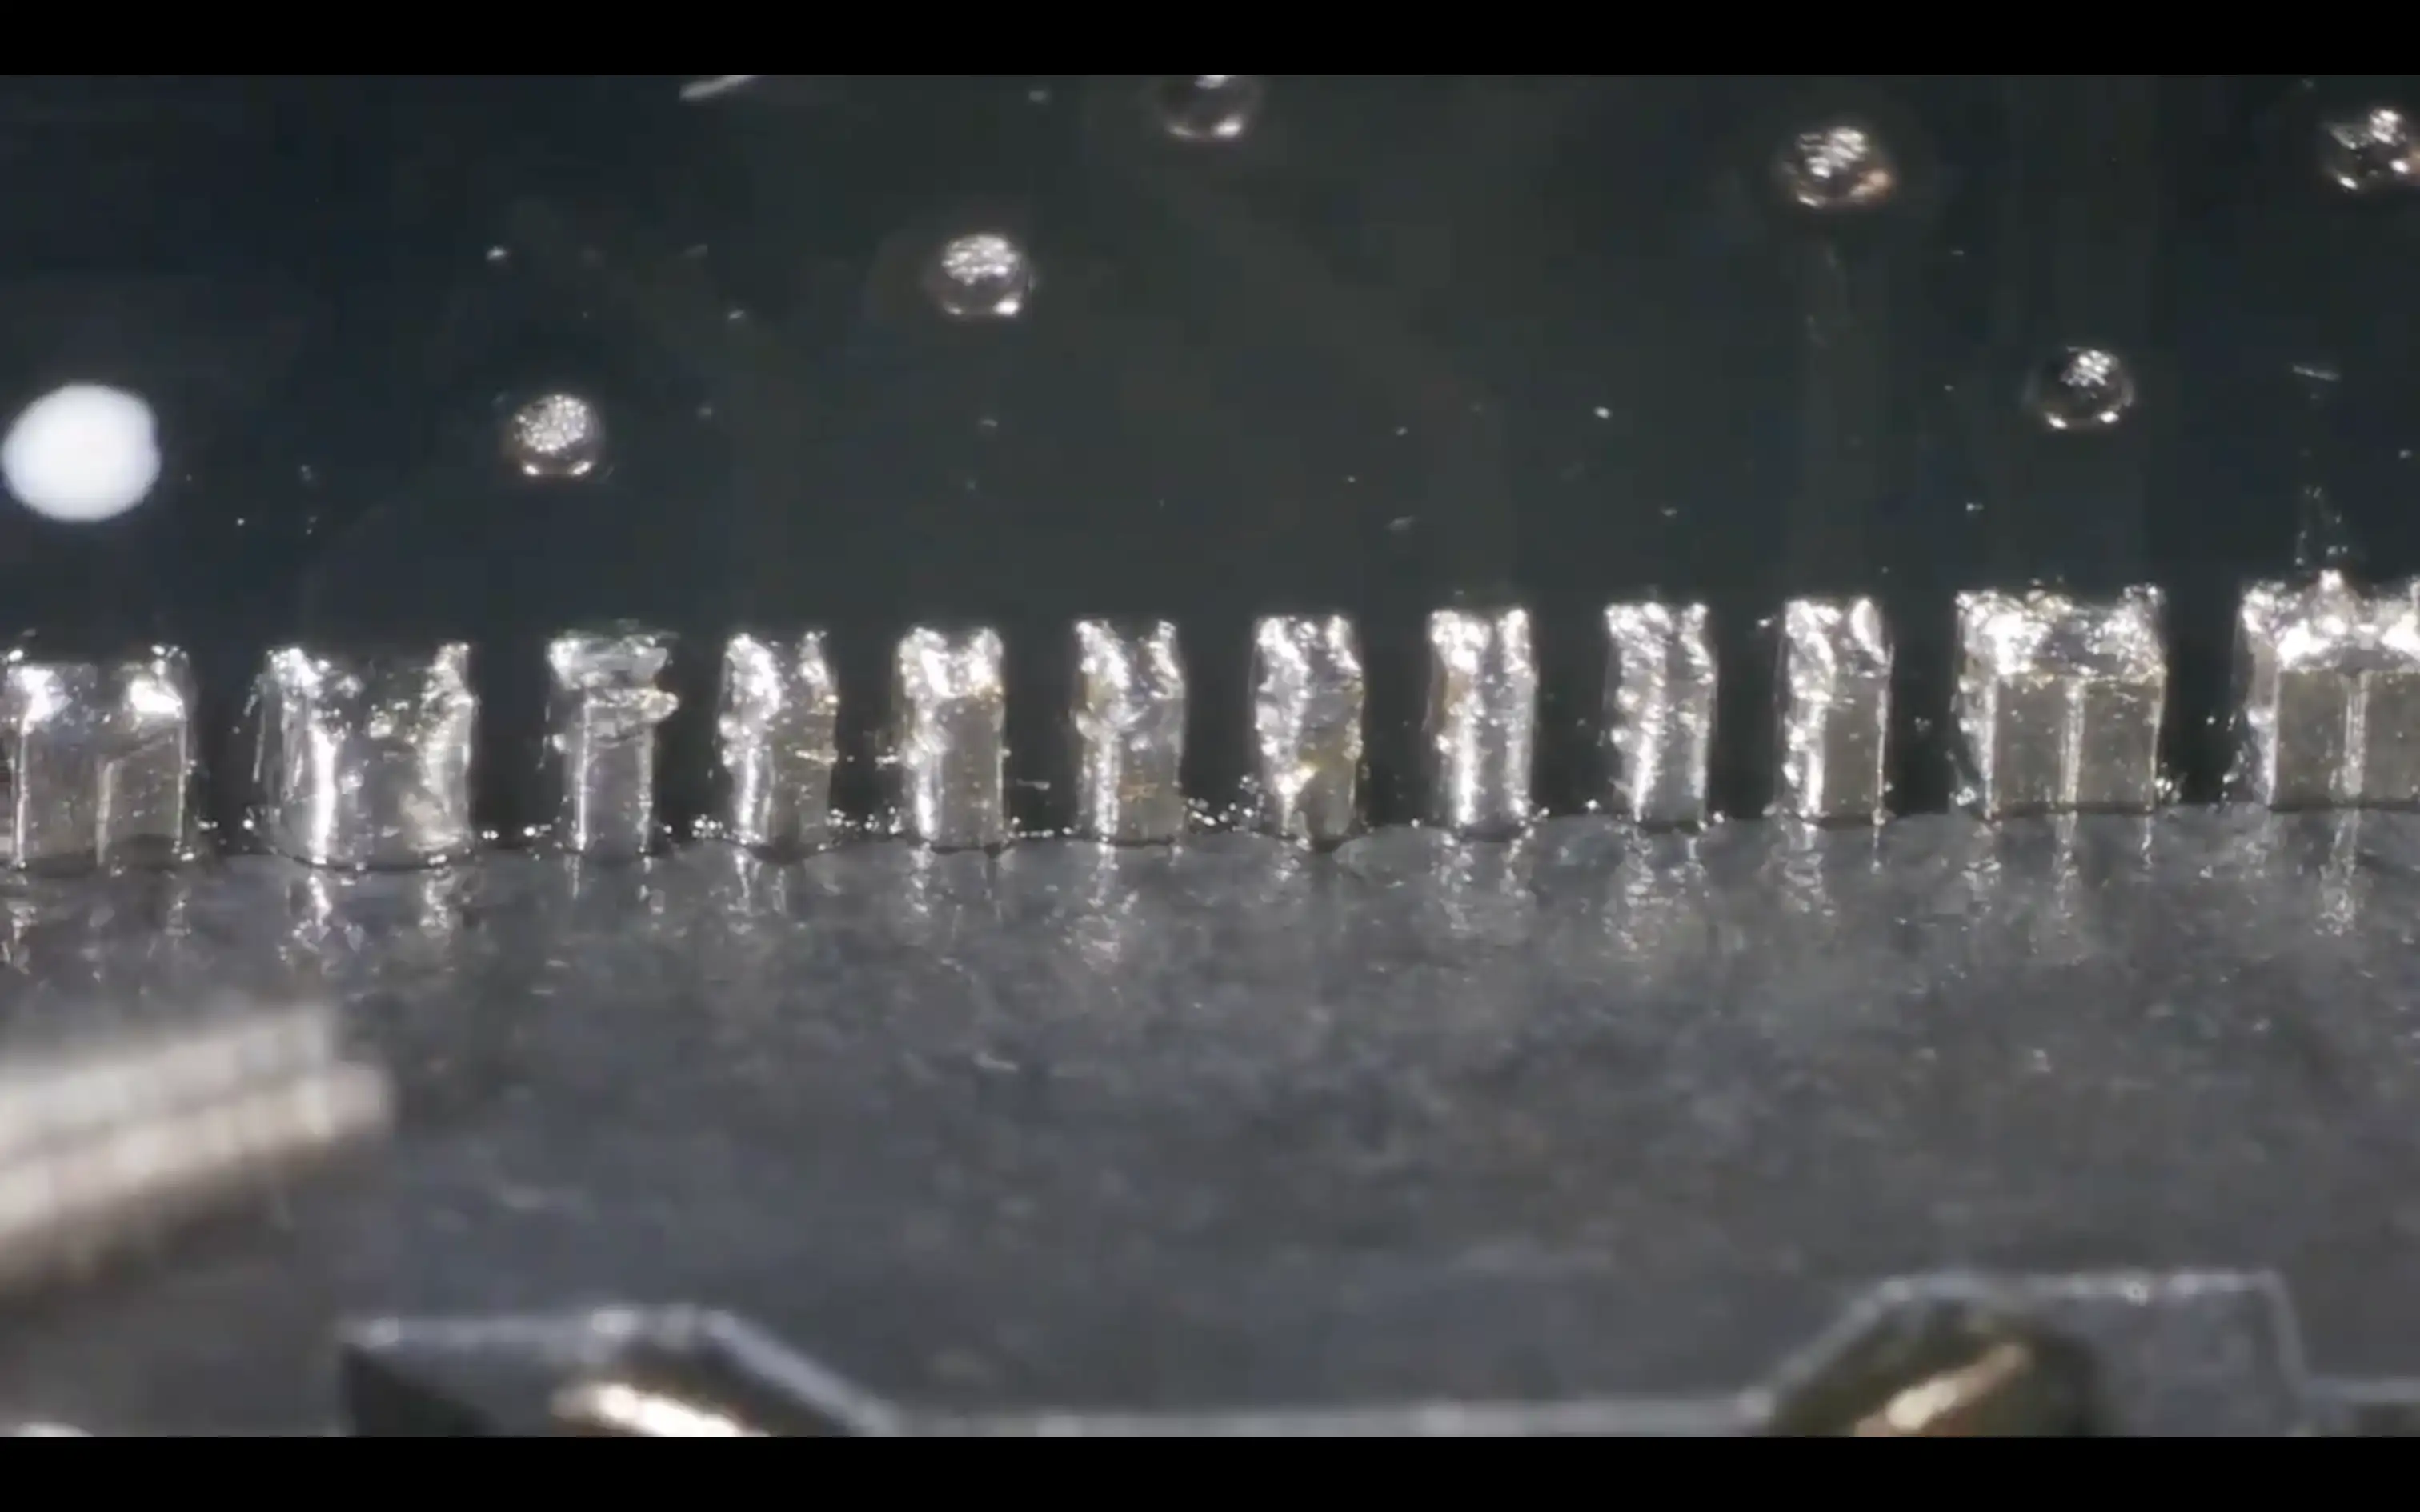
Solder paste is pretty forgiving, but I didn’t do a perfect job with this, so we did have some solder bridges on the USB pins. These are very fine pitch, so they often cause some problems.

Solder Bridges

But a quick run over with the soldering iron and plenty of flux cleans them up without any problems.

No Solder Bridges!

I also did a hand-assembled version - there aren’t that many components on the board so this is pretty straightforward. One thing that is worth mentioning is that you don’t need to solder the EPAD. Connecting this does improve thermal performance, but the datasheet explicitly says it is not needed.

Datasheet

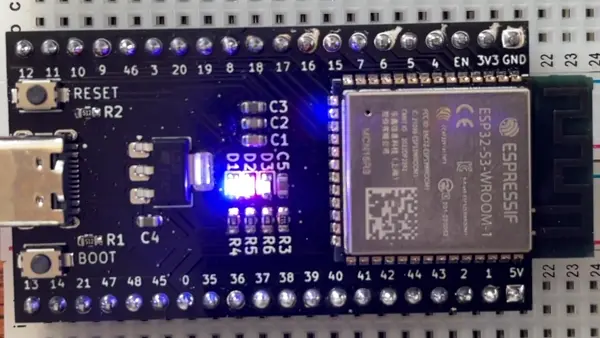
Plugging the board into USB gives us two LEDs - one showing we’ve got 5V coming in - and another showing that the 3V3 regulator is working.

You can easily check on a Mac to see if the device is working by typing the following command:

$ ls /dev | grep usb
cu.usbmodem1101
tty.usbmodem1101

You should see a couple of devices. For flashing, you may need to get the module into boot mode by holding down the boot button while pressing reset.

Flashing our board with a simple blink sketch works brilliantly.

Blink!

You can watch the full assembly and walk through here.

#BLINK #DEV BOARD #ELECTRONICS #EPAD #ESP32 #ESP32-S3 #FIRMWARE FLASHING #HAND SOLDERING #MACOS #PCB ASSEMBLY #REFLOW #SMD #SOLDER PASTE #USB #YOUTUBE

Related Posts

Easy esp32 s3 dev board - Quick recap: I’m putting together a super simple ESP32-S3 dev board—there’s a video walkthrough, the full KiCad project on GitHub, plus the schematic and a slick 3D render of the assembled board.
Minimalist Microcontroller: Building a Bare-Bones Dev Board - In a thrilling DIY endeavour, I attempted to build the most minimalist ESP32 dev board possible. Diving deep into the schematic of the ESP32 S3 WROOM module, I chopped out the non-essentials and whittled our needs down to bare bones. The experiment saw me juggling USB data lines and voltage regulators, waving goodbye to an array of capacitors and connectors and boldly embracing the simplicity of direct connections. Despite a few hitches, the miniature Frankenboard came alive, proving that sometimes less is more...at least in the world of microcontrollers.
Vibing a PCB - surprisingly good - In my latest adventure, I challenged AI to design a working ESP32-S3 development board from scratch using Atopile and Claude. The idea was as simple as vibe-coding actual hardware without diving into the code. It was a chaotic yet fascinating journey, with some misses like unwired components and a forgotten capacitor. After a few prompts, the AI delivered a surprisingly functional board featuring USB-C, an AMS1117 regulator, and status LEDs. While not yet perfect, vibe-coding feels like a glimpse into the future of hardware design.
ESP32-S3 USB UAC - I turned my new ESP32‑S3 board into a USB Audio device. After a ninja LED fix and confirming the IMU and charging, I streamed mic audio over Web Serial (with a slick AI-made ‘Audio Studio’) and then via USB UAC. The mic sounds great, but the speaker is crackly over UAC—even though I2S WAV playback is perfectly clean. ESP-IDF worked; Arduino didn’t. Bonus annoyance: macOS vs Windows is a toggle, not a combo. Still, this board passes QA.
The PCBs are in production - what have I messed up? - After some stress and trepidation, I finally took the plunge and sent my PCB design off for manufacturing. My design centers around building a large seven-segment clock with LED filaments. Jumping hurdles such as voltages, pin usage, and limiting the load on my power supply, I've settled on the ESP32 as the system's heart and come up with a final circuit design. While doing this, I've quickly realized I could improve my layout and fixed a small mistake. Also, I've prepared for either types of LED filaments - the high-voltage ones or the larger, 3v ones. However, I did bungle up a couple of things on the enable line of the shift registers and board layout. But hey, this is a learning curve, right? Can't wait to get the boards and see what other exciting errors surface!

Related Videos

I Designed My Own ESP32-S3 Dev Board… and It Actually Worked! - I finally assembled my super simple ESP32‑S3 dev board—voltage regulator, reset button, three status LEDs (5V, 3.3V, and a GPIO blinker), and all pins broken out. I showed two build methods: stencil + hot-plate reflow (quick, with a few USB bridges to clean up) and full hand-solder under the microscope, complete with the rigorous ‘solid’ test. Soldered the ESP32‑S3 module (skipping the center thermal pad unless you need it), plugged in, got power LEDs, confirmed USB enumeration, flashed a blink sketch, and we’ve got a blinking LED. Next up: turning this basic dev board into something more professional for production.
Super Easy ESP32-S3 Dev Board - Making an ESP32-S3 dev board is way easier than it looks. I simplify the datasheet reference: skip the external crystal, wire native USB D+/D− (pins 19/20) straight to a USB-C with 5.1k CC pulldowns, add a BOOT switch and an EN RC reset, and power it with an LD117 LDO that’s happy with ceramic caps. In KiCad I build the schematic with Espressif libraries, add LEDs for 5V, 3V3, and a blink GPIO, set up net classes, route a clean USB differential pair, stitch a solid ground plane, and label everything. It’s a bit wide—just gang breadboards together—and you end up with a neat, professional S3 dev board you can flash and debug over USB.
Minimalist Microcontroller: Building a Bare-Bones Dev Board - Dive into the fascinating process of building a minimal ESP32-based dev board, beginning with the ESP32-S3 Wroom module, and eliminating unnecessary components. Through soldering, wire connecting, and voltage testing, we reach a product that's compact, efficient and fully functional.
ESP32-S3 - Which Pins Are Safe To Use? - In this video, I've decided to dive deep into the ESP32-S3, a module ruling my lab recently due to its plug-in-and-play functionality, and the flexibility offered by its GPIO matrix. However, working with it requires vigilance, especially with regard to the strapping pins and USB data pins, among others. Discovering such quirks, I've encountered unexpected values, short glitches and the occasional code crash. To help you avoid these bumps, I've documented everything I've learned on my GitHub repo, where I'm inviting you, my fellow makers and engineers, to contribute your valuable experiences and findings. After a minor hiccup with my ESP32-TV, expect an updated PCB design, courtesy of PCBWay. Explore the ESP32-S3 with me, and let's unravel its secrets together, one pull request at a time.
Lovely High Res E-Paper Display - Just when we thought we'd done with our mailbag, some exciting new stuff tips up. This time, we've got a soldering kit, a fun-looking Dash, and extra bonus, an ink plate 10, which is a cool e-paper display from Soldered. We've unboxed it, pulling out a board with an esp32 module, an SD card, and a battery connector. One of the major selling points is its open-source nature, you can download all the schematics from GitHub, and for those inclined, learn about how to build pcbs. Also showcased a Simon Says game soldering kit, despite my modest soldering skills (we all need practice, eh?), it turned out to be good fun. Plus, we've got a Dev board fitted with an at Mega 328p and an ultra-bright ws2812 RGB LED. Let's see if I can turn this e-paper display into a weather display or maybe you have more exciting ideas, drop them down in the comments!
HELP SUPPORT MY WORK: If you're feeling flush then please stop by Patreon Or you can make a one off donation via ko-fi
Want to keep up to date with the latest posts and videos? Subscribe to the newsletter
Blog Logo

Chris Greening


Published

> Image

atomic14

A collection of slightly mad projects, instructive/educational videos, and generally interesting stuff. Building projects around the Arduino and ESP32 platforms - we'll be exploring AI, Computer Vision, Audio, 3D Printing - it may get a bit eclectic...

View All Posts