🌈 ESP32-S3 Rainbow: ZX Spectrum Emulator Board! Get it on Crowd Supply →
View All Posts
read
Want to keep up to date with the latest posts and videos? Subscribe to the newsletter
HELP SUPPORT MY WORK: If you're feeling flush then please stop by Patreon Or you can make a one off donation via ko-fi
#CIRCUIT DESIGN #DIY #ELECTRONICS #LED #PCB #TROUBLESHOOTING

You can watch a full video version with more details here.

New PCBs have arrived. Did they work? Hahahaha - well, mostly.

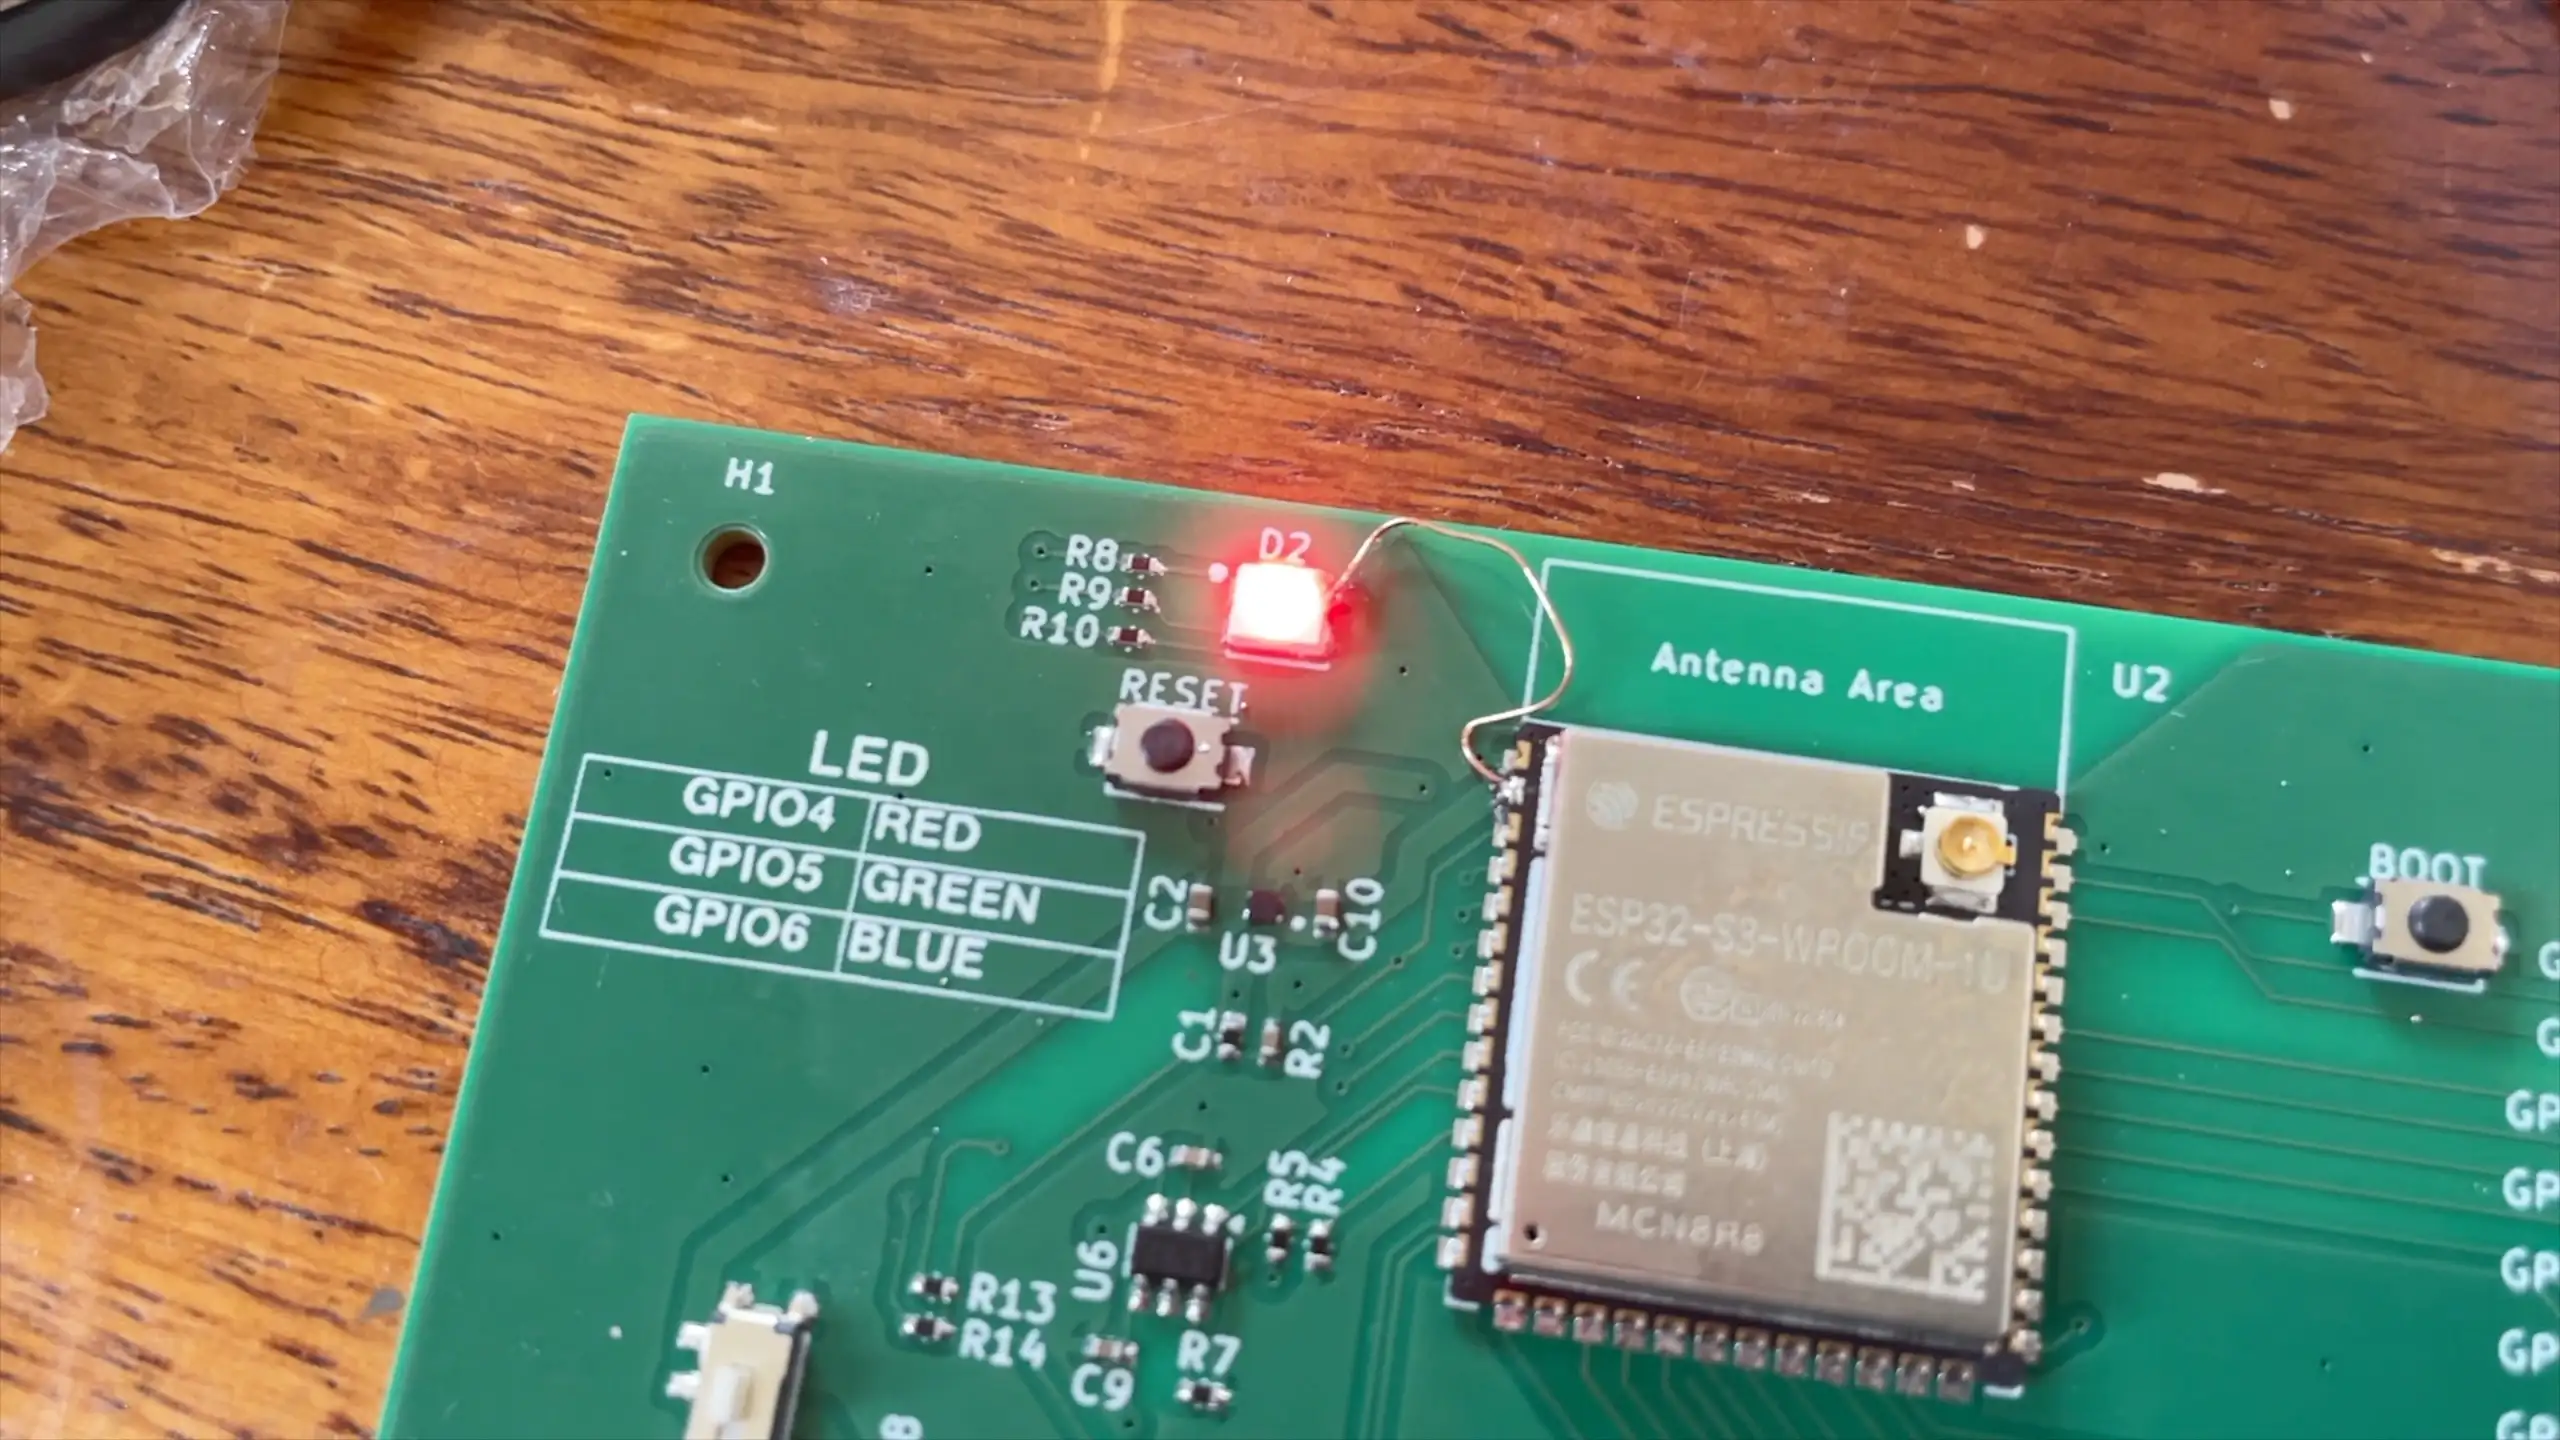
The simplest part of the PCB does not work. The LED…

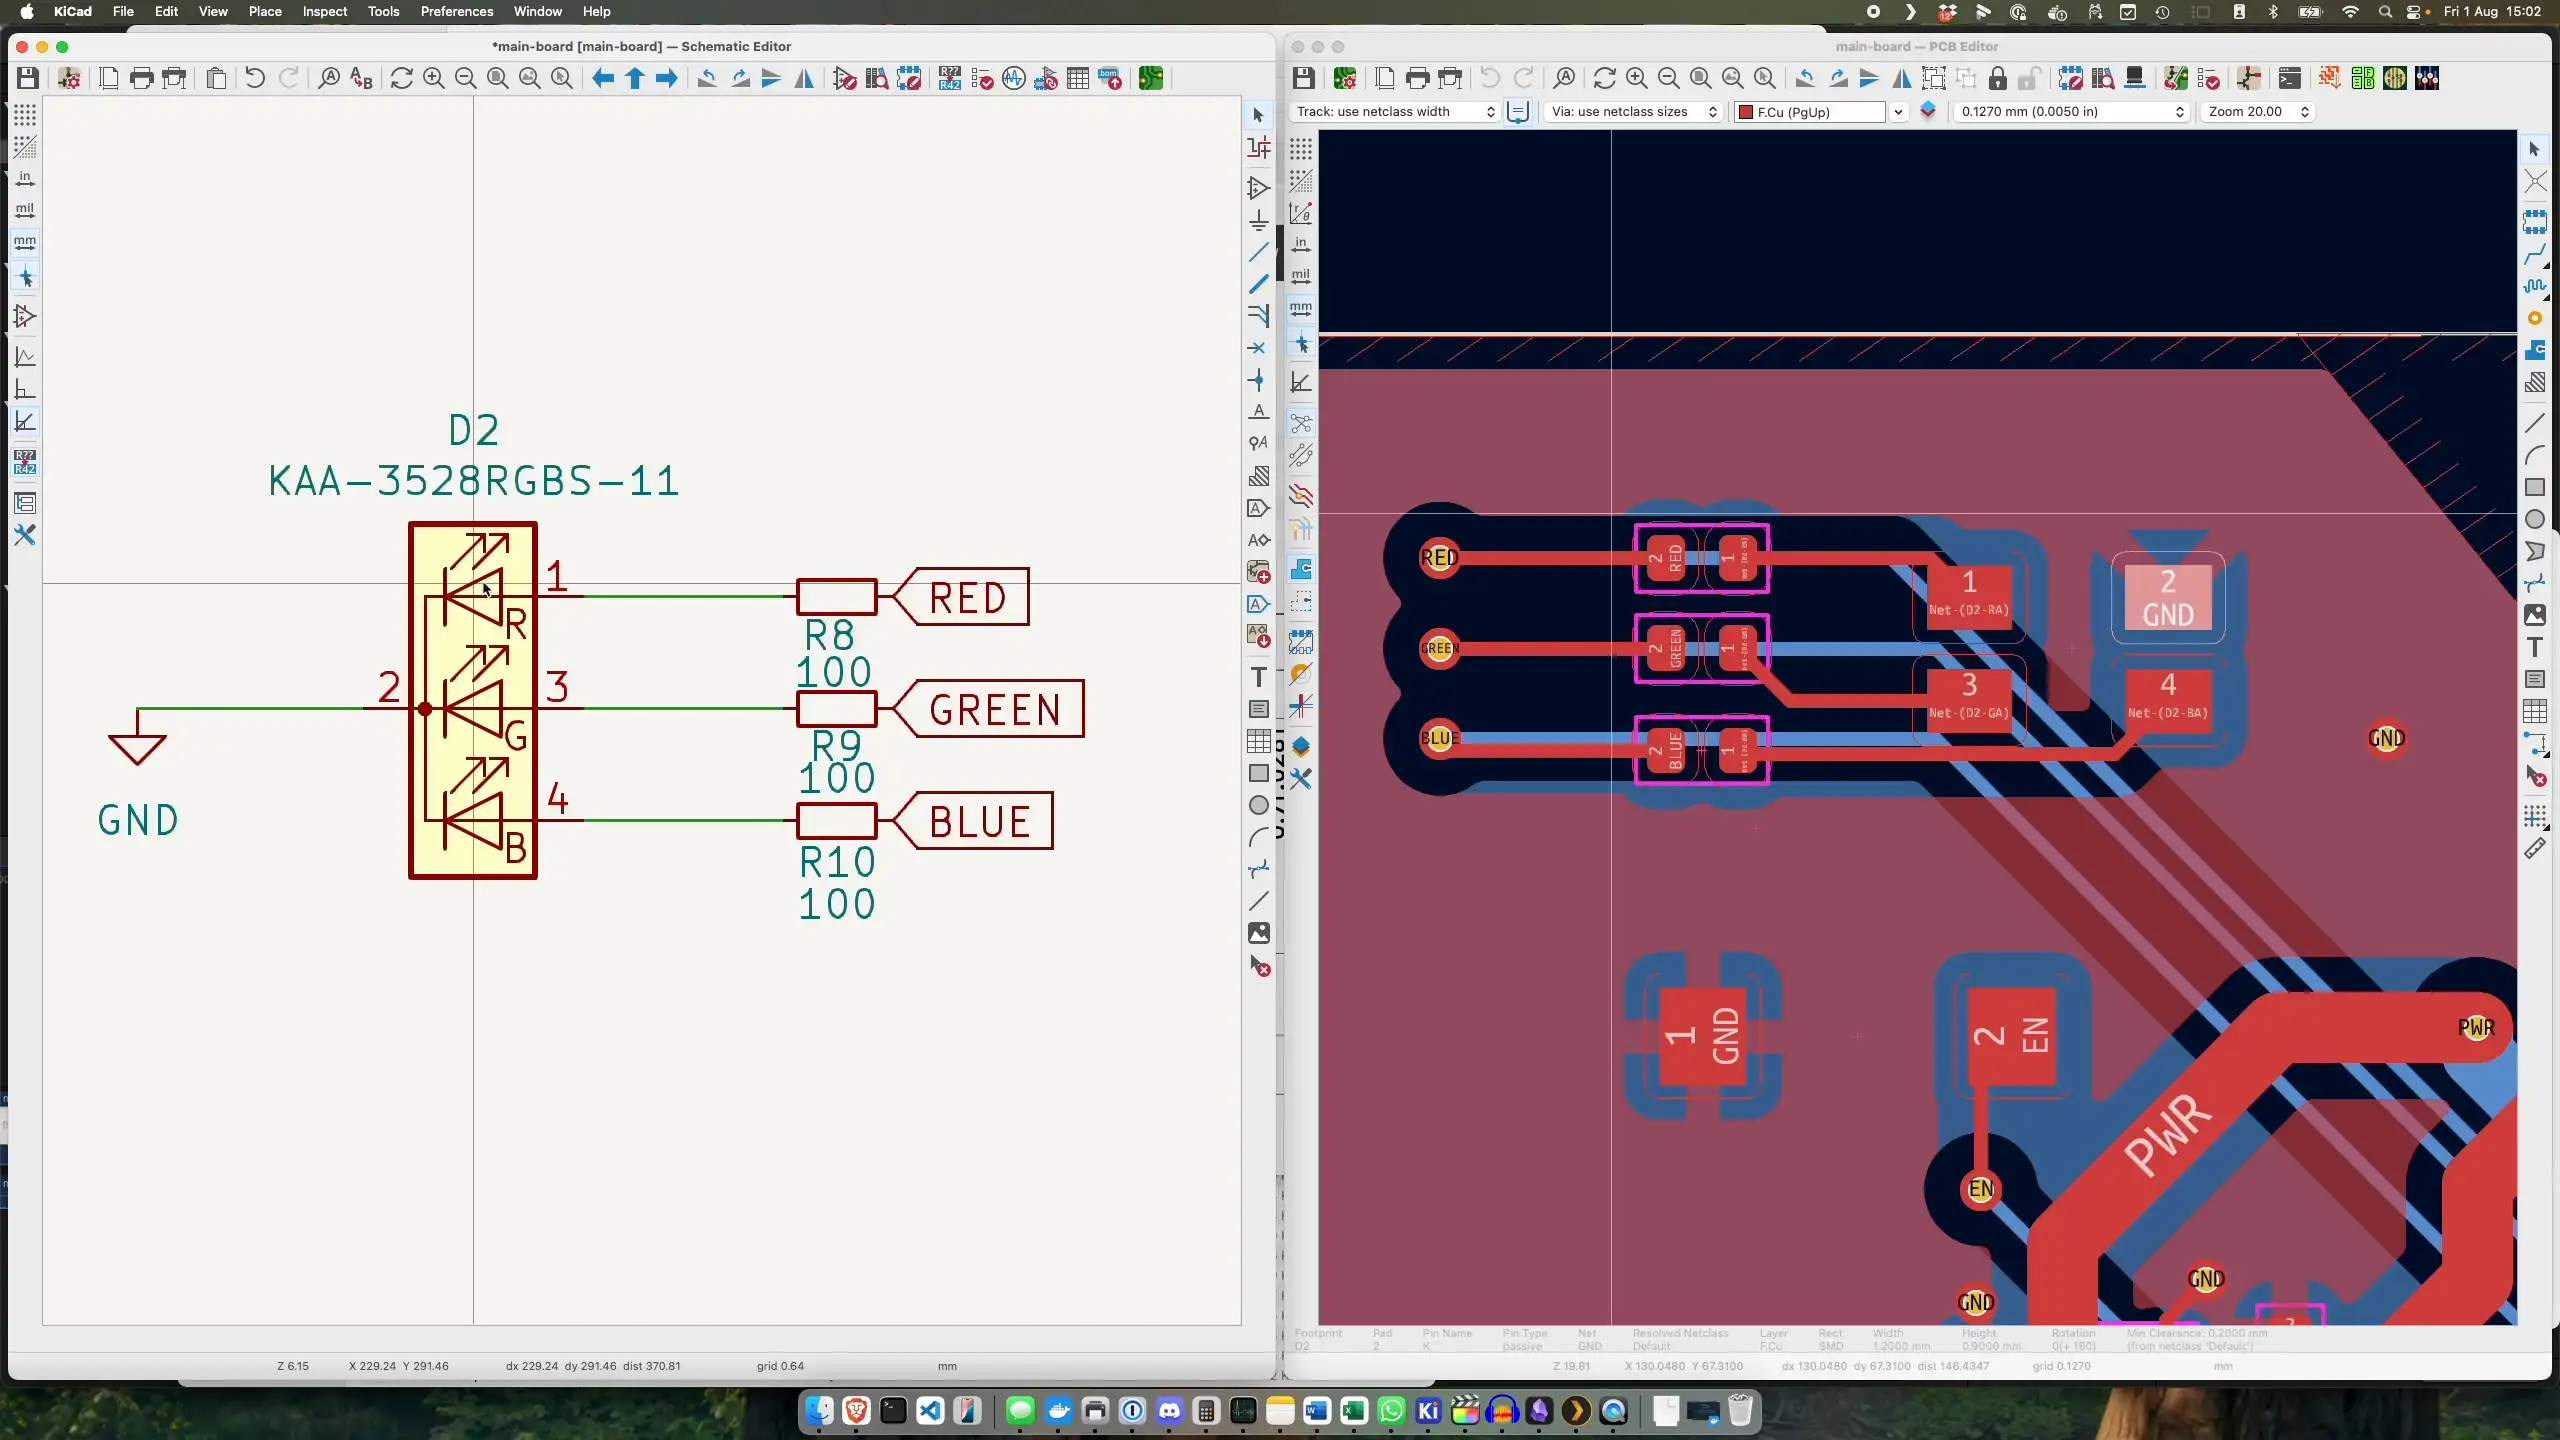
What went wrong? Common cathode, vs common anode. I designed the board for common cathode, and then specced common anode for the component.

Here’s the schematic and PCB layout.

Schematic and PCB

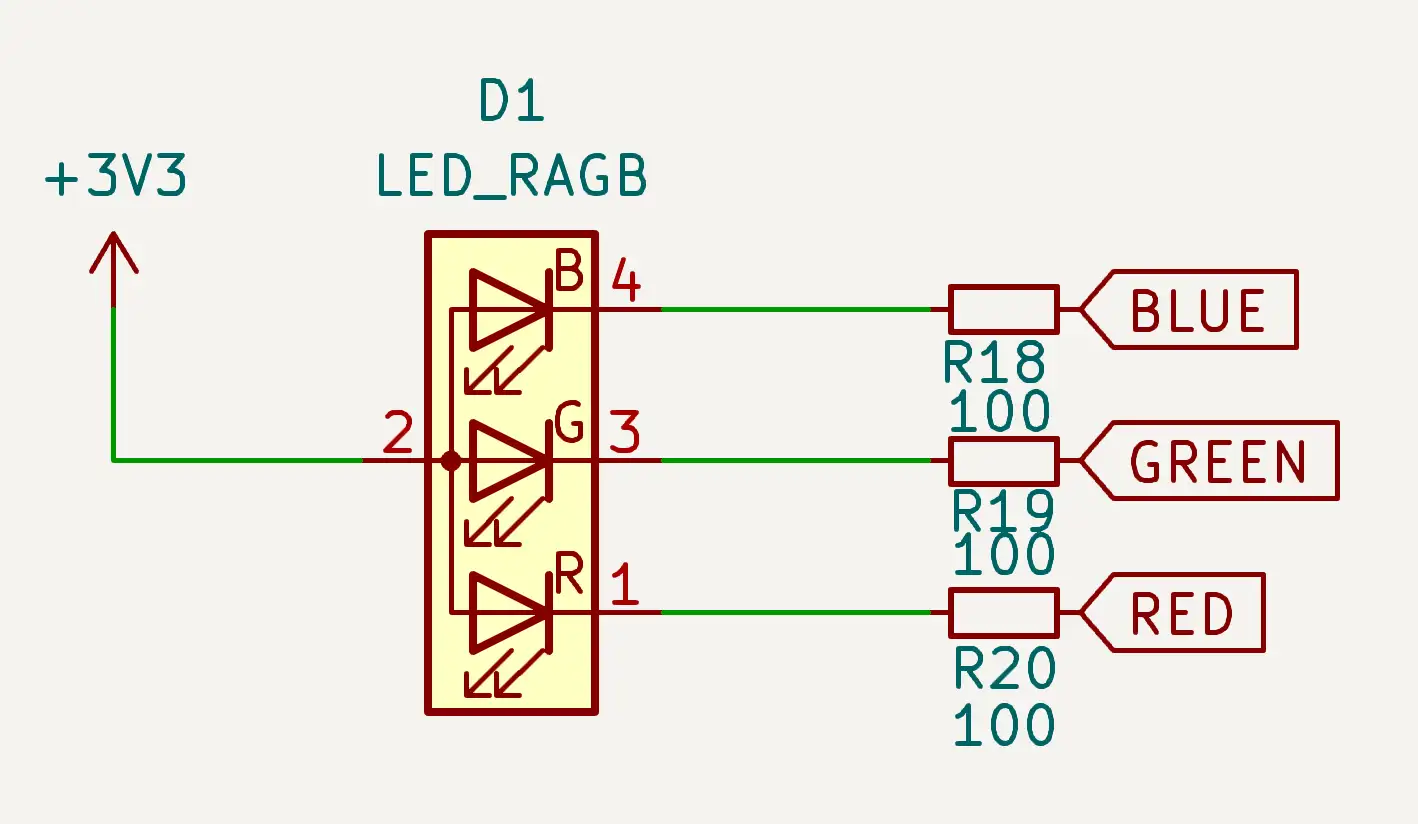
And here’s the correct schematic.

Correct schematic

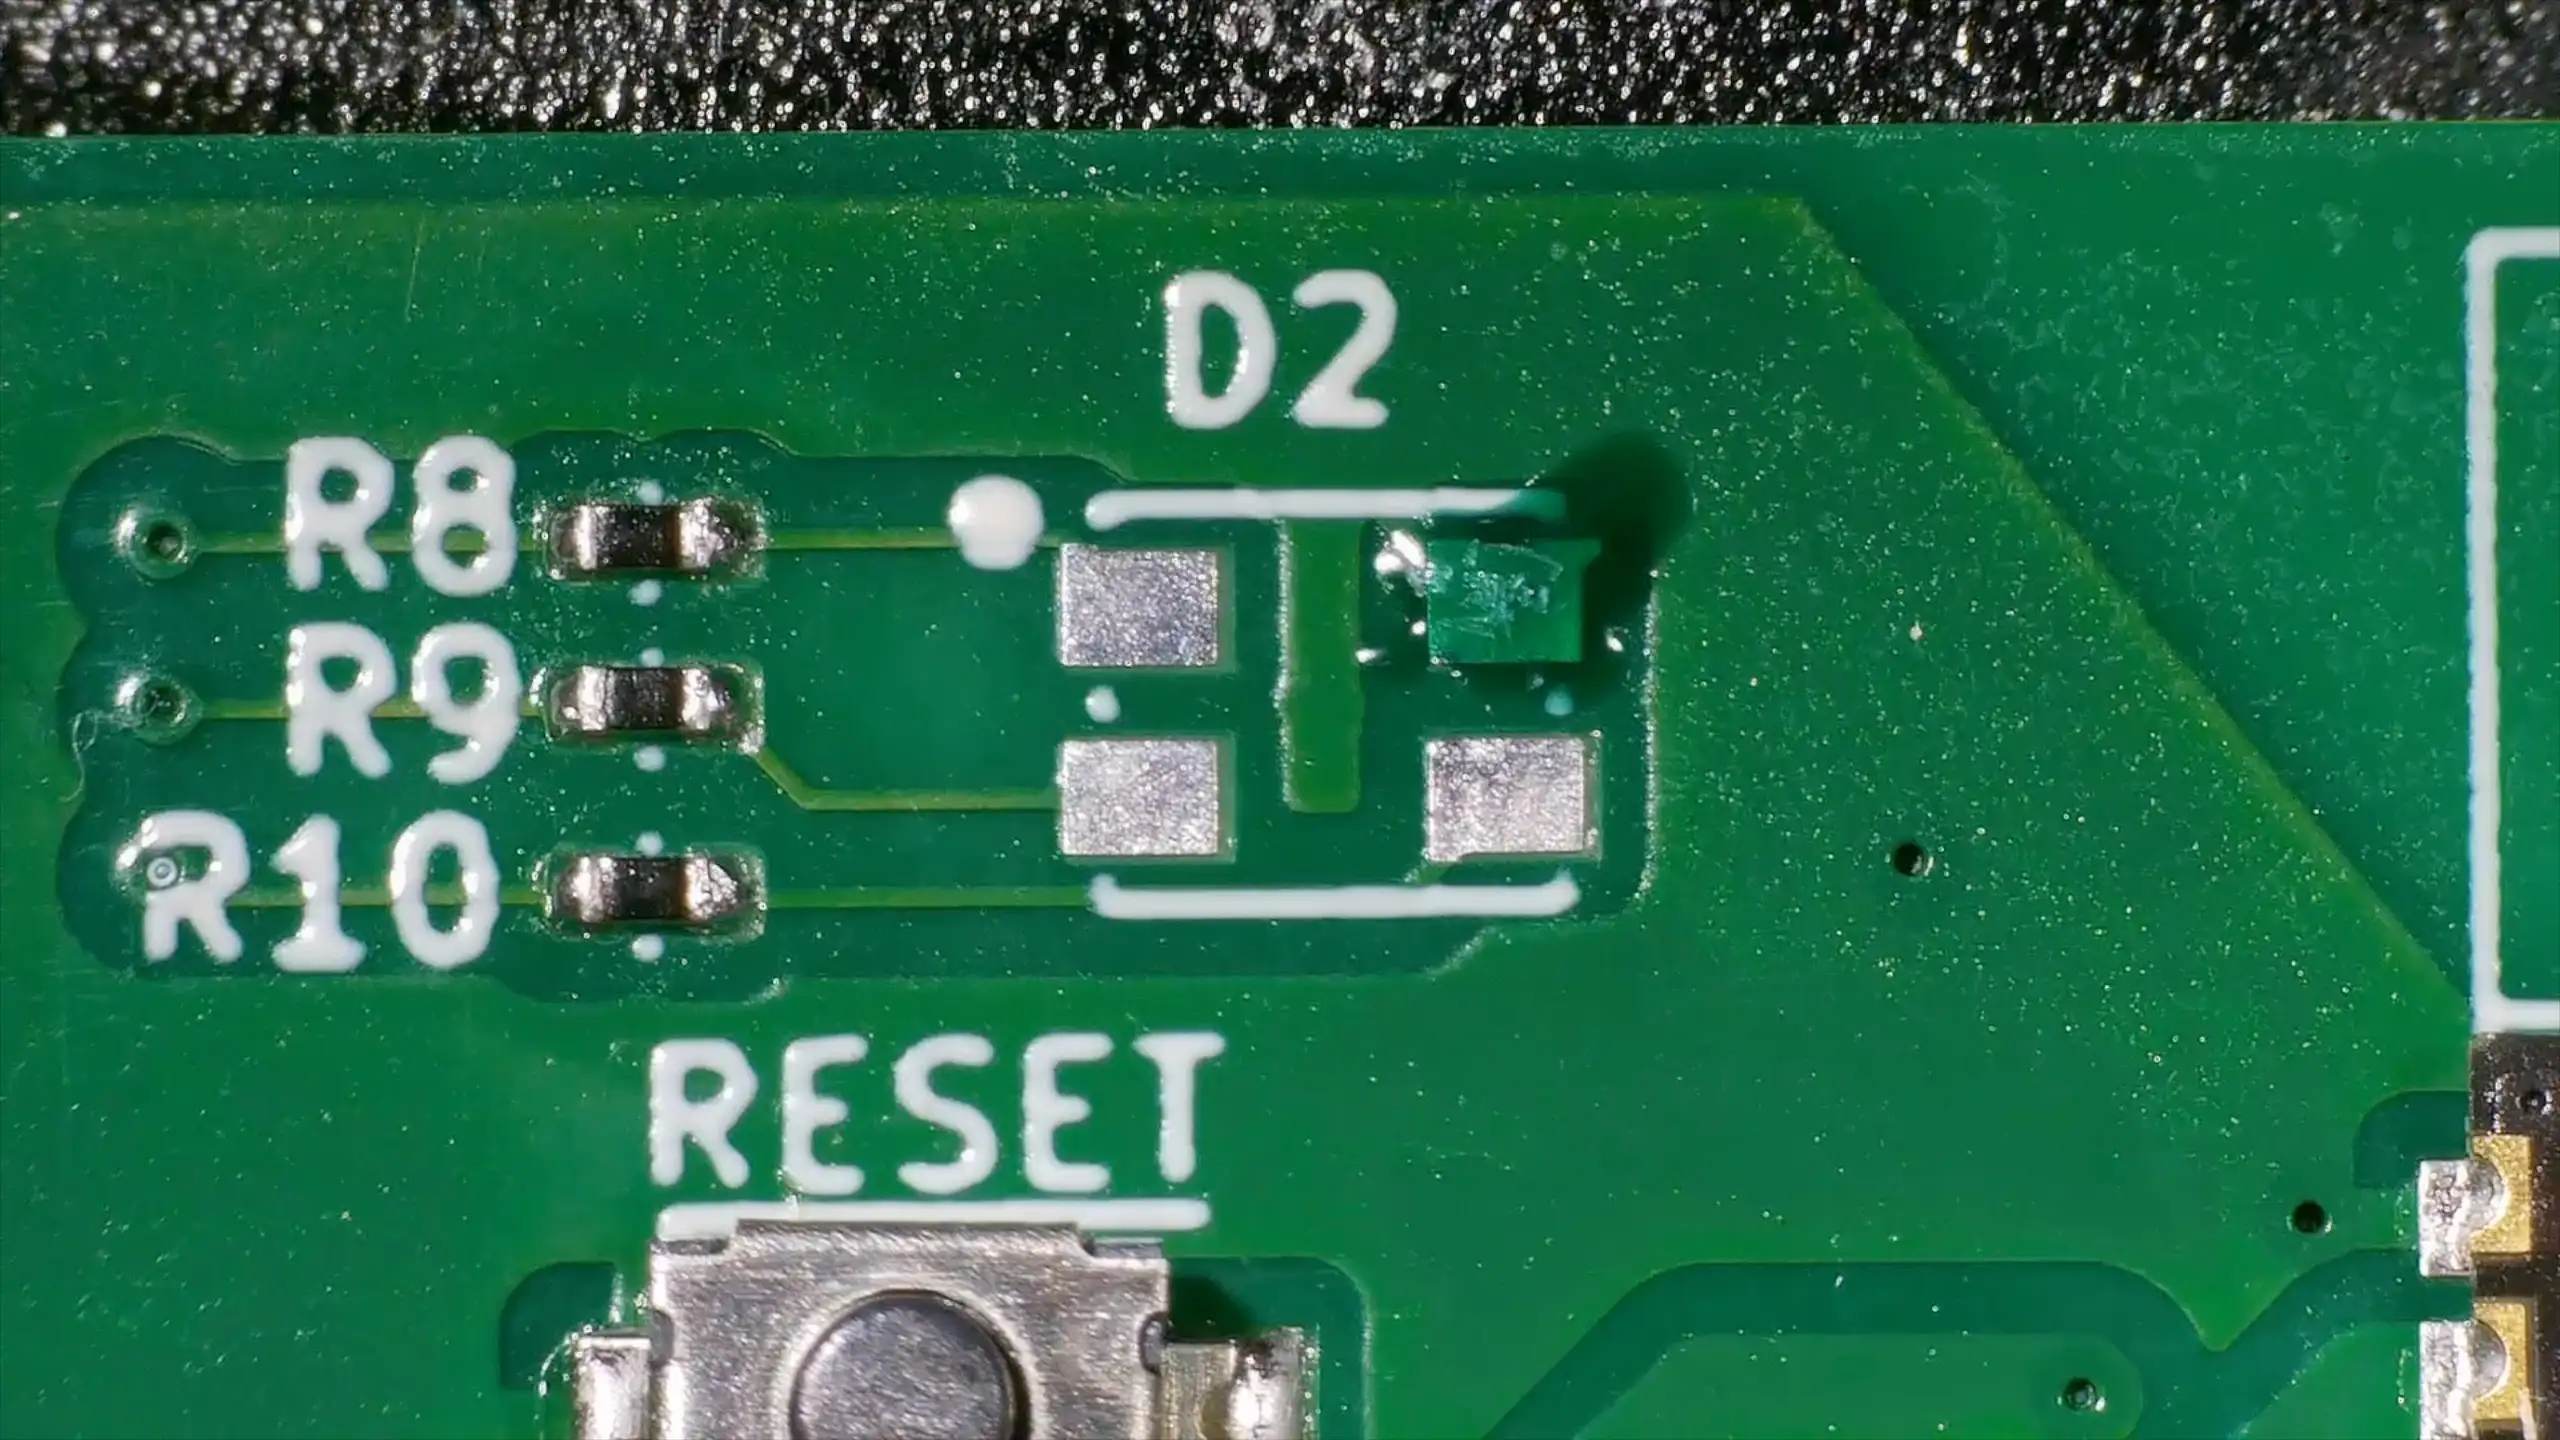
It’s not a difficult fix though - desolder the LED, and cover up the ground pad with solder resist.

Solder resist

And then solder the LED back on and attach a little wire to the 3V3 rail. This was a pain - and involved a lot of swearing.

Bodged

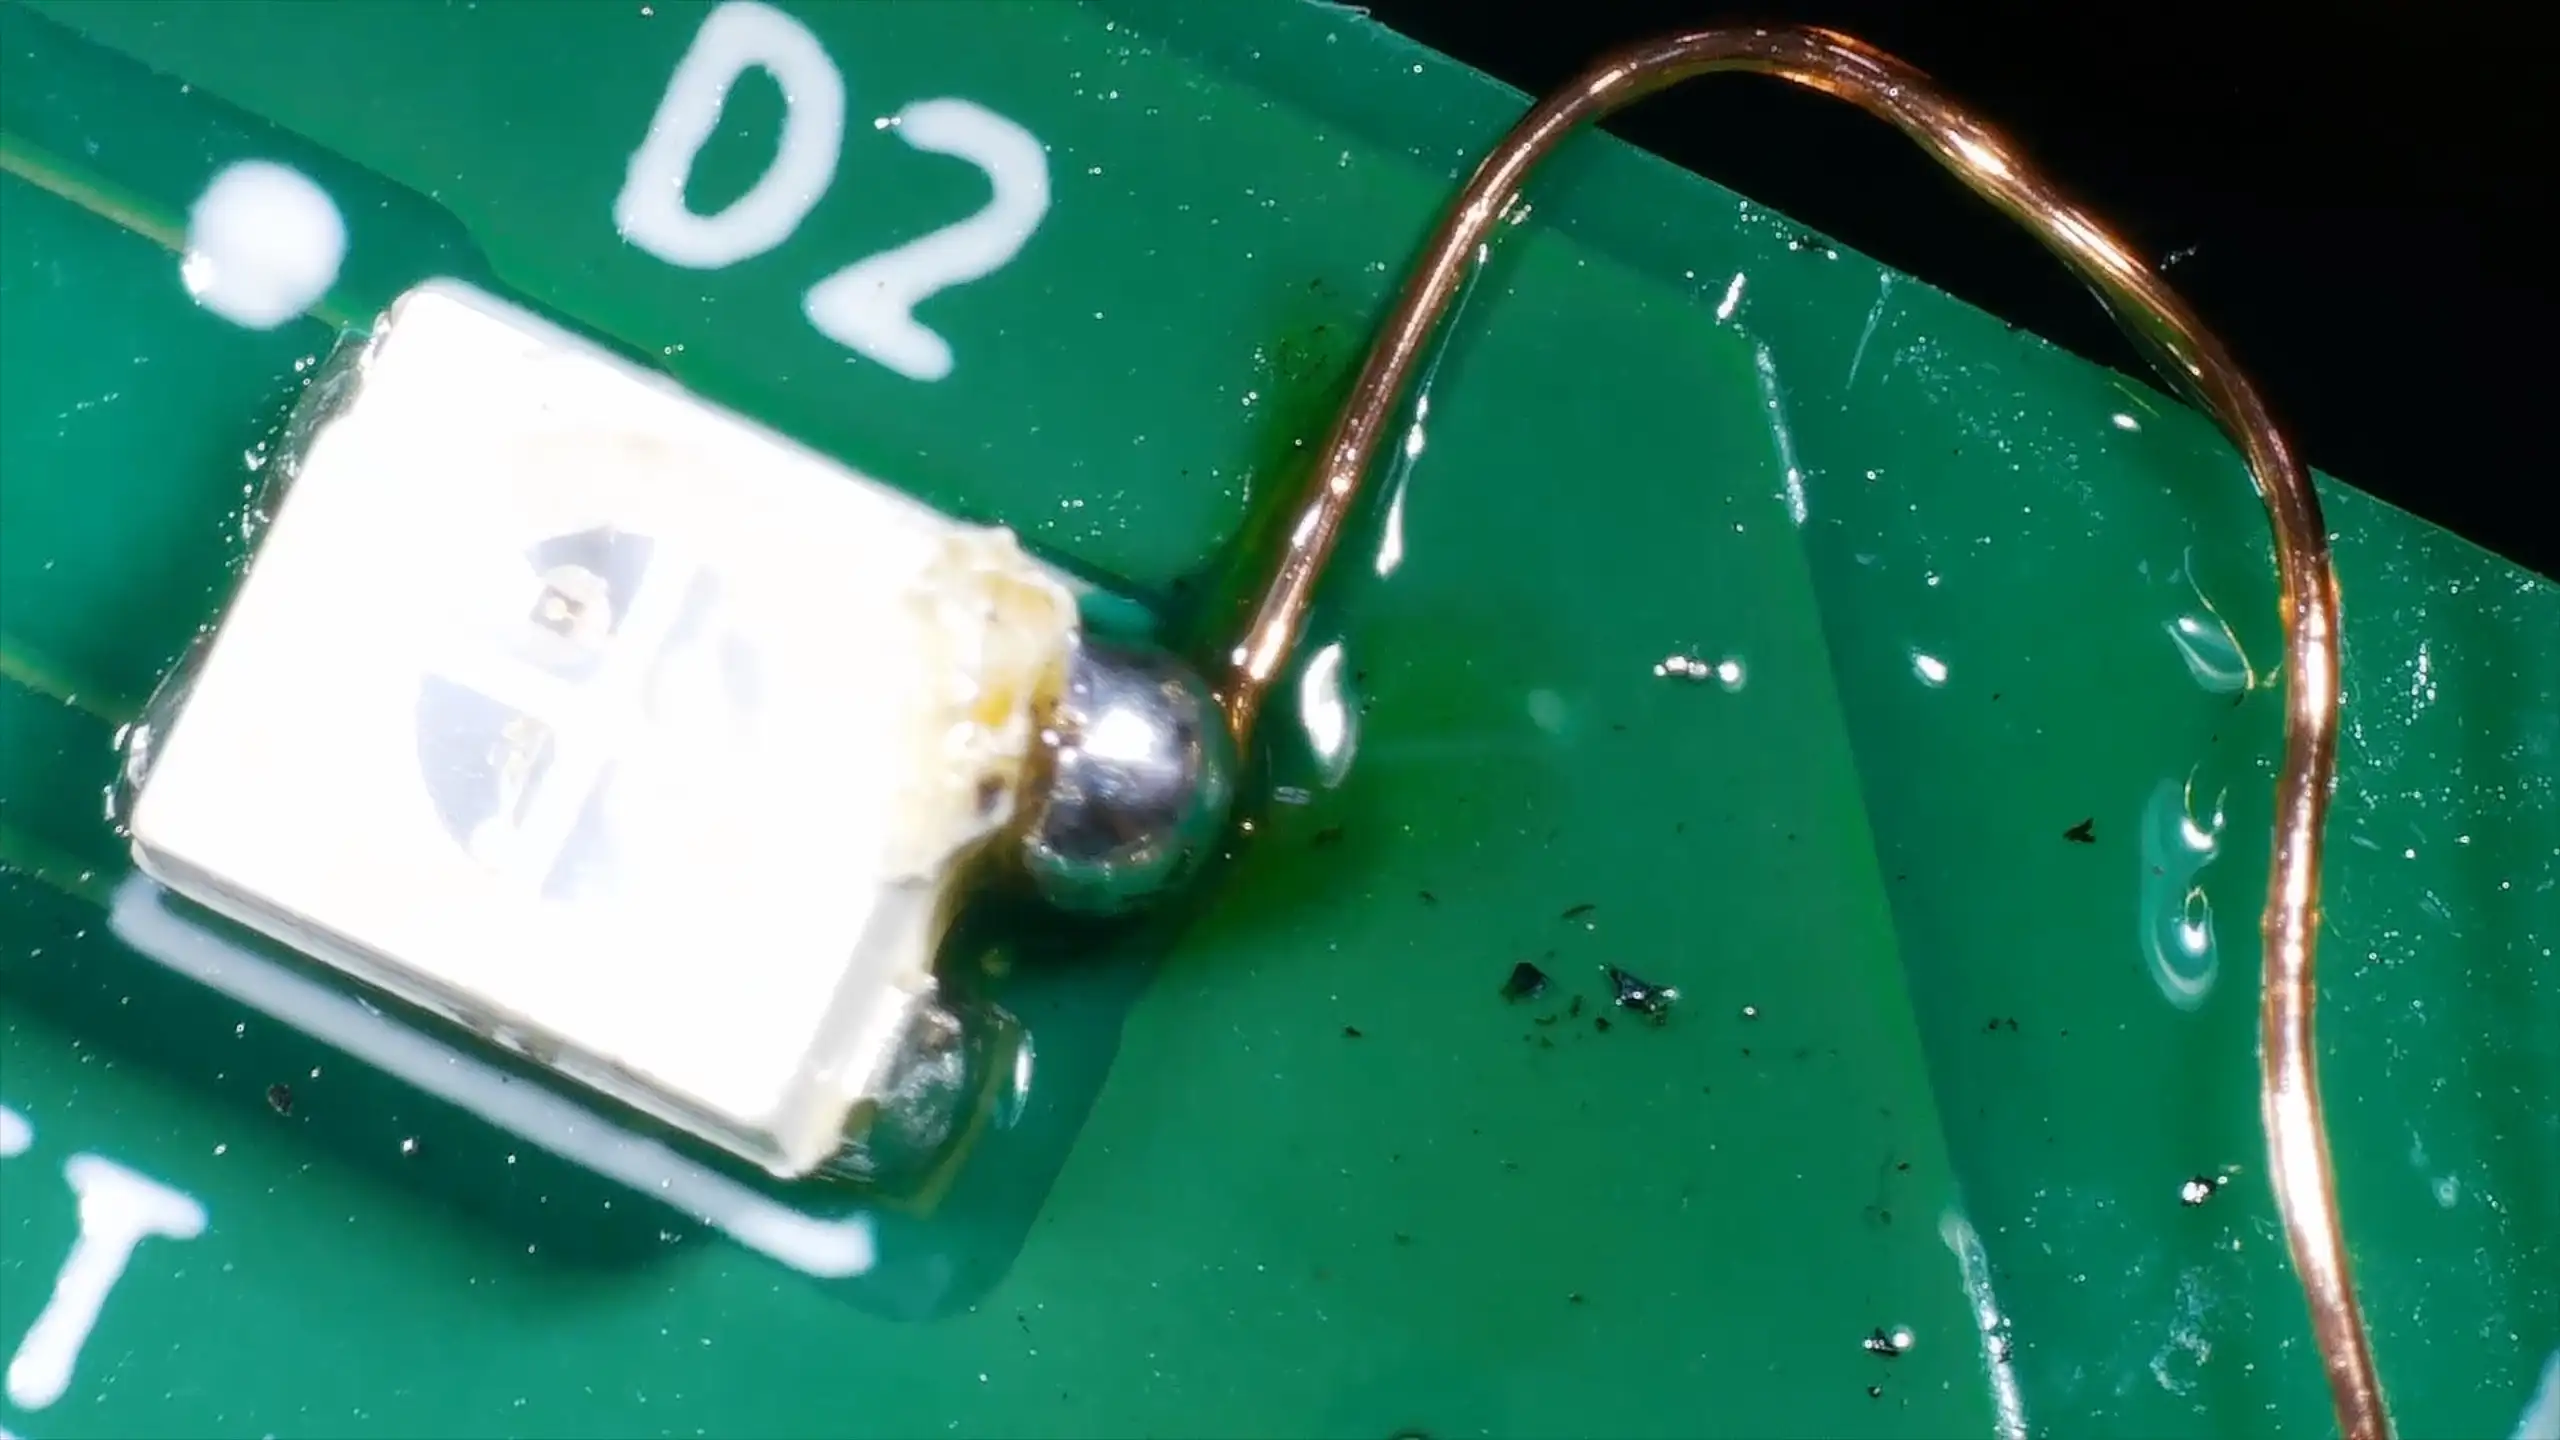
A working blink sketch appears!

Blink

#CIRCUIT DESIGN #DIY #ELECTRONICS #LED #PCB #TROUBLESHOOTING

Related Posts

The PCBs are in production - what have I messed up? - After some stress and trepidation, I finally took the plunge and sent my PCB design off for manufacturing. My design centers around building a large seven-segment clock with LED filaments. Jumping hurdles such as voltages, pin usage, and limiting the load on my power supply, I've settled on the ESP32 as the system's heart and come up with a final circuit design. While doing this, I've quickly realized I could improve my layout and fixed a small mistake. Also, I've prepared for either types of LED filaments - the high-voltage ones or the larger, 3v ones. However, I did bungle up a couple of things on the enable line of the shift registers and board layout. But hey, this is a learning curve, right? Can't wait to get the boards and see what other exciting errors surface!
It blew itself up! - I recently got my hands on a cheap mini handheld game console from AliExpress that gave up the ghost a bit sooner than expected! After some detective work with a multimeter, I found a dead battery and a suspicious burn mark on the PCB. Looks like the culprit was a failed capacitor, with some diodes to blame too. I managed to jump-start the board, though it lost its voice in the process. Replacement parts are on the way; stay tuned for the next round of electronic surgery!
Whats wrong with my lightbulbs - In the saga of my beleaguered light bulbs, I've found myself knee-deep in electrical components and a fair bit of frustration. Of the four LED bulbs I invested in, only one survives unscathed, while another's flickering demise is imminent. My investigation revealed overheating bases, resilient capacitors, and an interesting LED filament setup. Ultimately, it seems one LED strip in the bulbs went open circuit, setting off a cascading failure. It's been a journey through minor electrical engineering heartbreak, with some messy disassembly and a sprinkle of high voltage excitement!
Danger danger high voltage - In this blog post, I explore my experiments with high-voltage circuits, trying to light up LED filaments salvaged from broken light bulbs. Despite some explosive mishaps with capacitors and MOSFETs, I decided to try a proper DC-DC converter. Unfortunately, the one I got turned out to be faulty, highlighting some rough soldering and component failures. I've ordered replacements and hope to successfully light the filaments soon. Follow along on my troubleshooting journey with plenty of learning curves!
Hue Light Hack - In a fun-filled deep dive into a Philip's Hue Color light bulb, I disassembled, analyzed, and ultimately restored it to working order. Over the course of the hack, I dismantled the bulb’s interior, from the aluminum PCB to the tiny ICs on the logic board, gave a detailed breakdown of their functions and even reverse engineered the signals controlling the colors. Most of the colors worked out pretty well, except for the dodgy yellow. Also, I tried running the hacked bulb setup with my old Moonlamp project. It was a great challenge and an exciting journey!

Related Videos

Oops I Did It Again… Swapped VCC and GND, on My PCB 🙈 - Hey everyone! In this video, I made a little snafu with my PCB layout by confusing a common anode with a common cathode for my RGB LED. I walked through fixing it by a bit of desoldering, applying solder resist, and reconnecting with a fine wire. Thanks to PCB Way for their awesome service, and as always, all the mistakes you see are mine alone! It's all sorted now, and our LED is shining brightly once again. Let's take a look at the process!
Not what I was expecting! Why are all my lightbulbs failing? - So, we've been dealing with a little epidemic of light bulb failures in the house. I took apart a couple of dead bulbs to get to the bottom of what's going on. Turns out, one of the bulbs is kind of flickering and faintly working, while another bulb's base gets surprisingly warm. After some poking around, I found the PCB inside the bulb has a bridge rectifier and a LED driver IC, but all components test out fine! The investigation took a turn when I checked the LED filaments with a makeshift power supply, and surprise surprise, some filaments are completely dead. Still not sure what's causing these failures, but it was fun to tinker!
1024 LEDs - WLED Flame Lamp - Today we're elbow-deep in LEDs for another exciting project — we're building a high-resolution flame lamp! Kick-starting the endeavour with a 1024-pixel LED matrix, we proceed to throw in the towel with a faulty old flame lamp boasting a mere 300 LEDs. Mislabelled PCBs and questionable diodes keep us on our toes, making this undertaking a little more Sparky than usual. With the help of competitive soldering skills, a beefy 5V power supply and a 3D printer, we channel our inner Edison to bring our LED matrix to light. After a pinch of struggle, our LED matrix rollercoasters into a tube shape, faintly resembling our coveted flame lamp. Tune in to bask in the warm (or cool) glow of our LED flame lamp.
Dodgy circuit could have caused a fire! - So, I got this red mini handheld game thing from AliExpress and it died pretty quickly. After a bit of tinkering, I found that it still draws current but isn't turning on because of a dead battery and a burnt voltage regulator. I removed the faulty components and injected 3.3 volts directly into the system, and guess what? The screen lights up and it works, but there's no sound. Despite the hiccup with my microscope, which stopped recording some interesting bits, you get the picture. It's partly revived but not quite there yet. Big shout out to PCB way who help us out with PCBs!
DIY SMD Wireless LED Lights: Better than Store-Bought? - Learn how to create sleek, wireless LEDs using surface mount components! This tutorial demonstrates the soldering process for a 0503 inductor package, 1206 size LEDs, and capacitors, providing an attractive alternative to through-hole components.
HELP SUPPORT MY WORK: If you're feeling flush then please stop by Patreon Or you can make a one off donation via ko-fi
Want to keep up to date with the latest posts and videos? Subscribe to the newsletter
Blog Logo

Chris Greening


Published

> Image

atomic14

A collection of slightly mad projects, instructive/educational videos, and generally interesting stuff. Building projects around the Arduino and ESP32 platforms - we'll be exploring AI, Computer Vision, Audio, 3D Printing - it may get a bit eclectic...

View All Posts