HELP SUPPORT MY WORK: If you're feeling flush then please stop by Patreon Or you can make a one off donation via ko-fi
I recently picked up a cheap mini handheld game console from AliExpress. It’s a nifty little red unit that boasts dozens of retro games – or at least it did, until it suddenly refused to power on.

You can get one for yourself here.
And you can watch me try and diagnose the issue in this video:
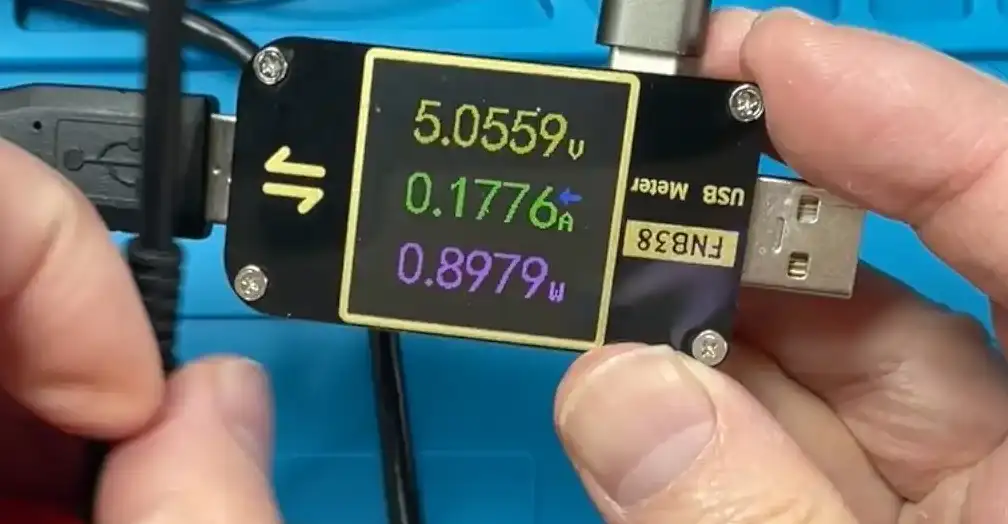
My first guess was that the battery had died completely, so I tried to power it directly from USB. Weirdly, it did draw some power — around 200 mA — but nothing worked.

The console has a removable rechargeable battery, one of those slim lithium-ion packs originally made for old feature phones. I pulled out the battery to test it, and unsurprisingly it was completely flat – my multimeter read only about 0.03 V (basically zero). A healthy charged Li-ion should be around 3.7–4.2 V, so clearly the battery had been drained to oblivion. Checking the battery terminals, there’s a dead short between them, which explains the dead battery.

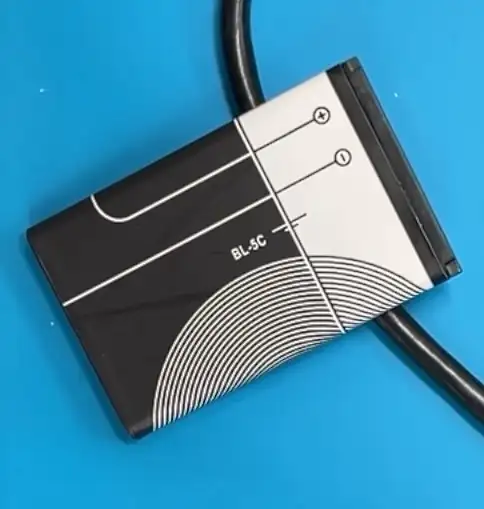
These batteries seem to be very popular and keep cropping up in these little arcade machines.
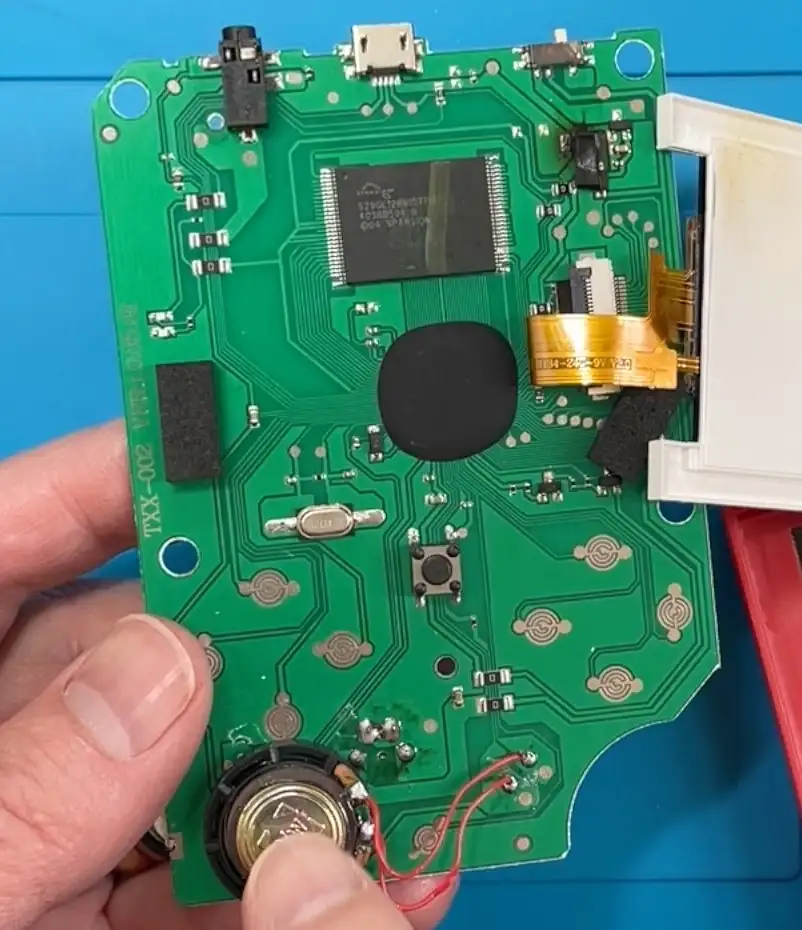
The PCB inside is very minimal, as expected for these inexpensive devices. There’s not much beyond the essentials: a black epoxy “blob” chip (COB) that contains the main game logic, a flash memory chip that stores all the games, a little crystal oscillator, a speaker, and some buttons and wiring. In fact, the design is so bare-bones that the PCB is single-sided (all components on one side and a few 0-ohm resistor links for routing). It’s impressive how these manufacturers cost-optimize everything.

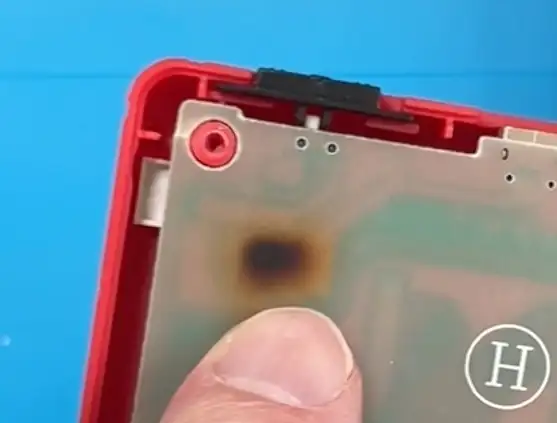
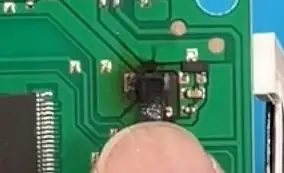
One thing that did immediately jump out - there’s a very obvious burn mark on the back of the PCB.

And flipping the board over we can see a couple of badly damaged components near the voltage regulator.

Tracing the circuit - this looks well dodgy. From what I can tell, they take 5 V from USB, drop it across a couple of diodes, and then feed that straight into the battery! Not a great idea…
There’s only one component on the battery side of the switch, a small decoupling capacitor - removing this got rid of the short.

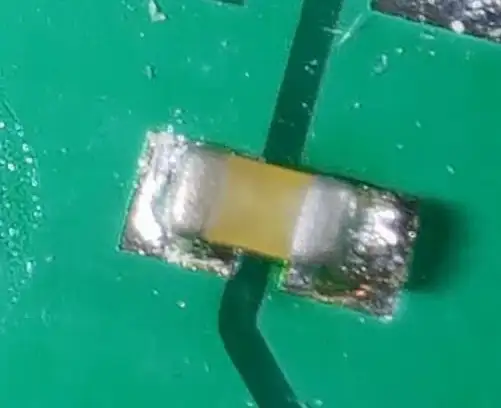
My best guess is, I had it on charge, the capacitor failed and went short circuit. This pulled a large amount of current through the diodes, burning them out, and then it drained the battery flat.
Jump-Starting the Board
I tried injecting 5 V directly into the voltage regulator, to see if that was working, but it looks like that is damaged as well - I’ve ordered a replacement.
Putting 3V3 in after the regulator does work! The display comes on.

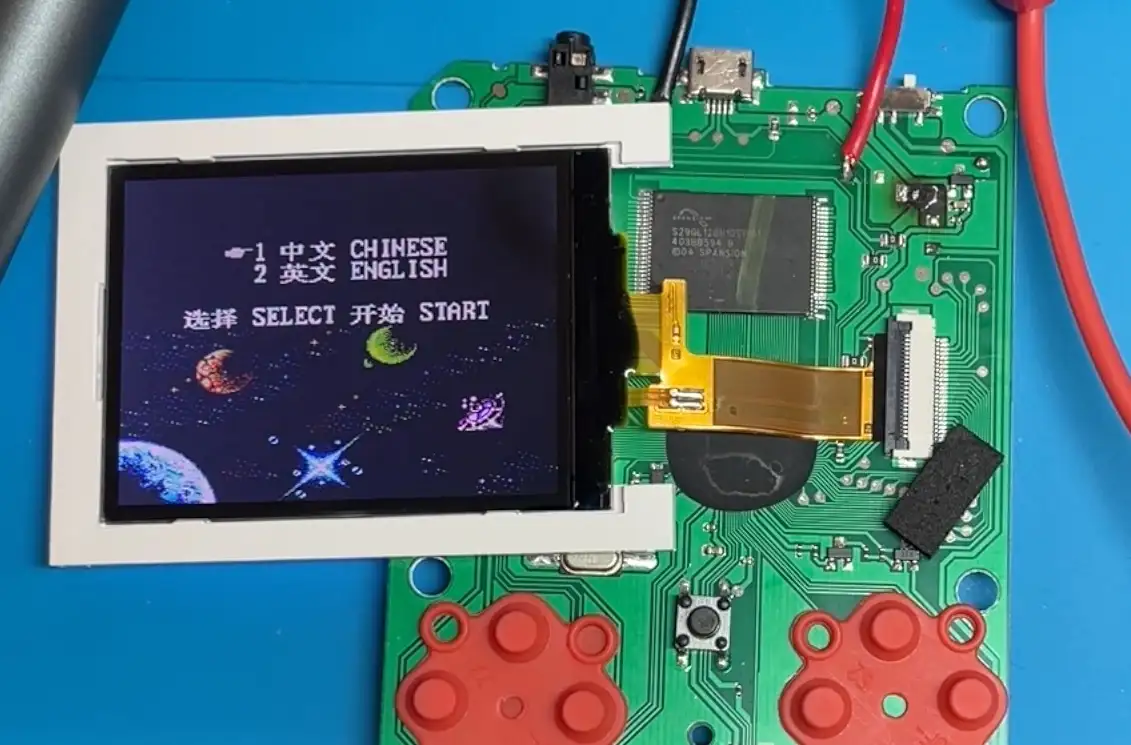
The Console Lives, But No Sound
The only problem is we’re not getting any sound. I tried swapping the speaker, but no joy.
So, I’m waiting on a replacement regulator. As soon as that arrives we’ll do a bit of surgery and swap out the misbehaving one. And then we’ll do something about the battery charging nonsense.
Related Posts
I broke it and then i fixed it - Started off on a techie adventure with an RP2040 DVI board from Adafruit, aiming to get the pico-zxspectrum going. Things started acting haywire once the USB hub got involved, ending in a complete shutdown, intuitive diagnosis showed the power pin was a ghost town! After pin-pointing (and removing) the dead IC, I performed a delicate soldering operation to bless it with a new 3V3 regulator. Working the kinks out with the resolution led to a thrilling revival and, voila, we were back in business with DVI output and SD Card support!
Oops I Did It Again - New PCBs have arrived, but of course, things didn't go as planned! The simplest part, the LED, was a bust due to a common anode vs. common cathode mix-up in the design. Thankfully, the fix wasn't too tough: just needed some good ol' solder resist, a bit of desoldering and resoldering, and a bit of a workaround to get it blinking right—and yes, it involved a fair amount of swearing!
Danger danger high voltage - In this blog post, I explore my experiments with high-voltage circuits, trying to light up LED filaments salvaged from broken light bulbs. Despite some explosive mishaps with capacitors and MOSFETs, I decided to try a proper DC-DC converter. Unfortunately, the one I got turned out to be faulty, highlighting some rough soldering and component failures. I've ordered replacements and hope to successfully light the filaments soon. Follow along on my troubleshooting journey with plenty of learning curves!
16 bit mini handheld video arcade - Disassembling a 16-bit mini handheld video arcade revealed a fairly uncomplex interior with most of the functionality being handled by a blob chip on a single-sided PCB. Despite the simplicity, the impressive design manages to fit 156 games into flash storage on a multi-layered daughter board, which helps simplify the main board's design. While not as hackable as hoped, the teardown provided an interesting glimpse into the device's construction.
Worlds smallest USB-C Li-Ion charger - I stumbled upon these incredibly tiny USB-C Li-ion chargers on AliExpress and couldn't resist checking them out! These minuscule PCBs, just 10mm x 6mm, feature the LP4054 (or TP4054) linear battery charger. With a 1.65K programming resistor, they offer a charging current of around 600mA. Keep in mind, they can get pretty toasty, reaching up to 92-93C! For fun, I tried recreating them in KiCad and found it surprisingly easy.
Related Videos
Looks like this blew itself up! - So, I got this red mini handheld game thing from AliExpress and it died pretty quickly. After a bit of tinkering, I found that it still draws current but isn't turning on because of a dead battery and a burnt voltage regulator. I removed the faulty components and injected 3.3 volts directly into the system, and guess what? The screen lights up and it works, but there's no sound. Despite the hiccup with my microscope, which stopped recording some interesting bits, you get the picture. It's partly revived but not quite there yet. Big shout out to PCB way who help us out with PCBs!
Mysterious Battery Drain Solved: Rechargeable LED Lights Mystery - Discover the intriguing issue of faulty tp4056 chips causing battery drainage and how to solve it using a DIY power board. Learn how a customized PCB, created with PCB way, can be designed to improve battery life and ensure a stable voltage output.
ESP32 Touch Spectrum - Battery and Expansion port test. - It's time for a bit more testing of the boards from PCB Way, and I must say, these boards have come out amazingly well. Check out PCB Way – there's a link in the description! Today, we're focusing on testing the battery charging and the expansion port. The battery charging circuit seems successful, and even when playing music, everything is running efficiently. I've looked into some optimizations for the speaker side, such as adding more decoupling capacitors. We also tested the expansion port, successfully running an emulator on the Pico that drives the display via the expansion port. Excitingly, I wired up an HDMI breakout board and now we have a big screen! This is still experimental, but it's looking promising. Next steps include more focus on EMI and EMC as we prepare for production. Stay tuned for more updates!
Another Street Battery Salvage - In this video, I plucked a battery from a Honey Melon street crystal, ending up with another 500-milliamp hour battery to add to my growing collection. After checking the connection, I added a protective PCB and tested the battery - a reasonable 3.5 volts at a flat level. Following the safe soldering of wires and wrapping it up, I hooked the revamped battery to my charger. It showed promising results, charging quickly at one amp with voltage visibly on rise. After a full recharge, I performed a load test which unfortunately gave a disappointing 311 milliamp hour. It falls short of my other salvaged batteries – 500 and 550 milliamp hour, but nonetheless, it’s a fine addition to the collection.
Surprisingly not CR*P - Vibing hardware - Well folks, what an adventure! After vibe coding our vibing button, I took up the challenge to vibe code the actual hardware for an ESP32 S3 dev board. Used a tool called at pile and gave it a whirl with some AI help from Claude. Interestingly, it handled everything from sourcing components with LCSC part numbers to wiring them up. Had a wee hiccup with missing capacitor in the RC circuit, but overall it was a thrilling ride watching the AI process! A bit of tweaking here and there, and we're good to go! Can't wait to see it in action.
HELP SUPPORT MY WORK: If you're feeling flush then please stop by Patreon Or you can make a one off donation via ko-fi