Fixing the Arcade Handheld – Voltage Regulators, Dead Batteries, and a Bit of Soldering
In my last post, I showed how this little arcade handheld from AliExpress had completely died. The screen was blank, the battery was flat, and the power circuitry had gone to silicon heaven.

You can get one for yourself here.
This time, I’ve gathered all the bits I need to bring it back to life. Let’s see if we can actually get this thing working again.
Replacing the Voltage Regulator
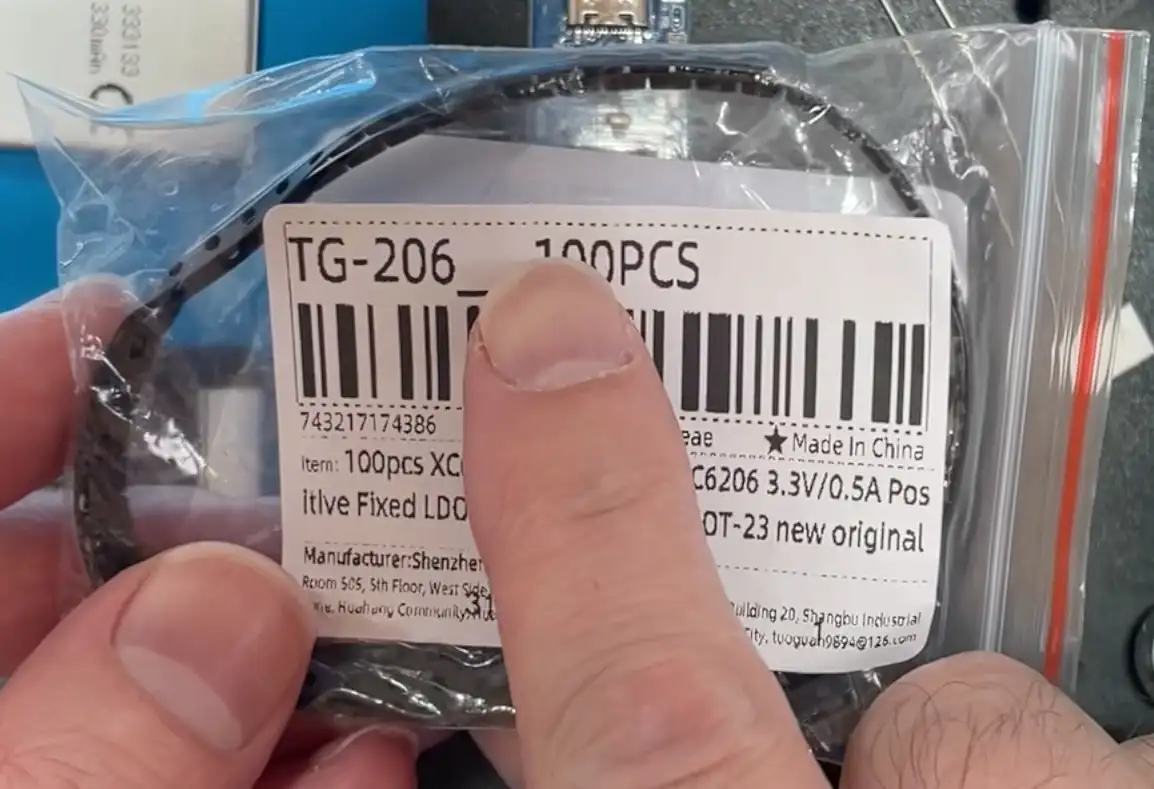
The main culprit in the first teardown was the voltage regulator. Sadly, you can’t just order one of these – I had to buy a bag of 100. So, if anyone needs a spare, I’ve got 99 going cheap…
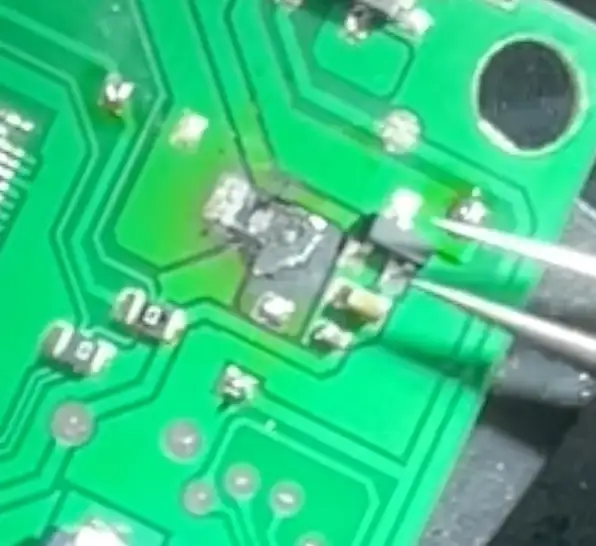
I fired up my trusty mini hot plate, dropped the board on, and carefully heated the old regulator off the PCB. A little messy, but the replacement went on without too much drama. A quick touch-up with the soldering iron and we had a new regulator in place.
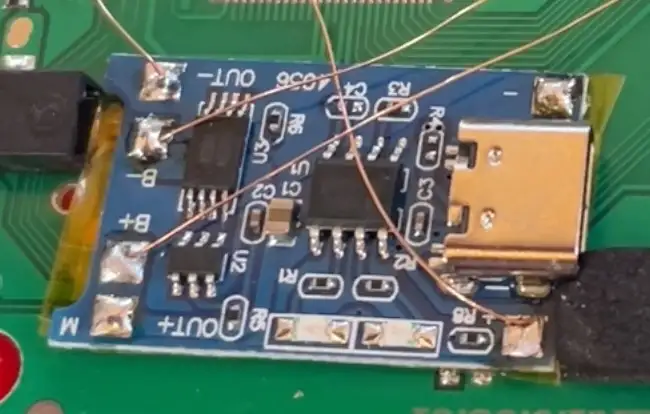
Charging Circuit – The Missing Piece
One of the big surprises with this console was the total lack of charging circuitry. The USB port connects straight in, no protection, no control – nothing.
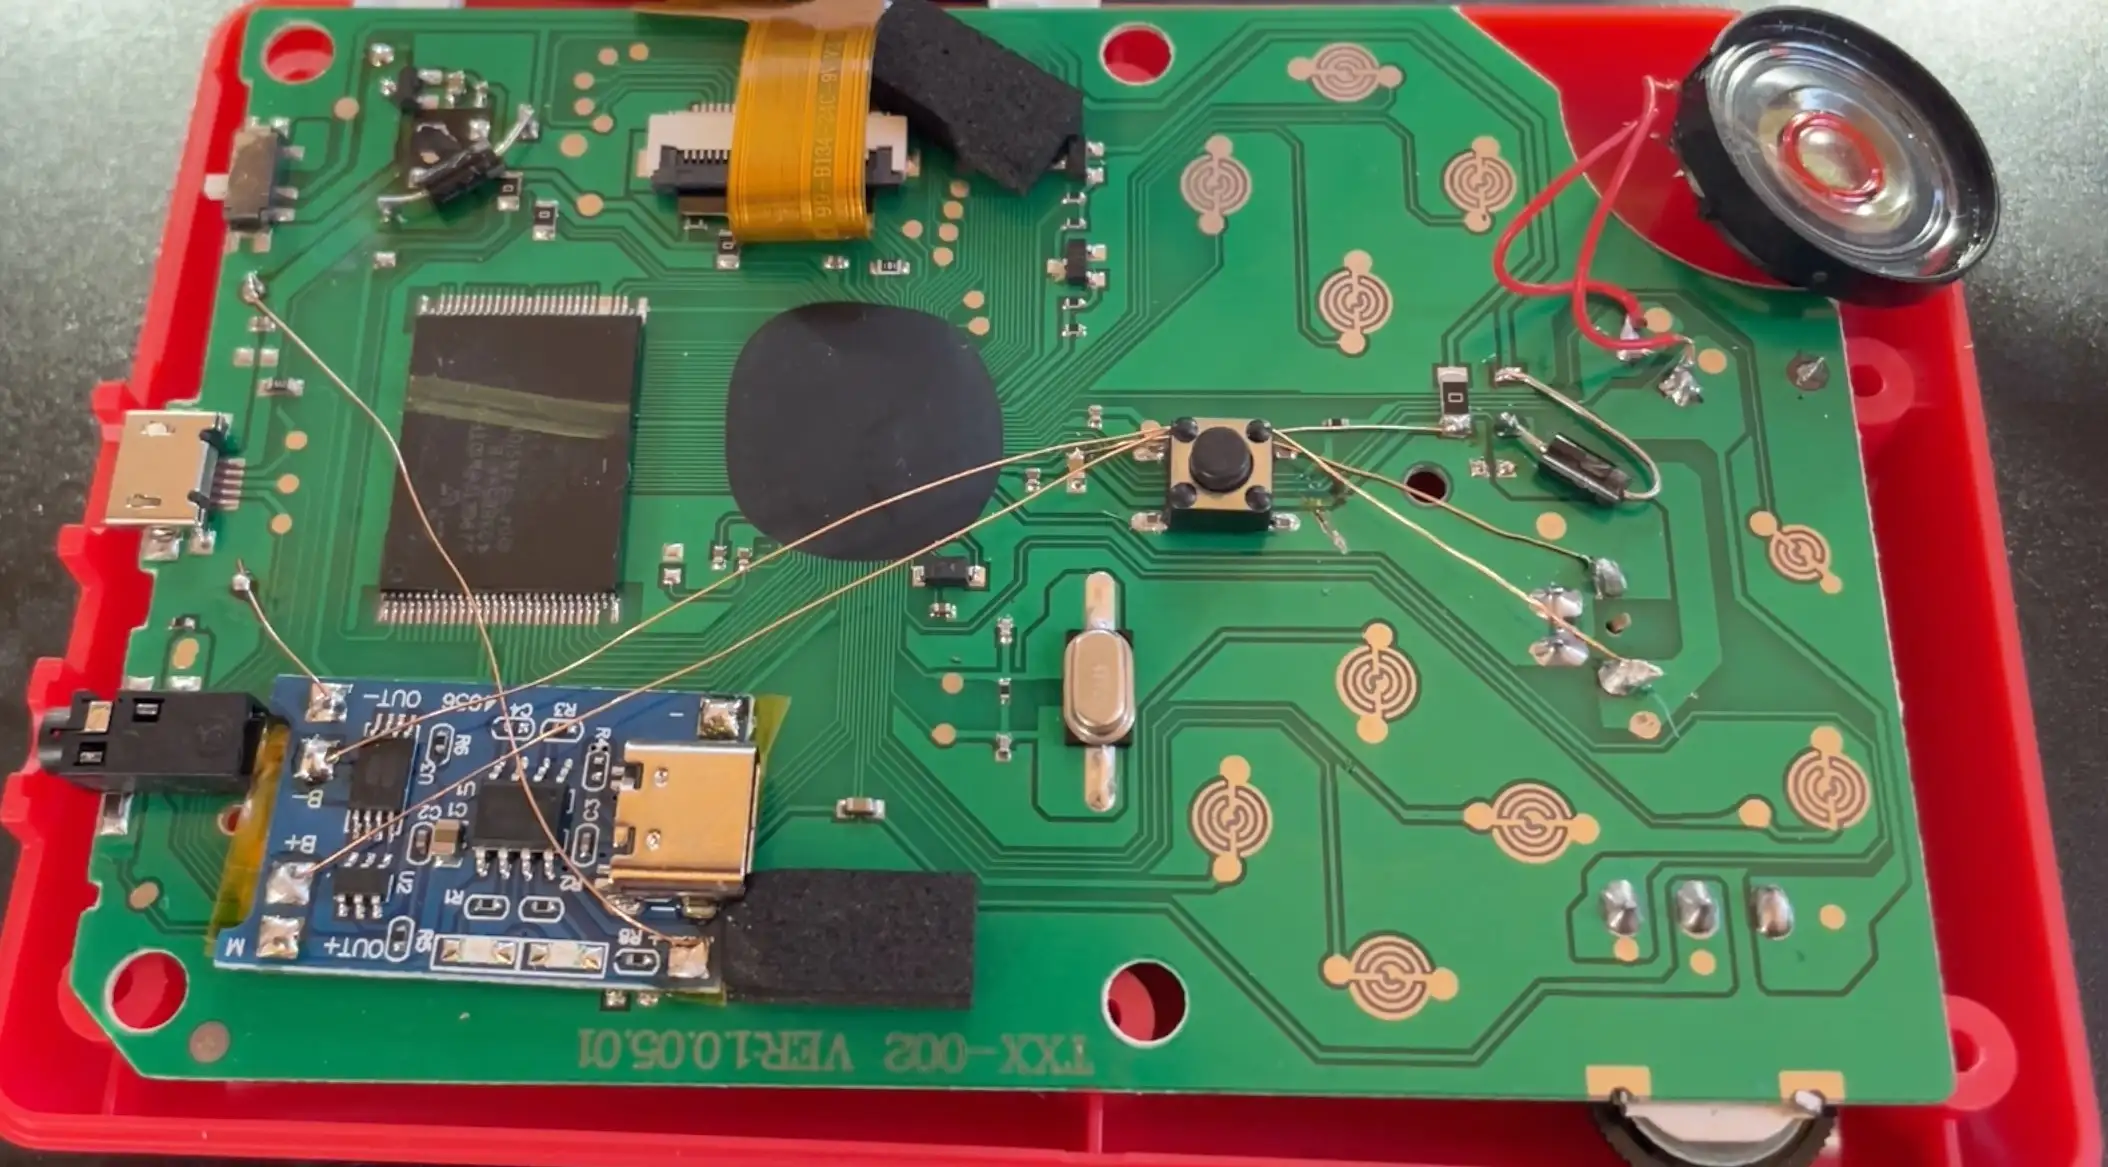
To fix this, I dropped in one of those classic TP4056 charger boards. These are cheap, reliable, and just the right size to tuck inside the case.
I also added a couple of Schottky diodes so I could isolate the USB 5V line from the battery line. That way, charging works properly without feeding power back where it shouldn’t go.
The Dead Battery Problem
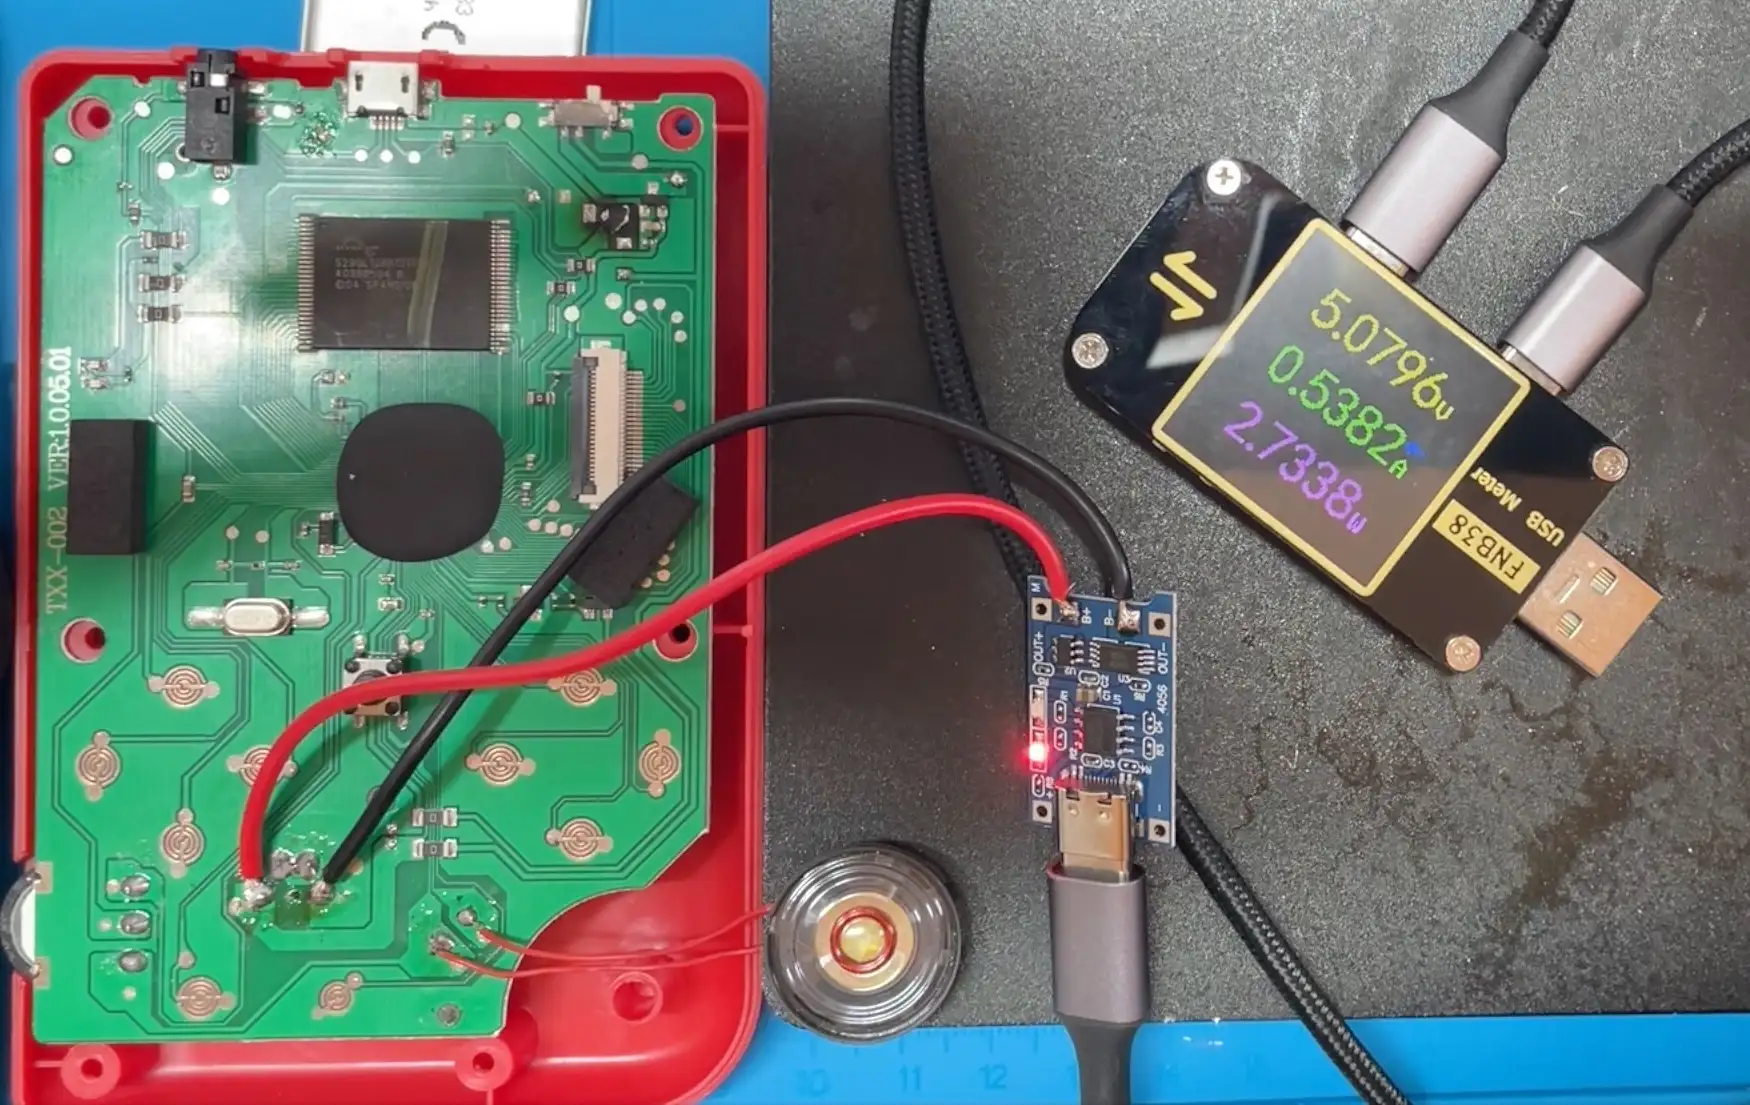
Before any of that could work, I had to see if the original battery was even salvageable. It was reading 0 volts – not a good sign.
I wired it up to the charger board and, to my surprise, it started to come back to life. The multimeter showed the voltage climbing steadily, and the board’s little LED flicked from red to blue once the charge kicked in.
Wiring Everything Together
With the regulator swapped and the charger behaving, I wired 5V from the USB input across to the new board. Ground, battery positive, and battery negative all found neat test points on the main PCB.
After removing the rattly little speaker (why didn’t I do that earlier?), things were much quieter and easier to work on. A quick test with the multimeter showed 5V on the input and a healthy 3.3V coming out of the regulator. Promising!
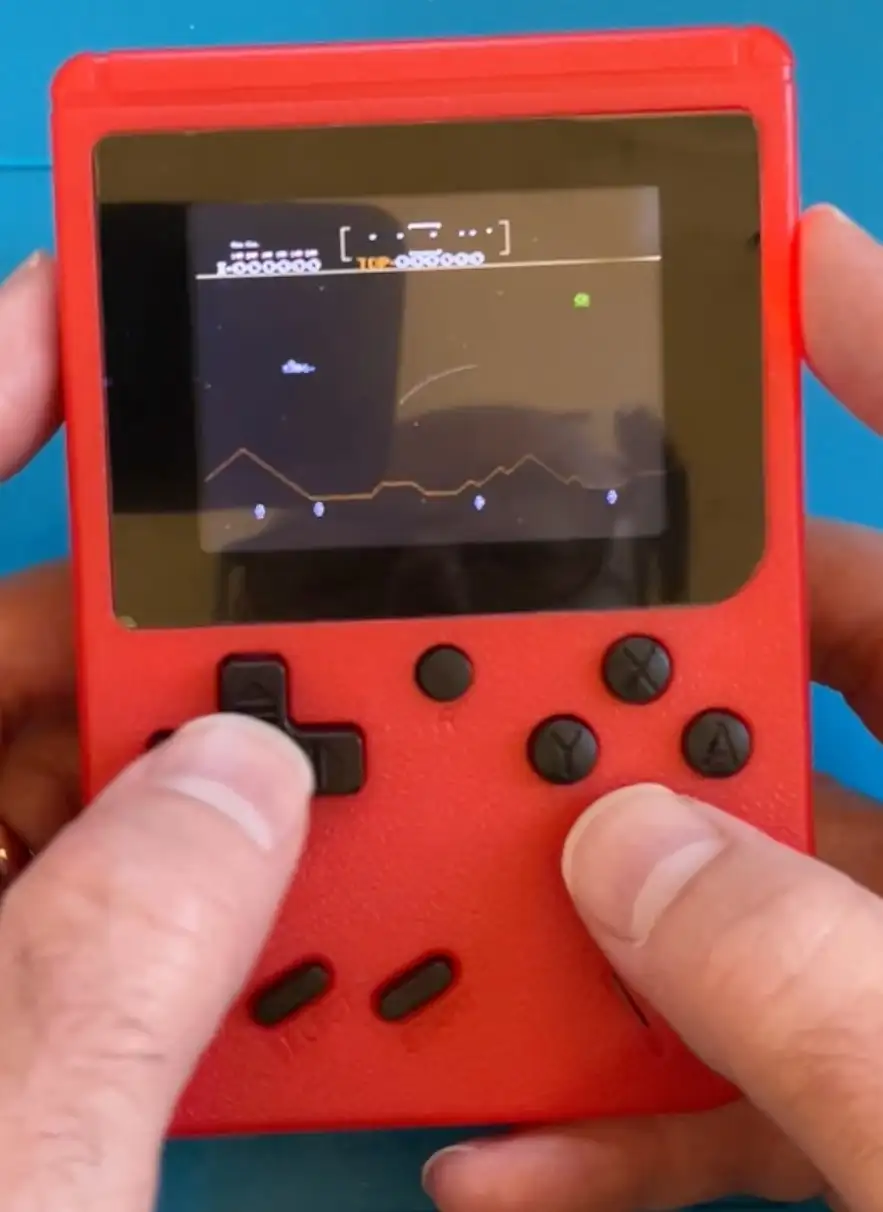
The Big Moment
With the screen plugged back in, I flipped the switch…
…and it booted! The screen lit up, sound came through the speaker, and the handheld actually worked on battery power.
It’s not the neatest soldering I’ve ever done, but the important thing is: it’s alive again.
You can watch the complete repair video here: